There are plenty of options for redesigning T-shirts and other clothing at home, regardless of whether you are a specialist newbie or experienced. It is not foreign to expect. so that you will get the most Updated Technique Of How To Screen-Print At home For Cheap. It is the work of screen printing experts.
In all honesty, screen printing is much easier than you think. Since the vast majority believe that it doesn’t cost too much to get started, you can spend a penny on a screen printing machine that is great for your full salary or a carport that can transform a piece of clothing at lightning speed.
At the moment, when you are simply starting, there are many more medium choices. Also, when you start practicing, all you need to do with your own hands is change clothes for yourself, give gifts as a blessing, and sell. I hope you are now wondering what you need for screen printing at home. Here I will give you the solution. Need to know some materials and proper methods. But screen printing t-shirts at home are a lot of fun.
What do you need for screen printing at home?
Some essential elements are required for screen printing at home. They are –
- A screen
- Photograph Emulsion
- One-and-a-half-watt light
- Screen printing wiper
- Printer
- Texture paint
- Glass 2 bits
So without these elements, you can’t be printing t-shirts at home.
How to screen print at home step by step to make your t-shirt cheap
There are many ways to print t-shirts. However, one of its most widely known is screen printing. There is also a lot of appreciation for dry screen printing nowadays.
There are many steps to screen printing. And each step is to be observed periodically. Otherwise, your T-shirt will have flaws that you don’t want at all. This is screen printing for beginners and How to screen print t-shirts at home. So what are you waiting for? Let’s start with the steps.
- Basic
Before we jump into full instructional practice, let’s take a break for a minute on how we can test the essentials. In this educational exercise, you will outline how to create your screen printing, consume it properly, and use it in screen printing plans on top of the texture.
There are different types of screen printing, but you will determine how to screen light-touch photos using emulsion in this post. Essential cycles include:
- Painting your screen with light-fine paint.
- Allowing it to be fixed.
- Placing your image on top of the color.
- Restoring it under the light again.
Since it is not presented to the light, you will not fix the area below your image. However, at this point, when you run the screen under any water, this part will wash away, leaving a clear space to look like your image. Then you draw the ink on the plan to apply that time to the shirt.
- Make your edge
A screen printing outline is a fundamental part of this initiative. Then, when you get to buy a casing, you can make one at home in just a few minutes. Start by making an edge straight out of 2-inch x 2-inch sheets. The standard edge measures up to about 20 inches x 24 inches, yet you don’t need this exact size. The standard casing should not be extraordinary, but it needs to be level.
Then, you need to add the screen. Again, the use of 110 polyester network textures is best proven. Stretch the edge tightly to the texture and set it up using the primary firearm. You must pull the structure firmly to pull the bolts and bolts out, yet the staples are not close to the tear. Whenever you attach the texture, trim the edges and make sure the staples are thoroughly pressed not to move the cover when placed on a level surface.
Tape does not spread around the edges of the screen inside and outside the casing to guarantee the paint. Painter’s tape is your most ideal option, yet channel tape works when needed.
- Coat casing with photograph emulsion
This is where the magic begins to happen. Buy a screen printing photograph emulation to prepare your screen and then track any dull room in your home to work. Since the photograph shows the reaction of emulsion light, you should be in a dim room when using it.
Carefully read the guidelines of Photographic Emulsion and prepare the item as educated. Then, apply a line of emulsion across the highest point of the screen across that moment in the dull room. Next, use a wiper to draw the whole screen tightly on both sides. Work fast, but make the coat as thin and as expected.
After both sides, place the screen in a flat area to dry. It needs to be left to dry completely, so make sure no light can fill the site at any rate for one to three hours. You can similarly speed up the drying interaction by pointing to a fan on the screen and turning it “low.” Leave the screen in a single layer to dry.
- Could you choose a plan and print it out?
Since you have fabricated your screen, you are ready to pick and print a picture. A basic outline with involuntarily featured edges is as confusing as a robust playing red scheme. You’ll almost certainly struggle with the first print. Whenever you have mastered the method, you can move on to more mind-boggling plans and those that require multiple tones. For now, keep it basic.
- Print your plan
Now the real fun begins! We recommend buying plain shirts reliably before setting this progress so you can start a lot of rehearsals. Then, when emptying the shirt, keep in mind the chips of this cycle in any textured item. Discounted Cruvenc pullovers, handbags, tank tops, hoodies … they will all be able to work again through the allure of screen printing.
Spread your shirt on the surface of the layer and smooth out any wrinkles or wrinkles. If you want to make a mistake in terms of caution, you have to press it. Given the opportunity to have wrinkles, they can be accountable for the plan. The shirt should also be spotless and dry.
Tips before Screen printing at home
How to make a screen for screen printing? Here are some tips to help you print your T-shirt.
Tips-1: Color-based limitations
While applying different tones, it’s essential to see how filth ink ought to be used. The primary technique added is the one that is necessary to infiltrate the most profoundly into the material.
Since colors added later will lay on top of the ink previously added to the material, those connections should not be as thick. It’s fundamentally critical to add a diminishing specialist to the resulting tones added to stay away from shading blotching and squandering ink and different assets.
Tips-2: Know your shading-based limits
One-shading plans are regularly best for screen printing materials rapidly. While different tones are conceivable, the more intricate your project is – both shape, size, and shading – the more cautious you should be at the point at which there are numerous tones.
You’ll likewise have to change out the screen or possibly altogether flush between ink applications which is troublesome and could bargain the last picture’s quality.
Tips-3: Don’t move the plate.
When squeezing the picture, the platen can’t move by any means. This is the most effortless approach to demolish the last image and mutilate your plan. While going through the screen printing measure, don’t allow the platen to move.
Tips-4: A straight, sharp wiper
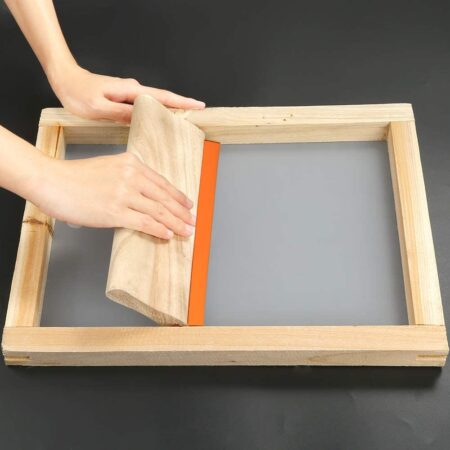
A screen printing wiper dribbling with ink is to help the ink go through the screen and arrive at the material. A wiper is required. You should make sure that the wiper is sharp and straight.
When screen printing, the fewer strokes you make, the better, so guaranteeing your wiper is in prime condition is significant.
Tips-5: Take as much time as necessary to save time.
Screen printing is an artistic expression similarly however much an assembling interaction. Therefore, to save time, take as much time as necessary when screening printing materials.
As you’ve effectively seen, this is a perplexing interaction that requires persistence, a cautious eye, and an undistracted mind. On the off chance that you use it through screen printing, odds are you’ll need to rehash the cycle over.
Tips-6: Guarantee the craftsmanship is prepared for screen printing
Similarly, as significant as setting up the ink, setting up the fine art accurately for your screen printer is an absolute necessity. Again, the ideal approach to do this is to have the picture replicated onto a straightforward layer, which you can have a nearby printer accomplish for a bit of expense.
While complex plans are conceivable, a fledgling should attempt straightforward screenprint plans with noticeable lines. The objective ought to be to duplicate the work of art that is dark and on a reasonable foundation.
Conclusion:
Screen printing gives impressive results, and the interaction is less complicated than many people imagine. Using the above basic materials and guidelines, you can create extensive planning opportunities and make changes to the materials of the T-shirt room. Hopefully, we have solved your problem with this article ‘What do you need for screen printing at home?‘
Research Links:
You May Also Read Some Other Related Articles:
- Best and Efficient T-Shirt Printing Machine For Small Businesses
- Best Paint For Handprints On Fabric
- 6 Best Screen Printing Ink For Dark Fabric
YOU SHOULD KNOW ABOUT FABRIC PAINTING AND ITS TYPE FOR A BETTER UNDERSTANDING
Garments Fabric Printing || How Many Types Of Printing Methods in Garments?