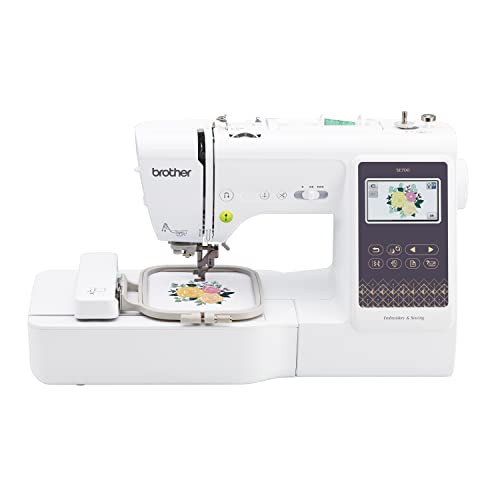
Embroidery machines have revolutionized the way we approach textile art, allowing both beginners and seasoned crafters to create intricate designs with ease and precision. Whether you are looking to embellish clothing, create custom gifts, or even start a small business, understanding the capabilities and features of embroidery machines is essential. This article will provide a comprehensive guide to embroidery machines, helping you navigate the various types, features, and techniques you can use to elevate your sewing projects.
Table of Contents
- Types of Embroidery Machines
- Key Features to Consider
- How to Use an Embroidery Machine
- Common Embroidery Techniques
- Troubleshooting Tips
- Maintenance and Care
- FAQ
Types of Embroidery Machines
1. Home Embroidery Machines
Home embroidery machines are designed for hobbyists and crafters. They are user-friendly and typically feature built-in designs, making them perfect for beginners. Many home machines allow for customization and are suitable for small-scale projects.
2. Commercial Embroidery Machines
Commercial embroidery machines are more advanced and intended for business use. They can handle larger volumes and more complex designs, making them ideal for embroidery shops. These machines often require a higher investment but offer more features and capabilities.
3. Multi-Needle Embroidery Machines
Multi-needle machines come equipped with several needles that allow for multiple thread colors to be used simultaneously. This feature can significantly reduce the time it takes to complete a project and is particularly useful for intricate designs.
4. Single Needle Embroidery Machines
Single-needle machines are more affordable and are suitable for beginners who want to learn the basics of embroidery. While they may have limitations in terms of speed and thread color changes, they are excellent for small projects and personal use.
Key Features to Consider
1. Embroidery Area
The embroidery area is the maximum size of the design that the machine can accommodate. For larger projects, look for machines with a wider embroidery area.
2. Built-in Designs and Fonts
Many machines come with built-in designs and fonts. This feature is especially useful for beginners who may not have access to design software.
3. Connectivity Options
Consider machines that offer USB or Wi-Fi connectivity for easy design transfers. This allows you to use your computer to create or download designs and send them directly to your machine.
4. LCD Screen and User Interface
A user-friendly LCD screen can make navigation much easier. Look for machines that offer intuitive menus and clear instructions.
5. Speed and Efficiency
The stitching speed of an embroidery machine indicates how quickly it can complete a design. Higher speeds can save you time, especially for larger projects.
How to Use an Embroidery Machine
1. Setting Up the Machine
Begin by unboxing the machine and following the manufacturer’s instructions for setup. Ensure the machine is plugged in and properly threaded.
2. Selecting a Design
Choose a design from the built-in options or upload one via USB. Be sure to adjust the size and placement according to your fabric.
3. Preparing the Fabric
Hoop the fabric securely to prevent it from shifting during stitching. Use stabilizers if necessary to support the fabric and maintain the design’s quality.
4. Starting the Embroidery
Once everything is set, press the start button and monitor the machine as it stitches. Keep an eye on the thread and fabric to avoid any issues.
Common Embroidery Techniques
1. Appliqué
Appliqué involves sewing a piece of fabric onto another fabric to create a design. This technique adds dimension and texture to your projects.
2. Monogramming
Monogramming is a popular technique for personalizing items. It typically involves stitching letters or initials onto fabric using decorative fonts.
3. Free Motion Embroidery
This technique allows you to create unique, freehand designs by moving the fabric in various directions while the needle is in motion. It requires practice but can yield stunning results.
4. Digitizing
Digitizing is the process of converting a design into a format that an embroidery machine can read. While many machines come with built-in designs, learning to digitize can expand your creative possibilities.
Troubleshooting Tips
1. Thread Breakage
If you experience frequent thread breakage, check the threading path and ensure the thread is correctly seated in the tension discs. Adjust the tension settings if necessary.
2. Fabric Bunching
Fabric bunching can occur if the stabilizer is insufficient or if the fabric is not hooped tightly. Ensure the fabric is stretched evenly in the hoop.
3. Poor Stitch Quality
Poor stitch quality may be caused by dull needles or incorrect tension. Regularly change your needles and adjust tension settings as needed.
4. Machine Jamming
If the machine jams, turn it off and carefully remove the fabric. Check for any tangled threads or debris that may be causing the issue.
Maintenance and Care
1. Regular Cleaning
Keep your machine clean by regularly removing lint and debris from the bobbin area and tension discs. A clean machine performs better and lasts longer.
2. Oil the Machine
Refer to the manufacturer’s instructions for oiling your machine. Proper lubrication is essential for smooth operation.
3. Needle Replacement
Change the needle regularly, especially after completing several projects or if you notice any stitch quality issues. Using the correct needle type for your fabric can also improve results.
4. Software Updates
Some embroidery machines can be updated with new software. Regularly check for updates to ensure you have the latest features and improvements.
FAQ
A: Home embroidery machines are often the best choice for beginners due to their user-friendly features and built-in designs.
A: Many embroidery machines can also function as regular sewing machines. However, it’s advisable to check the specifications of your model.
A: Designs can usually be transferred via USB, or some machines offer Wi-Fi connectivity for direct downloads.
A: It is best to use high-quality embroidery thread, such as polyester or rayon, to achieve the best results. You can find quality options at places like Stitch Perfect: High Quality Embroidery Thread!.
Conclusion
Embroidery machines offer a fantastic way to bring your creative ideas to life, whether for personal projects or professional endeavors. By understanding the different types, key features, and techniques, you can make informed decisions that enhance your sewing experience. With regular maintenance and a bit of practice, you’ll be able to create beautiful, intricate designs that showcase your unique style. For more inspiration, check out our articles on Stylish Craft: Hand Embroidery on Denim Jacket Delight, Try This Embroidery Shop Once, You’ll Keep Coming Back!, and Exploring Simple Floral Embroidery Designs Seamlessly. Happy stitching!