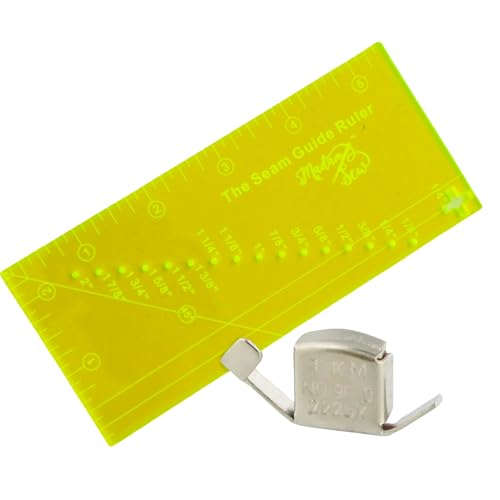
Sewing is an art that combines creativity and technical skill, making it a rewarding hobby or profession for many. One of the fundamental aspects of sewing that every enthusiast must master is the seam allowance. Among various seam allowances, the 1/4 seam allowance is particularly significant, especially for quilters and garment makers. Understanding how to use a 1/4 seam allowance on a sewing machine can enhance the precision of your projects and improve your overall sewing experience.
What is Seam Allowance?
Seam allowance is the space between the edge of the fabric and the stitching line. It is crucial for ensuring that seams are strong and that the fabric can be finished neatly. The width of the seam allowance can vary depending on the project, with common measurements being 1/4 inch, 1/2 inch, and 5/8 inch. Each measurement has its specific applications, with the 1/4 seam allowance being particularly popular in quilting and smaller garment construction.
Importance of 1/4 Seam Allowance
The 1/4 seam allowance is essential for several reasons:
- Precision: It ensures that pieces fit together accurately, which is especially important in quilting where multiple pieces come together to create intricate designs.
- Consistency: Using a standard seam allowance across your projects allows for uniformity, making it easier to create patterns and repeat designs.
- Ease of Finishing: A 1/4 inch seam allowance is often easier to finish with methods like serging or zigzag stitching, reducing fraying.
How to Set Up Your Sewing Machine for a 1/4 Seam Allowance
Setting up your sewing machine for a 1/4 seam allowance requires a few adjustments. Here’s how to do it:
Using a 1/4 Seam Foot
A 1/4 seam foot is a specialized presser foot designed to help sew a precise 1/4 inch seam. Here’s how to use it:
- Attach the 1/4 seam foot to your sewing machine, ensuring that it is secured properly.
- Align the fabric edge with the guide on the foot, which will serve as a reference point for your seam allowance.
- Begin sewing, keeping the edge of the fabric consistently aligned with the guide.
Measuring the Seam Allowance
To ensure accuracy, it’s important to measure your seam allowance correctly. Here’s a step-by-step guide:
- Use a ruler or measuring tape to measure 1/4 inch from the edge of the fabric.
- Mark this line lightly with a fabric marker or chalk.
- Align the edge of your fabric with the marked line as you sew.
Tips for Sewing with a 1/4 Seam Allowance
Here are some practical tips to ensure successful sewing with a 1/4 seam allowance:
- Use Quality Fabric: Always choose good quality fabric that doesn’t fray easily. This will help maintain the integrity of your seams.
- Press Your Seams: After sewing, press your seams open or to one side to help them lay flat. This will enhance the overall appearance of your project.
- Practice: If you’re new to sewing, practice on scrap fabric to get a feel for the 1/4 seam allowance before starting on your actual project.
Common Mistakes to Avoid
Even experienced sewers can make mistakes when working with a 1/4 seam allowance. Here are some common pitfalls and how to avoid them:
- Inconsistent Seam Allowance: Measure and mark accurately. Inconsistent seam allowances can lead to fitting issues and misaligned patterns.
- Not Backstitching: Always backstitch at the beginning and end of your seams to secure the threads and prevent unraveling.
- Sewing Too Fast: Take your time. Rushing can lead to mistakes and misalignment. Focus on maintaining a steady pace.
FAQ
A: A traditional seam allowance typically measures 5/8 inch, while a 1/4 seam allowance is narrower. The choice between them depends on the project; 1/4 inch is often used in quilting and smaller garment construction for a more delicate finish.
A: While you can, using a 1/4 seam foot is recommended for better accuracy. A regular foot may make it more challenging to maintain a consistent seam width.
A: Most modern sewing machines allow you to adjust the needle position. Refer to your machine’s manual for specific instructions on how to move the needle to achieve a different seam allowance.
In conclusion, mastering the 1/4 seam allowance on your sewing machine is vital for achieving precision and quality in your sewing projects. Whether you are a beginner or an experienced sewer, taking the time to understand and practice this technique will greatly enhance your skills. Remember, the key to successful sewing is patience, practice, and attention to detail. Happy sewing!
For those looking to expand their sewing skills, consider exploring Stunning Black on Black Embroidery: A Chic Must-Have! or check out our Review: brother lb5500 embroidery machine. You can also transform your fabrics with Stick and Sew Embroidery Designs or find Naturally the Best Choice for Silk Screen & Embroidery! Lastly, don’t forget to explore the Game-Changer: Perfect Cut Away Stabilizer for Embroidery! for your embroidery needs.