VEVOR sewing machine reviews need a specific model because a fixed industrial station and a small repair machine are not interchangeable purchases. The JK-9803 listing describes one straight-stitch setup, but broad material claims do not establish every feeding capability. This guide explains the documented configuration, questions to settle before ordering, and a controlled troubleshooting process so you can assess a working station without confusing motor power with suitable seam performance.
As an Amazon Associate, Practical Textile earns from qualifying purchases. Product links may earn us a commission.
Quick Answer
Evaluate VEVOR JK-9803 only as its specifically listed industrial straight-stitch station, with the manual, feed mechanism, assembly, and service clarified. Do not infer compound feed from the motor rating or upholstery language. The Juki Amazon box below identifies a separate unison-feed alternative, not the VEVOR product.
This guide compares published specifications and project fit; it does not report hands-on testing.
Juki DNU-1541
No verified Amazon offer is linked for this model; read the buying checks below.
Confirm complete station contents and the actual unison-feed requirement.
What the JK-9803 Listing Establishes
| Listed item | What it means for comparison |
|---|---|
| Industrial straight stitch | A specialized operation, not every household function |
| 550-watt servo motor | A motor description, not proof of compound feed |
| 110-volt configuration | Confirm the exact delivered electrical setup |
| Table and stand | Check assembly and total operating footprint |
| Advertised speed range | Test controlled starts rather than only maximum speed |
A Fixed Station Is an Ownership Decision
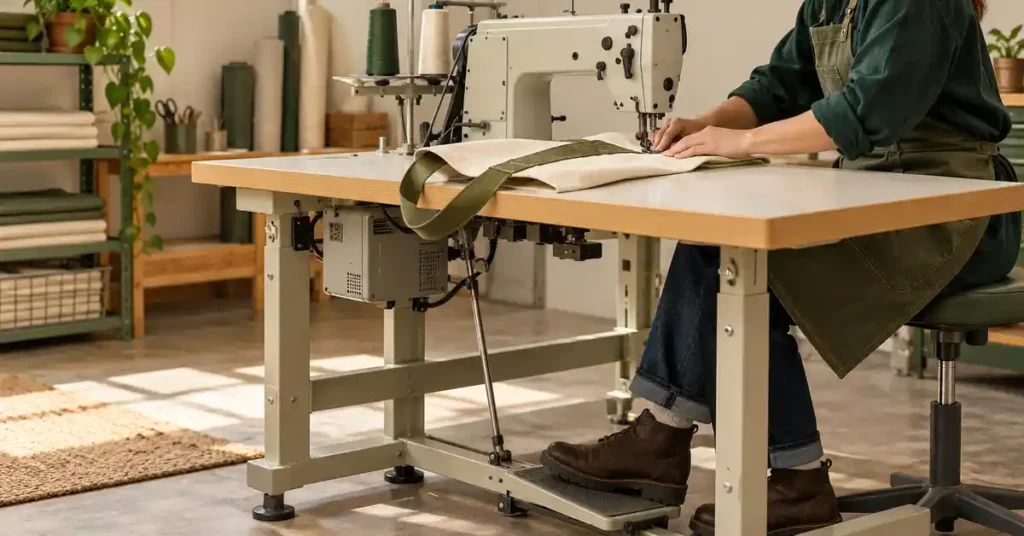
The JK-9803 offer belongs in a fixed-workstation comparison. It should not be evaluated like a portable household unit that can be put away after a quick repair. Measure room for the operator, material path, chair, maintenance access, and actual assembled equipment.
Ask how the shipment is divided, what assembly is required, and whether setup help is available. Confirm the manual, supplied parts, controller, and compatible consumables. A group of cartons does not by itself create a ready-to-use production station.
Settle the Feed Question Before Buying
A servo rating and an application list do not establish industrial walking-foot or unison feed. Ask the seller to identify the exact mechanism and demonstrate the required layered seam. If the intended work needs a specific feed arrangement, an unresolved answer is a reason to keep comparing.
Needle penetration is only one part of capacity. Inspect stitch consistency, layer shift, underside formation, and visible surface marks. A machine may pierce a stack while producing an unsuitable finished seam. Bring the real backing, reinforcement, and transition instead of unrelated flat scraps.
Check the Controls at Useful Sewing Speeds
Maximum speed can be relevant to repeated long seams but does not demonstrate precise starts or corners. Test the controller and documented settings at the pace the project requires. The station should be manageable while loading and turning the work, not merely impressive during a fast run.
Do not change several adjustments together to conceal a poor sample. Begin with correct threading, appropriate needle and thread, and a documented starting setup. A controlled checking sequence helps identify whether the problem is preparation, an unsuitable operation, or a fault needing service.
Five Reasons to Investigate and Two Reservations
- A fixed station can organize repeat straight sewing.
- The listing identifies a specific model for documentation checks.
- A servo-driven setup deserves a deliberate pace-control test.
- Table and stand inclusion helps define the offer.
- Specialization may suit an appropriate panel-sewing task.
Two reservations must be settled: broad material language is not a verified feed specification, and local parts, installation, and service may differ from the expectations created by a low initial price.
Juki DNU-1541: A Different Feed Category
The DNU-1541 is an industrial unison-feed straight-stitch comparison. It is not identical to the VEVOR offer and should not be presented as the same product under another label. Match its complete station, suffix, supported needle and thread, and actual sample to the operation.
A head-only industrial price is not directly comparable with an assembled table-and-motor package. Write every missing component into the total before choosing. Confirm that a technician supports the exact model rather than assuming every industrial machine has equally accessible parts.
Read our DNU-1541 guide, DDL-8700 comparison, and household 4452 review to separate categories. Our bag guide and leather construction guide provide sample-planning context.
Project Preparation and a Repeatable Sewing Setup
A controlled tension-checking process helps evaluate the exact VEVOR station without masking setup errors. Use the matching manual and a known sample, keeping diagnostic observations separate from assumptions about the machine’s feed mechanism or material capacity.
Common Tension Issues
Understanding the common tension problems can help you identify issues quickly. Here are some of the most frequent issues sewists encounter:
If you notice loops of thread on the underside of your fabric, this typically indicates that the upper tension is too loose. The bobbin thread is pulling through without enough resistance from the upper thread, causing the loops.
When the tension is too tight, it can lead to thread breakage. If you find that your thread keeps snapping, check the tension settings and adjust them accordingly.
Puckering occurs when the fabric gathers unevenly. This can be a result of either too much upper tension or not enough bobbin tension, causing the fabric to be pulled in different directions.
If your stitches appear uneven, it may be due to improper tension settings. This problem can affect both the quality and durability of your seams.
Establish a known starting sample
Choose stable fabric in the actual number of layers you need for the test. Use a suitable needle, ordinary supported thread, and the specified bobbin. Set the machine according to its normal instructions for the operation. Sew a short labeled line, leaving enough material around it to judge puckering rather than trimming immediately beside the seam.
Inspect the top and underside with the fabric relaxed. Stretching the sample flat can hide distortion. Check whether the issue appears through the whole seam or only at the beginning, end, or a particular intersection. Those differences provide useful information. A fault that appears only when a heavy garment drags off the table needs a handling check as well as a thread-tension discussion.
Keep the successful sample with its setup notes. Record the needle, thread product, stitch, foot, fabric, and any documented adjustment. If a later project develops a problem, this reference helps you return to a known combination. It is more useful than remembering that the dial was somewhere near a particular number.
Rethread deliberately before making fine adjustments
Use the exact model’s diagram. Raise the needle and presser foot as instructed, then follow every guide and the take-up path. Check that thread is seated correctly rather than simply running beside a guide. A missed step cannot reliably be corrected by turning a tension control harder in one direction.
Inspect spool feed. Thread can catch on a damaged spool edge, an unsuitable cap arrangement, or another obstruction. A large cone may require a supported stand and path rather than being balanced on a small spool pin. Confirm the documented arrangement for the machine and thread package before changing tension to compensate for intermittent feed.
Check the bobbin’s type, winding, direction, and route into its case or slot. Similar-looking bobbins are not necessarily compatible. Remove loose thread or lint only through the access and cleaning method described by the manual. Do not dismantle unfamiliar mechanisms as an exploratory part of an ordinary tension check.
Change upper tension as a controlled experiment
Once threading and the basic setup are correct, follow the manual’s adjustment procedure. Record the starting setting and make a small suitable change. Sew another fresh sample using the same layers and handling. Compare it with the original before making a second change. This allows you to see whether the adjustment moved the result in a useful direction.
Do not change needle size, stitch length, thread, and tension at the same time unless you are intentionally establishing a completely different documented setup. For diagnosis, multiple changes erase the link between cause and result. A tidy record can save time when you later need to explain the problem to a support technician.
If repeated small changes do not resolve the fault, return to the known starting point and reconsider the diagnosis. The thread may not suit the needle, the material may be difficult to feed, or the machine may need attention. Continuing to turn the same control is not proof that the tension system is the cause.
Keep bobbin-tension adjustment model-specific
Some specialist operations include documented bobbin arrangements or adjustments, but that does not make the bobbin screw a sensible first response for a beginner. Check the manual and the correct bobbin case. A machine may use different cases or procedures for particular techniques, so advice copied from another model can be misleading.
If the manual requires an adjustment, understand the procedure and how the starting point will be restored. If it does not describe a user adjustment for your situation, seek model-specific help. Do not use a generic chart to justify altering a screw whose function you have not identified.
For embroidery, distinguish its thread and backing setup from ordinary sewing. A bobbin-thread pattern that is assessed in one embroidery workflow should not automatically be treated as the rule for a woven garment seam. Use the correct instructions for the operation rather than transferring a visual rule without its context.
Know when pressure or handling is the issue
Presser foot pressure concerns the material’s contact with the feeding system; it is different from thread tension. Some machines provide a user adjustment and others do not. Use the exact documented control if one exists. A nearby screw is not automatically a substitute pressure adjustment.
Support fabric weight and avoid stretching a knit or pulling a seam through the machine. Try the correct foot and a suitable needle on a representative sample. If a fabric stretches only while being fed, the way it is supported or handled can be part of the explanation. A tighter thread setting may make the distortion more obvious rather than solve it.
Use a four-step diagnostic record
First describe the visible symptom without naming a cause: loops on one surface, repeated thread breaks, puckering, or skipped stitches. Note whether it appears from the start, at a particular junction, or only on the garment rather than the sample. This observation is more useful than beginning with the conclusion that the bobbin screw must be wrong.
Second record the complete baseline: model, needle system and type, thread product, bobbin specification, fabric layers, foot, stitch, and current ordinary setting. Rethread through the exact manual’s route and replace a questionable needle before adjusting unfamiliar mechanisms. A missed guide can make later tension experiments difficult to interpret.
Third change one relevant variable through the documented procedure and sew a fresh labeled sample. Keep the previous result for comparison. If the appearance changes, describe how it changed rather than simply writing better or worse. A flat sample may improve while the same heavy garment still drags off the table; that is another observation to resolve.
Fourth decide the next action from the evidence. If an ordinary known-compatible baseline still fails after the manual’s checks, use model-specific support. If the baseline works and a different material fails, investigate that combination. Do not keep turning a dial indefinitely to compensate for a needle strike, incompatible bobbin, damaged part, or unsuitable construction.
A short record also helps restore the machine after a specialist project. Return through the documented setup rather than assuming a change made for embroidery or a heavy topstitching sample remains suitable for the next ordinary seam. The result is a repeatable troubleshooting process, not a chart that promises one number for every machine.
Accept the Station Through a Complete Sample
Check delivery against the inventory, obtain the correct manual, and follow the documented setup. Test threading, bobbin winding, controlled forward and reverse sewing, and the actual construction. Keep the successful sample with settings and material notes.
If an electrical or mechanical fault is suspected, use the seller’s qualified support route rather than continuing to force operation. Clarify responsibility for parts, labor, travel, and freight before the return period expires. A practical service arrangement belongs in the original purchase comparison.
Frequently Asked Questions
Are all VEVOR sewing products the same type?
No. Review the exact model and application. A fixed industrial straight-stitch station is not the same purchase as a small repair machine or another product sold under the brand.
Does the servo motor prove walking-foot capability?
No. Motor and feed specifications are different. Obtain the exact manual and mechanism description, then test the layered seam required by your work.
Can it replace a household machine?
A specialized straight-stitch station does not automatically provide zigzag, buttonholes, or every garment function. Compare the complete operation list rather than the industrial label.
How should I compare its price?
Include assembly, delivery, parts, table, motor, consumables, instruction, and service. Match usable complete stations rather than comparing a bare head with an equipped offer.
What if the machine struggles with the sample?
Check the documented setup and change one variable at a time. Stop if the operation appears unsuitable or a fault persists. Do not use force or random adjustment to manufacture a successful demonstration.
Final Recommendation
Investigate JK-9803 as an exact station with unresolved capability questions answered in writing and through samples. If industrial unison feed is required, compare a documented alternative explicitly. Choose supported repeatable sewing, not a motor rating or unrestricted application claim.