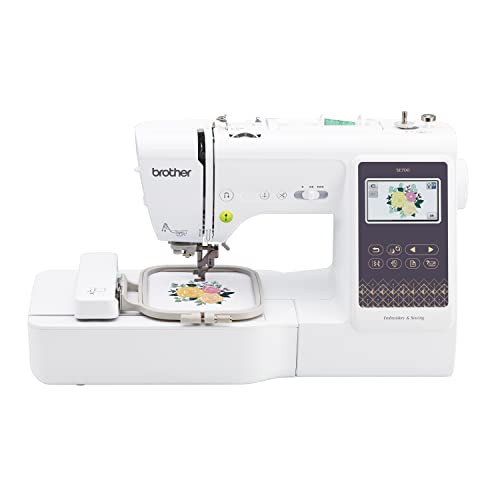
Applique is a charming sewing technique that allows you to add intricate designs and patterns to fabric projects, enhancing their visual appeal. With the advent of sewing machines equipped with embroidery capabilities, the process of creating beautiful appliques has become more accessible and efficient. Whether you’re an experienced sewist or a beginner looking to explore new techniques, mastering the art of applique on a sewing machine can open a world of creative possibilities. In this article, we will delve into the essentials of machine applique, covering everything from the necessary materials and techniques to tips for achieving professional results.
Table of Contents
- Understanding Applique
- Materials Needed for Machine Applique
- Techniques for Applique on a Sewing Machine
- Common Challenges and Solutions
- Tips for Successful Applique
- Frequently Asked Questions
Understanding Applique
Applique is derived from the French word “appliquer,” which means “to apply.” In sewing, it refers to the technique of attaching a piece of fabric onto a larger piece of fabric to create a design or pattern. This method is particularly popular in quilting, garment making, and home decor projects. The beauty of applique lies in its versatility; you can create simple shapes or intricate designs, making it suitable for various skill levels.
Types of Applique
There are several types of applique techniques you can use on a sewing machine, including:
- Raw Edge Applique: This method leaves the edges of the fabric exposed, creating a casual and textured look.
- Turned Edge Applique: The edges of the fabric are turned under and secured, resulting in a neat finish.
- Machine Embroidery Applique: This technique combines embroidery and applique, using decorative stitches to secure the fabric and add embellishments.
Materials Needed for Machine Applique
Before you start your applique project, gather the following materials:
| Material | Description |
|---|---|
| Fabric | Choose a variety of fabrics for your applique pieces, such as cotton, felt, or fleece. |
| Stabilizer | A stabilizer helps support the fabric during stitching, preventing distortion. |
| Thread | Use high-quality thread that complements your fabric colors. |
| Scissors | Sharp scissors are essential for cutting fabric accurately. |
| Iron | An iron is necessary for pressing fabrics and securing the applique pieces. |
Techniques for Applique on a Sewing Machine
Once you have your materials ready, you can begin the applique process. Here are the basic steps to follow:
1. Preparing Your Fabric
Start by cutting your main fabric to the desired size. Next, cut your applique fabric into the shapes you want to use. If you’re using multiple colors or layers, make sure to plan your design ahead of time.
2. Applying Stabilizer
Attach a stabilizer to the back of your main fabric. This step is crucial, especially for delicate fabrics, as it provides support during the stitching process.
3. Positioning the Applique
Place your applique pieces on the main fabric according to your design. Use fabric glue or double-sided tape to hold them in place temporarily. This will prevent shifting during stitching.
4. Stitching the Applique
Choose an appropriate stitch for your applique. Common options include zigzag, satin, or straight stitches. Adjust the stitch width and length to suit your design. Start stitching from one edge of the applique, following the shape carefully. Make sure to secure the edges well to prevent fraying.
5. Finishing Touches
Once you’ve completed the stitching, trim any excess stabilizer from behind the applique. Press the entire piece with an iron to ensure everything is flat and well adhered.
Common Challenges and Solutions
While machine applique can be a rewarding process, you may encounter some challenges along the way. Here are a few common issues and how to resolve them:
1. Fabric Shifting
Fabric can shift during stitching, leading to misaligned pieces. To minimize this issue, use a stabilizer and secure the applique with fabric glue or tape before stitching.
2. Fraying Edges
Fraying can occur, especially with raw edge applique. To prevent this, consider using a zigzag or satin stitch that encases the edges of the fabric.
3. Uneven Stitches
If your stitches appear uneven, check your sewing machine settings. Ensure the tension is properly adjusted, and practice on scrap fabric before starting your project.
Tips for Successful Applique
Here are some additional tips to help you achieve the best results in your applique projects:
Frequently Asked Questions
A: Yes, most modern sewing machines can handle applique work. Just ensure you have the right attachments and settings for the best results.
A: A zigzag stitch is commonly used for raw edge applique, as it helps secure the edges while allowing some fraying for a textured look.
A: Choose fabrics that complement each other in color and texture. Cotton is a popular choice for applique due to its versatility and ease of handling.
Conclusion
Applique on a sewing machine is a fantastic way to add creativity and personality to your sewing projects. By understanding the techniques, gathering the right materials, and following best practices, you can create stunning designs that enhance your fabric creations. Whether you’re making quilts, clothing, or home decor items, the art of machine applique will allow you to express your unique style. With practice and experimentation, you’ll soon be able to master this fun and rewarding sewing technique.
If you want to enhance your sewing and embroidery journey further, consider exploring resources like Exploring the Quality of J&P Coats Embroidery Floss or check out the Amaya Embroidery Machine Review: Features, Pros & Cons 2026. For those interested in custom designs, don’t miss Stitching Magic: Custom Embroidery in Los Angeles. And if you’re looking for specific tools, consider reading the Review: embroidery machine 5×7 hoop or discover Exploring Wildflower Machine Embroidery Designs Seamlessly.