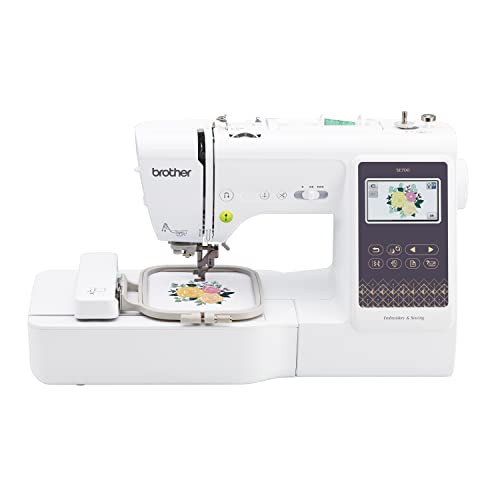
Embroidery has long been a cherished craft, allowing individuals to express their creativity through fabric and thread. Traditionally, embroidery was done by hand, requiring time and skill. However, modern technology has transformed this age-old practice, leading many to wonder: can I do embroidery on a sewing machine? The answer is a resounding yes, and this article will guide you through the ins and outs of machine embroidery, the types of machines available, and tips for getting started.
Understanding Embroidery Machines
Embroidery machines are specialized tools designed to create intricate patterns and designs on fabric. They can be standalone machines or multi-functional sewing machines that incorporate embroidery capabilities. Understanding how these machines work will help you make informed decisions about which one to choose for your projects.
How Embroidery Machines Work
Embroidery machines use a combination of computerized technology and stitching techniques to create designs. Users can upload digital designs, and the machine translates these designs into stitches, automatically moving the fabric in sync with the sewing process. This automation allows for precise and complex designs that would be challenging to achieve by hand.
Types of Sewing Machines for Embroidery
When considering embroidery on a sewing machine, it’s essential to understand the different types available. Each type has unique features that cater to various needs and skill levels.
1. Mechanical Sewing Machines
These machines offer basic sewing functions and may have limited embroidery capabilities. They are suitable for beginners who want to dip their toes into embroidery without the complexity of advanced technology.
2. Computerized Sewing Machines
Computerized sewing machines come with built-in embroidery designs and the capability to upload new designs. They offer more features than mechanical machines, making them a popular choice for hobbyists and semi-professional embroiderers.
3. Embroidery-Only Machines
These machines are dedicated solely to embroidery and often include advanced features such as larger hoops, more design storage, and better speed. They are ideal for those who want to focus exclusively on embroidery work.
4. Combination Machines
Combination machines offer the best of both worlds, allowing users to sew and embroider. This versatility makes them a great choice for crafters who want to handle various projects without needing multiple machines.
Features to Look For
When selecting a sewing machine for embroidery, consider the following features to ensure it meets your needs:
| Feature | Importance |
|---|---|
| Embroidery Area Size | A larger embroidery area allows for bigger designs. |
| Built-in Designs | More designs provide variety and save time. |
| Hooping System | A user-friendly hoop system makes it easier to position fabric accurately. |
| Speed Control | Adjustable speed helps manage intricate designs. |
| Connectivity Options | USB ports or Wi-Fi capabilities for easy design uploads. |
Setting Up Your Sewing Machine for Embroidery
Once you’ve chosen your sewing machine, it’s time to set it up for embroidery. Follow these steps to get started:
1. Gather Your Supplies
You will need the following:
- Your sewing machine with embroidery capabilities
- Embroidery thread
- Stabilizers
- Hoops
- Scissors
2. Prepare Your Fabric
Choose a fabric suitable for embroidery and ensure it’s clean and wrinkle-free. Stabilizers are crucial as they provide support during the stitching process, preventing puckering or distortion.
3. Load Your Design
Using the machine’s interface, upload your chosen design. Adjust the size if necessary and prepare to set your fabric in the hoop.
4. Secure the Fabric
Place your fabric in the hoop along with the stabilizer and tighten it. Ensure the fabric is taut but not stretched to prevent distortion during stitching.
5. Start Embroidering
Once everything is set up, initiate the embroidery process according to your machine’s instructions. Monitor the stitching to ensure everything is proceeding smoothly.
Embroidery Techniques
Machine embroidery offers various techniques to explore, each with its unique aesthetic and application. Here are some popular techniques:
1. Appliqué
This technique involves stitching a piece of fabric onto another fabric to create a design. It’s a great way to add depth and texture to your work.
2. Free Motion Embroidery
Free motion embroidery allows you to move the fabric freely under the needle, creating intricate designs. This technique requires practice to master but can produce stunning results.
3. Monogramming
Monogramming is a popular way to personalize items with initials or names. Many sewing machines come with built-in monogramming fonts, making it easy to add a personal touch.
4. Digitizing
Digitizing is the process of converting images or designs into a format that embroidery machines can read. Some machines come with built-in digitizing software, while others require external programs.
Common Issues and Solutions
Like any craft, machine embroidery can come with its share of challenges. Here are some common issues and how to resolve them:
Puckering
Puckering can occur when the fabric is not adequately stabilized. Ensure you are using a suitable stabilizer for your fabric type and that it is securely hooped.
Thread Breakage
Thread breakage can result from various factors, including improper threading or using the wrong type of thread. Recheck your machine’s threading instructions and ensure you are using high-quality embroidery thread.
Skipped Stitches
Skipped stitches can happen if the needle is blunt or if the fabric is not fed properly. Replace the needle regularly and ensure your fabric is properly secured in the hoop.
Design Distortion
Design distortion can occur if the fabric is stretched during the embroidery process. Always ensure the fabric is taut in the hoop, and avoid pulling or tugging on it while stitching.
FAQ
A: Some sewing machines can be upgraded with embroidery attachments, but not all machines are compatible. Check your machine’s specifications and consult the manufacturer for options.
A: It’s best to use embroidery-specific threads, such as rayon or polyester, as they are designed to withstand the stitching process and provide a high-quality finish.
A: Yes, stabilizers are crucial for supporting the fabric during embroidery, preventing distortion and ensuring clean stitches.
A: Consider the fabric type, the project’s purpose, and your skill level when selecting a design. Start with simpler designs if you’re a beginner.
Conclusion
In conclusion, the answer to “can I do embroidery on a sewing machine?” is a definite yes! With the right machine and some practice, you can create beautiful embroidered pieces that showcase your unique style. Whether you choose a dedicated embroidery machine or a combination sewing machine, understanding the features and techniques will help you succeed in your machine embroidery journey. Embrace the creativity that embroidery offers, and let your imagination guide your projects!