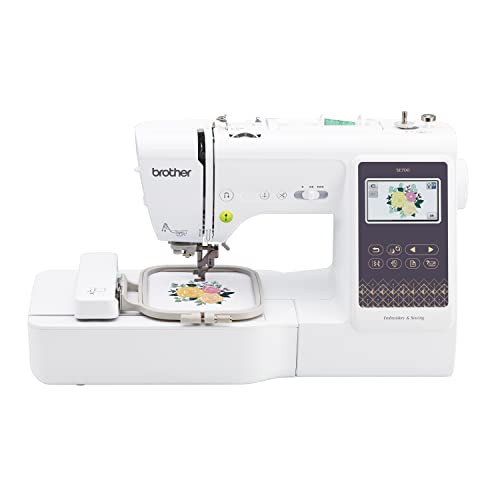
Embroidery has traditionally been a meticulous art form, often requiring skilled hands and dedicated time. However, with advancements in technology, many hobbyists and professionals alike are now asking the question: can I embroider with a sewing machine? The answer is a resounding yes! With the right tools and techniques, sewing machines can be transformed into powerful embroidery machines. In this article, we will explore how to effectively use your sewing machine for embroidery, what types of machines are best suited for this purpose, and tips to enhance your embroidery experience.
Table of Contents
- Understanding Embroidery with Sewing Machines
- Types of Sewing Machines for Embroidery
- How to Set Up Your Sewing Machine for Embroidery
- Essential Tools and Materials for Embroidery
- Techniques and Tips for Successful Embroidery
- Common Issues and Solutions
- FAQ
Understanding Embroidery with Sewing Machines
Embroidery with a sewing machine involves using the machine’s capabilities to create decorative patterns and designs on fabric. Unlike traditional hand embroidery, machine embroidery allows for faster and more precise stitching. Some sewing machines include built-in embroidery designs and font options, while others can be connected to computers for custom designs.
Types of Sewing Machines for Embroidery
When considering embroidery with a sewing machine, it is essential to know the various types of machines available. Here are the primary categories:
Mechanical Sewing Machines
These machines are basic and often do not come with built-in embroidery features. However, they can still perform simple embroidery techniques if used with the right attachments.
Electronic Sewing Machines
Electronic machines have more features than mechanical ones, including several stitch options and sometimes built-in embroidery designs. They are a great choice for hobbyists looking to explore machine embroidery.
Combination Sewing and Embroidery Machines
These machines provide the best of both worlds, allowing users to sew and embroider. They typically come with a variety of embroidery designs and can be connected to computers for custom design uploads.
Specialized Embroidery Machines
For those serious about embroidery, specialized embroidery machines are available. They often come with advanced features, larger embroidery areas, and more intricate design capabilities.
How to Set Up Your Sewing Machine for Embroidery
Setting up your sewing machine for embroidery may seem daunting, but with the right steps, you can be ready to create beautiful designs in no time. Follow these guidelines:
1. Gather Your Materials
Before you begin, collect the necessary materials such as fabric, embroidery thread, stabilizers, and hoop frames. Having everything ready will streamline the process.
2. Choose the Right Needle
Using the correct needle is crucial for successful embroidery. A special embroidery needle or a larger-size needle can help in creating clean and precise stitches.
3. Attach the Hoop
Secure the fabric into the embroidery hoop. Make sure it is taut but not overly stretched, as this could distort your design.
4. Select Your Design
If your machine has built-in designs, select one that you want to work with. For machines capable of connecting to a computer, you can upload custom designs. Ensure that the design is compatible with your machine.
Essential Tools and Materials for Embroidery
Having the right tools and materials on hand can make your embroidery project much easier and more enjoyable. Here’s a list of essentials:
| Tool/Material | Purpose |
|---|---|
| Embroidery Thread | Specialized threads designed for machine embroidery. |
| Stabilizer | Provides support to the fabric during stitching. |
| Embroidery Hoops | Holds the fabric in place while you stitch. |
| Embroidery Needles | Designed for the specific requirements of embroidery work. |
| Scissors | For trimming threads and finishing touches. |
Techniques and Tips for Successful Embroidery
Embroidery can be a rewarding but intricate craft. Here are some techniques and tips to help you achieve the best results:
1. Choosing the Right Stabilizer
The type of stabilizer you choose can greatly affect the outcome of your embroidery. There are several types, including:
- Cut-Away Stabilizer: Great for designs with dense stitching.
- Wash-Away Stabilizer: Ideal for delicate fabrics or lace designs.
- Tear-Away Stabilizer: Best for lightweight designs.
2. Thread Tension
Correct thread tension is essential for achieving professional-looking embroidery. If the tension is too tight, the stitches may pucker; if it’s too loose, the stitches may sink into the fabric.
3. Use Quality Threads
Investing in high-quality embroidery threads can make a significant difference in the final appearance of your embroidery. They not only stitch better but also last longer.
4. Experiment with Designs
Don’t hesitate to try out different designs, sizes, and placements on your fabric. Experimentation can lead to unique creations!
Common Issues and Solutions
Even experienced embroiderers encounter issues from time to time. Here are some common problems and their solutions:
1. Thread Breakage
Thread breakage can be frustrating. This may be caused by incorrect tension, using the wrong needle, or poor-quality thread. Ensure you are using the correct needle and thread for your project.
2. Fabric Puckering
If your fabric puckers, it may be due to using the wrong stabilizer or not having enough tension. Adjust your settings and consider using a more suitable stabilizer.
3. Design Misalignment
Misalignment of the design can occur if the fabric is not hooped correctly. Always double-check your fabric’s placement before starting the stitch.
FAQ
A: Yes, many regular sewing machines can be used for embroidery, especially if they have the necessary features and attachments.
A: Use an embroidery needle or a larger-sized needle to prevent thread breakage and achieve clean stitches.
A: Select a stabilizer based on the fabric type and the density of your embroidery design for best results.
Conclusion
Embroidery with a sewing machine opens up a world of creative possibilities. With the right machine, tools, and techniques, you can create stunning designs on a variety of fabrics. Whether you’re a beginner or an experienced embroiderer, exploring the capabilities of your sewing machine can enhance your crafting journey. Remember to choose the right materials, pay attention to tension settings, and practice patience as you refine your skills. For more information on specific machines, check out our reviews on the Viking Sewing Machine or the Happy 12 Needle Embroidery Machine. Happy stitching!