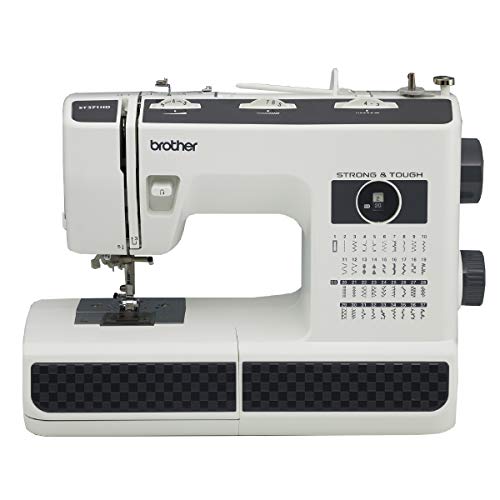
Sewing machines have evolved significantly over the years, accommodating various needs and preferences of both casual hobbyists and professional sewists. One of the features that has become quite popular among users is the free arm. But what is a free arm on a sewing machine, and why is it important? Understanding this feature can greatly enhance your sewing experience, making it easier to tackle complex projects. In this article, we’ll dive into the specifics of a free arm, its benefits, and how to utilize it effectively.
Table of Contents
- What is a Free Arm?
- Benefits of Using a Free Arm
- How to Use the Free Arm
- Free Arm vs. Standard Arm
- Care and Maintenance of the Free Arm
- Common Issues with Free Arms
- Frequently Asked Questions
What is a Free Arm?
A free arm on a sewing machine is a cylindrical section that can be detached or is built into the machine, allowing for more accessible sewing of tubular items. This feature is primarily designed for sewing the narrower parts of garments, like sleeves, cuffs, and pant legs. When the free arm is in use, the fabric can easily wrap around the arm, enabling the user to maintain better control and precision.
Benefits of Using a Free Arm
Utilizing a free arm can significantly improve your sewing projects. Here are some of the key benefits:
- Enhanced Accessibility: The free arm makes it easier to access areas that are difficult to sew on a flat surface.
- Improved Precision: You can achieve more accurate stitching on small, intricate parts of garments.
- Versatility: It’s suitable for a variety of sewing projects, from clothing to crafts.
- Less Fabric Bunching: The cylindrical shape reduces the chances of fabric bunching, providing a smoother sewing experience.
How to Use the Free Arm
Using the free arm is straightforward, but it can vary slightly from one machine to another. Here’s a general step-by-step guide:
Step 1: Detach the Extension Table
Most sewing machines come with an extension table that can be removed to expose the free arm. Locate the release button or latch and gently detach the table.
Step 2: Prepare Your Fabric
Before starting, ensure that your fabric is prepared. This includes cutting, pinning, and marking any necessary lines for sewing.
Step 3: Place Your Fabric on the Free Arm
Wrap the fabric around the cylindrical arm of the machine, ensuring that the area you plan to sew is easily accessible.
Step 4: Adjust the Machine Settings
Set your machine to the appropriate stitch type and length for the task at hand. For delicate fabrics, consider using a lighter needle.
Step 5: Start Sewing
Begin sewing slowly, guiding the fabric as you go. Take care to keep the fabric taut for even stitching.
Free Arm vs. Standard Arm
When comparing free arms to standard arms, the key difference lies in functionality and accessibility:
| Feature | Free Arm | Standard Arm |
|---|---|---|
| Design | Cylindrical shape for ease of use | Flat surface |
| Accessibility | Excellent for small, tubular areas | Limited to flat surfaces |
| Versatility | Great for various sewing projects | Best for basic sewing tasks |
Care and Maintenance of the Free Arm
To ensure that your free arm remains in optimal condition, regular maintenance is crucial. Here are some tips:
- Clean Regularly: Dust and lint can accumulate in the free arm area. Use a soft brush or cloth to remove debris.
- Check for Damage: Inspect the free arm for any signs of wear or damage, especially before starting a new project.
- Oil as Needed: Consult your sewing machine manual for guidance on oiling the machine, specifically around the free arm area.
Common Issues with Free Arms
While free arms are generally user-friendly, you may encounter some common issues:
- Fabric Slippage: If your fabric is sliding around, ensure that the presser foot is correctly set and the tension is adjusted appropriately.
- Misaligned Stitches: Check your fabric alignment and machine settings if you notice uneven stitches.
- Needle Breakage: This can occur due to incorrect needle size or tension settings. Always ensure you are using the right needle for your fabric type.
A: Not all sewing machines have a free arm feature. It is more commonly found in newer or more advanced models.
A: No, a free arm is designed to enhance usability. Once you understand the basics, it becomes a valuable tool in your sewing arsenal.
A: While the free arm is primarily designed for garment sewing, it can also be useful for quilted items that have tubular sections.
Frequently Asked Questions
A: A free arm is ideal for sewing narrow or tubular items such as sleeves, pant legs, cuffs, and collars.
A: It allows for easier manipulation of fabric and more precise sewing in areas that are usually challenging to access.
A: Yes, you can sew without a free arm; however, it may be more challenging for certain projects, especially those involving tubular sections.
In conclusion, the free arm is a valuable feature that can significantly enhance your sewing experience. By allowing easier access to hard-to-reach areas, it can improve precision and versatility in your projects. Whether you’re sewing garments, crafts, or other creative endeavors, understanding how to effectively use the free arm can make a world of difference. Explore new creative possibilities with designs and projects that can benefit from this feature, such as exploring creative possibilities with new embroidery designs or adding a personal touch with custom chain stitch embroidery. If you’re considering investing in a new machine, be sure to check out our reviews, like the PR1055X embroidery machine or the embroidery machine lace. Unleash your creativity with options like this single head gem and enjoy sewing with confidence!