Sewing and embroidery cover an enormous range of work — from hemming a pair of jeans on a twenty-year-old mechanical machine to running a six-head commercial embroidery setup that turns out branded polos by the hundred. What connects all of it is the same small set of fundamentals: the right machine for the job, the right needle and thread for the fabric, and correct tension.
This guide is the starting point for everything we cover in sewing and embroidery. It explains how the machine categories differ, what actually matters when you’re buying, and which fundamentals cause the most problems when people skip them.
Choosing Between the Machine Types
Most buying mistakes come from picking the wrong category of machine, not the wrong model within a category. Here’s how the main types differ.
Mechanical Sewing Machines
Mechanical machines use dials and levers to control stitch selection, length, and width. There’s no screen and no computer. They typically offer somewhere between 10 and 30 built-in stitches, which sounds limited until you realise that most sewing uses four or five of them.
The case for a mechanical machine is durability and repairability. Fewer electronics means fewer things to fail, and a competent repair shop can service one almost indefinitely. For someone learning to sew, or anyone whose work is mostly straight seams, hems, and zippers, a solid mechanical machine is often a better buy than a cheap computerised one at the same price. Our sewing machine reviews and buying guides compare specific models across budgets.
Computerised Sewing Machines
Computerised machines add a processor, an LCD screen, and usually a much larger stitch library — often 100 to 600 stitches. The practical benefits aren’t really about stitch count. They’re about precision and convenience: automatic needle threading, programmable needle up/down, speed limiting, automatic thread cutting, and precise stitch memory.
For garment sewing where you’re repeatedly switching between settings, or for buttonholes (where a computerised machine will make every buttonhole identical rather than approximately similar), the convenience is real. The tradeoff is repair complexity and a shorter expected service life.
Overlockers and Sergers
This is the category people most often misunderstand, partly because the terminology genuinely is inconsistent. The term “serger” dominates North American markets, tracing to industrial “overedge sewing” patents from the 1880s, while Japanese manufacturers later popularised “overlock” as a global technical descriptor.
In practice, the two words are used interchangeably for the same class of machine. What matters is what the machine does: it sews a seam, trims the excess fabric, and wraps the raw edge — all in a single pass. That’s the seam finish you see on the inside of virtually every commercially produced T-shirt.
These machines run on three, four, or five threads, and thread count determines capability. Three-thread overlocking is for edge finishing. Four-thread adds a second needle, which produces a seam strong enough to construct garments with. Five-thread configurations add a safety stitch.
The feature worth paying for is differential feed — the ability to run the front and rear feed dogs at different speeds. This is what stops knit fabrics from stretching into a wavy mess as they pass under the needle, and it’s the difference between a seam that looks homemade and one that doesn’t.
An overlocker doesn’t replace a sewing machine. It complements one. You still need a conventional machine for topstitching, zippers, buttonholes, and hems.
Coverstitch Machines
A coverstitch machine produces the twin-row hem you see on the bottom of T-shirts and activewear — two parallel rows of stitching on the face, with a looped chainstitch underneath that stretches with the fabric. A conventional machine can approximate this with a twin needle, but the result won’t stretch as well and will pop under load.
This is a specialist purchase. If you sew knits regularly and your hems keep breaking, it solves a specific problem. If you don’t, it doesn’t.
Embroidery Machines
Embroidery machines fall into two broad groups.
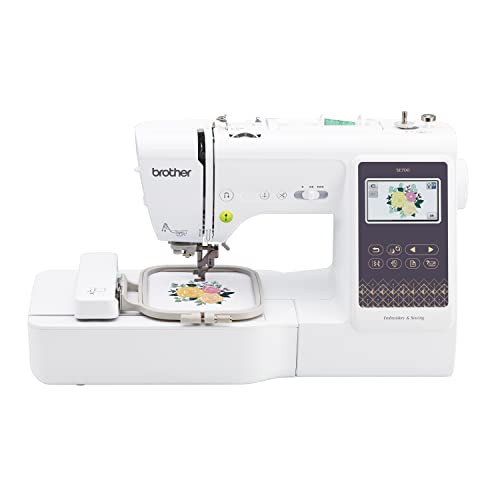
Single-needle machines stitch one thread colour at a time and pause for you to change threads manually. They’re the entry point for home embroidery, they’re comparatively affordable, and many double as conventional sewing machines. The limitation is obvious: a design with eight colours means eight manual thread changes.
Multi-needle machines hold six, ten, or more threads simultaneously and switch between them automatically. The design runs start to finish without intervention. This is what makes commercial work viable — if you’re taking orders, the time saved on thread changes is the whole business case. See our embroidery machine guides for model-by-model comparisons.
The other consideration is hoop size, which sets the maximum design dimensions. A 4×4 inch hoop covers monogram and small logo work. A 5×7 handles most decorative designs. Larger fields open up jacket backs and quilt blocks, but the machine price climbs steeply.
Heavy-Duty and Industrial Machines
“Heavy-duty” on a domestic machine usually means a stronger motor and a metal internal frame rather than a plastic one. It handles denim, canvas, and upholstery weight better than a standard domestic machine.
A true industrial machine is a different thing entirely: a single-purpose machine, usually bolted to its own table, with a clutch or servo motor, running far faster than any domestic unit and built to do one operation continuously for years. They’re excellent at that one operation and inflexible about everything else.
What Actually Matters When Buying
Stitch count is the most heavily marketed specification and one of the least important. A machine advertising 600 stitches is offering perhaps 590 you’ll never use. Look at these instead:
Build quality and frame material. A metal internal frame keeps the needle bar and hook in alignment under load. Plastic frames flex, and flex causes skipped stitches and timing problems over time. This is the single biggest predictor of how long a machine lasts.
Presser foot pressure adjustment. Being able to reduce pressure for knits and increase it for heavy wovens solves a whole category of feeding problems.
Feed system. Standard feed dogs pull from below only. A walking foot or built-in dual feed also pulls from above, which is what keeps layers from shifting — essential for quilting, matched plaids, and slippery fabrics.
Motor strength. The meaningful test is whether the machine can punch through several layers of denim from a standing start without you turning the handwheel to help it.
Throat space. The gap between the needle and the machine body. Standard is around 6 to 7 inches. For quilting, more is substantially better, since you have to physically fit rolled fabric through that space.
Parts and service availability. A machine from a brand with an established dealer network can be serviced in ten years. We cover how the major brands and models compare on support and build quality. A machine from a brand that exists only as a marketplace listing often can’t be serviced at all.
Needles, Thread, and Tension
Most sewing problems that feel like machine faults are actually one of these three things.
Needles
Needle size is given in two numbering systems, usually written together: European (60–120) and American (8–19). Higher numbers mean thicker needles. The rule is to match needle size to fabric weight — 70/10 for lightweight fabrics, 80/12 for standard cottons, 90/14 for heavier wovens, 100/16 and up for denim and canvas.
Needle point type matters as much as size:
- Universal — a slightly rounded point that works acceptably on most fabrics
- Sharp/Microtex — a very fine point for tightly woven fabrics and precise topstitching
- Ballpoint/Jersey — a rounded tip that pushes between knit loops rather than piercing them, which is what prevents laddering and skipped stitches on knits
- Stretch — a ballpoint with a modified scarf, for highly elastic fabrics like swimwear and lycra
- Denim/Jeans — a reinforced shaft and sharp point for dense woven fabric
- Leather — a wedge-shaped point that cuts a slit rather than punching a hole
- Embroidery — a larger eye and a specially shaped groove that reduces friction on high-speed decorative stitching
Needles, feet, bobbins and hoops are covered in more depth in our parts and accessories guides.
Needles are consumable. They blunt and develop microscopic burrs long before they visibly bend, and a blunt needle causes skipped stitches, snagged fabric, and thread shredding. Change the needle roughly every eight hours of sewing, and always after hitting a pin.
Thread
Thread weight is counted inversely: higher numbers are finer threads. A 50wt cotton is a standard piecing and general-sewing weight. Our yarn and thread guides cover fibre types and weights in detail. A 40wt is heavier, used for topstitching and machine embroidery. A 30wt is heavier still, for decorative work where the thread should be visible.
For machine embroidery, 40-weight polyester is the standard recommendation for beginners, and the reasons are practical: polyester is strong, colourfast, and survives commercial laundering. Rayon has a softer sheen that some people prefer for decorative work, but it’s weaker and less resistant to bleach.
The most common thread mistake is buying bargain-bin thread. Cheap thread sheds lint that accumulates in the tension discs and bobbin race, and it breaks under high-speed stitching. It costs more in wasted time than good thread costs in money.
Tension
Correct tension means the top and bobbin threads interlock in the middle of the fabric layers, with neither thread visible on the opposite face.
When tension looks wrong, work through the checks in this order:
- Rethread completely, with the presser foot raised. This is genuinely the fix most of the time — the tension discs only open when the foot is up, so threading with the foot down leaves the thread sitting outside the tension mechanism entirely.
- Check the needle — correct type, correct size, inserted fully, flat side facing the right way, not blunt.
- Check the bobbin — wound evenly, seated correctly, threaded through its own tension spring.
- Clean the bobbin area. Lint compacted under the bobbin case changes tension in ways that look like a mechanical fault.
- Only then adjust the tension dial, in small increments, testing on a scrap of the actual fabric.
Adjusting the dial first is the usual mistake, and it turns a threading problem into a threading problem plus a tension problem. Our techniques and how-to guides walk through threading, tension and troubleshooting step by step.
Machine Embroidery Fundamentals
Embroidery adds two variables that conventional sewing doesn’t have: stabiliser and hooping. Both are where beginners lose most of their material.
Stabiliser
Stabiliser is the backing material that supports fabric during the dense, high-speed stitching of an embroidery design. Without it, the fabric distorts, puckers, and shifts. It is not optional, and it is not a place to economise.
There are three main families, and the choice follows the fabric:
| Fabric type | Stabiliser | Why |
|---|---|---|
| Stretch knits (T-shirts, fleece, sweatshirts) | Cut-away | Permanent support; stops the knit distorting in wear and wash |
| Stable wovens (cotton, linen, denim, canvas) | Tear-away | Temporary support is enough; removes cleanly |
| Sheers (organza, tulle, lace) | Wash-away | Dissolves completely, leaving no visible backing |
| Textured (terry towelling, plush, fleece) | Backing + wash-away topper | The topper stops stitches sinking into the pile |
| Hard-to-hoop items (collars, leather, caps) | Adhesive-backed | Allows floating rather than hooping |
Cut-away is permanent and trimmed with scissors; tear-away is temporary and removed by tearing; water-soluble dissolves in water. The single most common error is using tear-away on a knit — it supports the fabric during stitching, then gets removed, at which point the knit has nothing holding it and the design distorts.
Hooping
Hooping tension is the other half of the problem. The fabric should be taut and flat — the usual description is “drum-tight” — but not stretched. Stretched fabric relaxes after unhooping, and the design puckers as it does.
Match the hoop size to the design. A hoop much larger than the design wastes stabiliser and gives the fabric room to shift; a hoop too small forces you into multi-hooping and alignment problems.
For items that genuinely can’t be hooped — thick collars, structured caps, leather — float the item on adhesive stabiliser that is hooped, rather than forcing the item into the hoop.
A Sensible Starting Setup
For a first embroidery project, the combination that fails least often is: stable woven cotton, tear-away stabiliser, 40wt polyester thread, and a 75/11 embroidery needle. Browse our embroidery designs and kits for beginner-friendly projects. Get consistent results with that before moving to knits, which need cut-away and considerably more care.
Hand Embroidery
Machine embroidery gets most of the attention, but hand embroidery remains its own discipline with its own tools and techniques — surface embroidery, crewel work, cross stitch, and counted thread work each have distinct conventions.
The core toolkit is small: an embroidery hoop, embroidery floss (typically six-stranded cotton, separated to the desired thickness), embroidery needles with larger eyes than sewing needles, and small sharp scissors. A handful of foundational stitches — backstitch, satin stitch, stem stitch, French knot, chain stitch — covers the majority of traditional designs. See our embroidery designs and kits section for patterns and starter kits.
Maintenance
Sewing machines fail from neglect far more often than from wear.
Every few projects: remove the needle plate, take out the bobbin case, and brush out the accumulated lint. Lint is the primary cause of tension problems and mysterious jamming.
Never use compressed air to clean a machine. It drives lint deeper into the mechanism rather than removing it.
Oil only if the manual says to, and only where it says to. Many modern machines have sealed bearings and need no oiling at all; oiling those does harm. When oiling is specified, use proper sewing machine oil — not general-purpose household oil, which gums up.
Change needles on schedule, not when they visibly break.
Cover the machine when not in use. Dust settling into the mechanism is a slow, avoidable problem.
Service annually if the machine is in regular use. A professional service resets timing and tension calibration in ways that home maintenance can’t.
Where to Go From Here
This guide covers the fundamentals that apply across sewing and embroidery. From here, the natural next steps depend on what you’re working on:
- Sewing Machines — detailed model comparisons, brand differences, and buying guides by budget and use case
- Embroidery Machines — single-needle versus multi-needle, hoop sizes, and what commercial work actually requires
- Brands & Models — how Singer, Brother, Janome, Juki, Bernina, and Husqvarna differ in build, support, and value
- Parts & Accessories — needles, presser feet, bobbins, hoops, and the accessories that genuinely change what a machine can do
- Techniques & How-To — threading, tension, hemming, appliqué, buttonholes, and troubleshooting
- Embroidery Designs & Kits — design formats, digitising, and project ideas
Related areas of the site:
- Knitting & Fabric — fabric types, GSM, weaves, quilting and yarn
- Fabric Printing — screen printing and garment printing, which often runs alongside embroidery in decoration work
Each of those areas has its own detailed guides covering specific machines, techniques, and problems.
Frequently Asked Questions
Do I need an overlocker as well as a sewing machine? Not to start. A conventional machine with a zigzag or overcast stitch will finish seams acceptably. An overlocker becomes worth it when you sew knits regularly or want commercially finished seams, and it supplements rather than replaces a sewing machine.
Can a regular sewing machine do embroidery? It can do free-motion embroidery, where you drop the feed dogs and move the fabric by hand. That’s a genuine technique with its own following. It can’t do automated design stitching from a digital file — that needs an embroidery machine.
What’s the difference between a serger and an overlocker? In everyday use, nothing — the words are regional variants for the same machine type. Some manufacturers use “overlocker” for simpler models and “serger” for more featured ones, but there’s no consistent industry definition. Judge machines by thread count, differential feed, and stitch options rather than by which word is on the box.
How often should I change my sewing machine needle? Roughly every eight hours of active sewing, and immediately after hitting a pin or if you notice skipped stitches, thread shredding, or a popping sound as the needle enters the fabric.
Why does my thread keep breaking? In order of likelihood: the machine is threaded incorrectly (rethread with the presser foot up), the needle is blunt or the wrong type, upper tension is too tight, or the thread itself is old or low quality. Thread degrades with age — decades-old thread from an inherited sewing box breaks readily.
Is stabiliser really necessary for machine embroidery? Yes, for essentially all machine embroidery. The dense stitching of a design exerts far more force on fabric than ordinary sewing does, and without backing support the fabric distorts and puckers. The type varies by fabric, but skipping it entirely is the most reliable way to ruin a project.
What size embroidery hoop should I buy? A 4×4 inch hoop covers monograms and small logos. A 5×7 handles the majority of decorative designs and is the most generally useful size. Buy the machine based on the largest design field you realistically need, since hoop capacity is limited by the machine, not just the hoop.