The best sewing machine for appliqué should help you place stitches accurately around the shape without distorting the background fabric. A large decorative menu is less useful than controllable speed, clear visibility, suitable stitch adjustment, and compatible feet. This guide compares three household options and explains how raw edges, turned edges, stabilization, curves, and corners change the buying decision before you choose equipment for decorative fabric projects made at home.
As an Amazon Associate, Practical Textile earns from qualifying purchases. Product links may earn us a commission.
Quick Answer
Compare the Brother XR9550 when speed limitation is useful, the CS5055 for focused computerized sewing, and the Singer 4432 if you prefer mechanical controls and its actual stitch chart fits the technique. Choose the appliqué method first. A narrow zigzag, blanket-style pattern, straight-stitch raw-edge method, and turned-edge approach do not ask for identical settings or accessories.
This guide compares published specifications and project fit; it does not report hands-on testing.
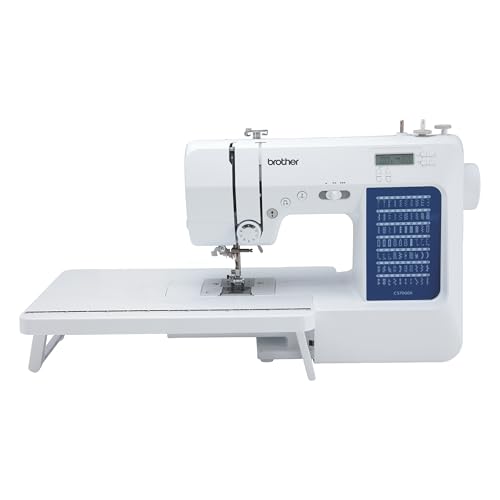
Brother XR9550
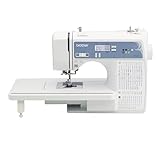
Evaluate visibility and speed management around curves and corners.
Brother CS5055
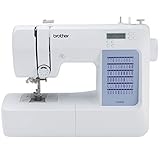
Compare the actual utility patterns with your chosen appliqué method.
Singer Heavy Duty 4432

Check the needed stitch and controller feel rather than buying by pattern count.
Choose the Appliqué Method Before the Machine
Appliqué attaches a fabric shape to a background, but the edge treatment changes the sewing task. A turned edge, a raw edge secured with straight stitching, and a dense zigzag border have different appearances and handling requirements. Decide which result you want before treating a particular stitch as essential.
Some projects use a blanket-style decorative edge, while others need a different method entirely. Inspect the actual stitch chart of the machine rather than assuming a decorative total includes the pattern you want. A high selection count can include letters and patterns unrelated to the technique.
Automatic embroidery is another process. A sewing machine can guide supported stitches around a shape, but it does not automatically load and stitch every digitized appliqué design in a hoop. Buy genuine embroidery capability only when that is the workflow you intend.
Compare Three Sewing Approaches
| Model | Reason to investigate | Appliqué buying check | Main caution |
|---|---|---|---|
| XR9550 | Computerized selection and speed limitation | Control through curves and planned stops | Speed limiting does not guide the edge automatically. |
| CS5055 | Focused computerized utility sewing | Exact stitch and compatible foot | Check convenience functions individually. |
| 4432 | Mechanical controls and a broader pattern menu | Needed pattern, adjustment, and pedal feel | Heavy Duty branding is not an appliqué-quality specification. |
The shortlist describes features and fit, not measured stitch quality. Test the chosen technique through the actual appliqué fabric, background, and any support. A sample on one flat layer does not establish the result on the complete decorative assembly.
Brother XR9550 Review: Controlled Decorative Sewing
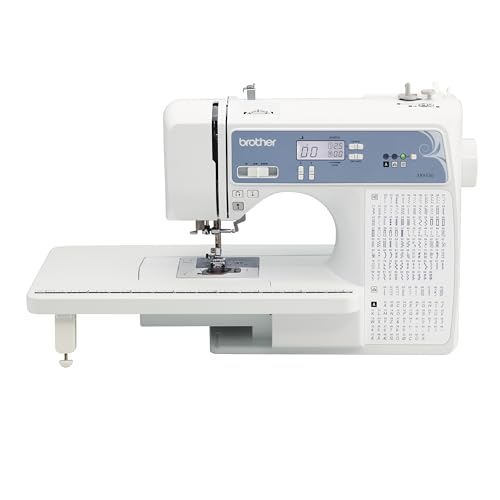

The XR9550 is relevant when you want computerized selection and a manageable speed range for detailed work. Curves and small changes in direction reward controlled movement rather than a high maximum speed. Try stopping at a planned point and restarting without losing the edge position.
Check the actual pattern and foot needed for your technique. A machine’s wide stitch range can provide options, but the correct setup depends on the chosen edge treatment. Confirm needle clearance before operating with a wider stitch or unfamiliar accessory.
Its general sewing functions may also serve garment and household work between decorative projects. That versatility can matter if this is your only machine. Do not buy around lettering or a total selection count if those functions are unrelated to the appliqué you plan.
Our Brother sewing guide distinguishes general sewing from automatic hoop embroidery. The label computerized does not make the two processes interchangeable.
Brother CS5055 Review: Keep the Required Stitch Clear
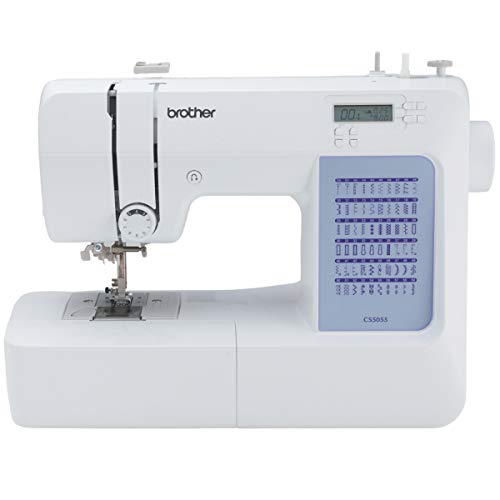
The CS5055 provides computerized stitch selection in a focused home-sewing configuration. It deserves comparison when its actual utility chart covers the edge method you intend. Verify a required blanket-style or other decorative pattern instead of assuming it accompanies every zigzag machine.
Also verify convenience controls separately. A screen does not automatically mean memorized needle positioning, an independent speed limiter, or automatic thread cutting. If one of those functions is essential to your workflow, make it an explicit model check.
For straightforward appliqué, accurate preparation, an appropriate foot, and suitable support can matter more than a long feature list. Try a small curved shape and an inside corner on a representative sample. Assess whether you can see and guide the fabric edge comfortably.
Our computerized versus mechanical guide explores the interface choice without treating the category as a universal quality score.
Singer 4432 Review: A Mechanical Alternative
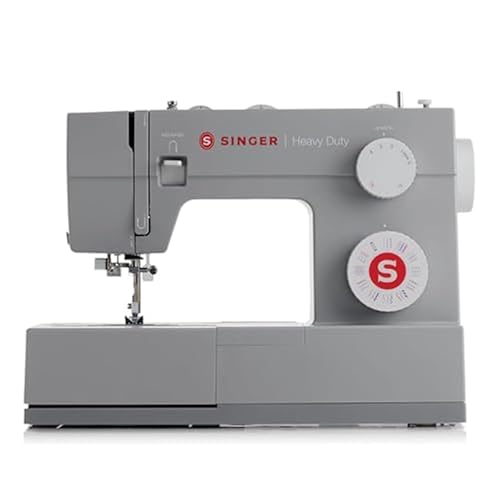
The 4432 offers mechanical selection with a broader built-in pattern menu than the 4423. That may be relevant when a particular available pattern serves the decorative finish you want. Inspect the chart rather than assuming every extra pattern is useful for appliqué.
Its foot-pressure adjustment is another setting to investigate within the model instructions when feeding needs attention. It cannot compensate for a shape positioned inaccurately or a background distorted during preparation. Start with a correct physical setup.
The standard mechanical arrangement does not provide a separate maximum-speed slider. Try the pedal at the pace you need around small details. A high speed specification is less important than whether you can maintain control around the actual shape.
Our Singer 4432 review explains the stitch-menu comparison. The Singer 4423 guide provides another mechanical reference when a smaller menu may already be sufficient.
Raw Edges, Turned Edges, and Stitch Placement
Raw-edge methods
Some raw-edge projects intentionally accept a particular amount of fraying or a visible stitched outline. Others need a supported edge treatment that holds the fabric securely. Follow the project technique and evaluate the final handling rather than assuming all raw edges should receive a dense satin border.
Test the distance from the edge and the way the stitch catches the shape and background. Inspect the reverse side as well as the surface. A decorative outline that looks acceptable in one area can fail to secure an awkward corner if the path is not planned.
Turned-edge methods
Turned edges create a different preparation task before sewing. The fold and shape accuracy influence the result, and the machine cannot correct an uneven outline automatically. Choose a stitch and appearance appropriate to the technique rather than adding density to hide preparation problems.
Keep a sample made from the intended fabrics. The same edge method can look different on a crisp woven background and a softer fabric. Make the finished appearance part of the decision instead of judging the stitch only while it is under the presser foot.
Stabilization, Fabric Preparation, and Compatible Feet
Appropriate support can help prevent distortion during detailed stitching. Choose a stabilizer according to the material, stitch density, technique, and the finished project’s needs. Consider whether it is removed, washed away, or remains in the work.
If using a fusible or positioning product, follow its instructions and the fabric’s care requirements. Do not assume every adhesive is suitable for sewing through or that heat settings are interchangeable. A small prepared sample can reveal problems before the final background is committed.
A foot that improves edge visibility may be useful when compatible with the machine and stitch. The word appliqué on a package is not enough to establish the correct shank, attachment, or needle clearance. Verify the exact accessory and setup.
For wider stitches, check the full needle path before operating. A narrow-opening foot can conflict with an unsuitable width. Follow the model’s safe setup procedure rather than assuming a previously installed accessory works with every pattern.
Curves, Corners, and Repeatable Practice
Practice on simple shapes before attempting a detailed motif. Sew a gentle curve, an outside corner, and an inside corner with the intended edge method. This lets you learn where to stop and reposition without experimenting on the finished project.
Use the needle position appropriate to the technique and the model instructions when pivoting. The needed stopping point can differ between edge methods. Do not apply one tutorial’s pivot instruction automatically to every stitch pattern.
Maintain fabric support and a comfortable pace. Pulling to force an outline around the needle can distort the background or stress the setup. Stop and reposition when necessary rather than trying to complete the whole shape in one uninterrupted movement.
When Hoop Embroidery Is a Different Purchase
A digitized appliqué design can involve placement, tack-down, trimming, and finishing stages controlled through an embroidery workflow. That is different from manually guiding an ordinary sewing stitch around a shape. Confirm which process the design file or tutorial requires.
Do not buy a sewing-only machine expecting a decorative stitch menu to load embroidery files. Equally, an embroidery-only unit does not replace ordinary construction sewing. Our Janome category comparison helps separate those roles.
Sample Inspection and Troubleshooting
- Prepare the actual shape, background, and intended support.
- Fit a suitable needle, thread, and compatible foot.
- Verify the chosen stitch and needle clearance.
- Practice the required curves and corners.
- Inspect attachment security, distortion, and the reverse side.
- Remove or retain support according to the product and technique.
- Record the successful setup before repeating the project.
For loose stitches or skipped formation, investigate threading, bobbin insertion, needle condition, and support before making broad adjustments. Change one variable at a time. Stop for repeated breakage or a jam and disconnect power as directed before clearing the needle area.
Advantages and Tradeoffs of This Shortlist
Useful strengths
- All three candidates retain ordinary household sewing functions.
- The shortlist compares computerized and mechanical preferences.
- Speed limitation can be assessed as a specific control.
- Pattern choice remains tied to the actual edge technique.
- Each can be evaluated with a representative decorative sample.
Important tradeoffs
- Stitch variety does not correct inaccurate preparation or poor support.
- Ordinary decorative sewing does not create automatic hoop embroidery.
Buying Checklist
- Choose the appliqué method and required finished appearance.
- Confirm the exact stitch chart and adjustment range.
- Try visibility, controlled starts, and planned stopping.
- Verify foot compatibility and needle clearance.
- Test the complete fabric and support assembly.
- Check condition, included accessories, electrical suitability, service, and returns.
For used equipment, request the relevant stitch demonstration rather than a straight seam alone. Compare the real cost of any missing compatible accessories and confirm support before relying on a low headline price.
A Project Check Before You Commit
For a useful appliqué test, prepare the same shape in two sizes. Include a shallow curve, a pointed corner, and an inside turn, then use the actual base fabric and support. Compare visibility at the needle and how comfortably you can stop near the marked turning points. A machine that looks impressive on a large smooth circle may be awkward on a small detail.
Keep the test after removing any temporary support as the project directs. Check whether the edge lies flat, whether the stitches cover or distort it, and how the base fabric feels. Record the foot and settings that produced the better result. This creates a repeatable project setup and helps distinguish a need for a different accessory from a need to replace the machine.
Frequently Asked Questions
Do I need an embroidery machine for appliqué?
Not for every method. Ordinary sewing can attach suitable shapes through supported stitches, while a digitized hoop design requires an embroidery workflow. Choose the process before buying the machine.
Is zigzag always the best appliqué stitch?
No. Raw-edge, turned-edge, and decorative methods can call for different choices. Follow the intended technique and test attachment security and appearance on the complete sample.
Do all computerized machines have a blanket stitch?
Do not assume that. Inspect the exact pattern chart. A large advertised selection total can include letters and other patterns unrelated to the edge treatment you need.
Why does my appliqué background pucker?
Investigate support, needle and thread suitability, stitch density, positioning, and handling. Change one variable at a time. More machine power does not automatically correct a distorted preparation.
Can I use any open-toe foot?
No. Confirm compatibility with the exact machine, attachment system, and selected stitch width. Verify needle clearance through the prescribed setup procedure before operating with an unfamiliar foot.
Final Recommendation
Compare the XR9550 for controlled computerized sewing, the CS5055 when a focused feature set covers the method, and the 4432 when mechanical operation suits you. Let a representative shape and edge finish guide the purchase.
The strongest appliqué setup combines accurate preparation, suitable support, a compatible foot, and controlled movement. Buy the functions that improve those tasks rather than the largest decorative menu.