The best sewing machine for leather depends on the material, thread, seam stack, and access required by the item. A flat wallet panel and the final corner of a lined bag are different tests. This guide compares industrial and qualified household roles, explains why permanent holes and feed marks matter, and connects machine choice to a staged construction plan so you can evaluate useful capability without relying on layer-count demonstrations.
As an Amazon Associate, Practical Textile earns from qualifying purchases. Product links may earn us a commission.
Quick Answer
Compare Juki DNU-1541 for appropriate industrial flat-bed unison-feed straight sewing; investigate a suitable cylinder-bed when final-assembly access requires it. Household Singer 4423 is only a limited comparison for suitable lighter work within its instructions. Test matching offcuts and the full construction before assigning any machine a leather workload.
This guide compares published specifications and project fit; it does not report hands-on testing.
Juki DNU-1541
No verified Amazon offer is linked for this model; read the buying checks below.
Check exact suffix, thread range, station, and surface marks.
Singer Heavy Duty 4423
Do not treat household utility as universal leather capacity.
Which Leather Operation Are You Buying For?
| Operation | Category to investigate | Main check |
|---|---|---|
| Accessible layered straight seams | Appropriate industrial flat bed | Feed, needle/thread range, finish |
| Narrow or tubular final assembly | Suitable cylinder bed | Actual opening and turning clearance |
| Occasional suitable light work | Documented household setup | Strict model and material suitability |
Juki DNU-1541: Compare a Defined Industrial Role
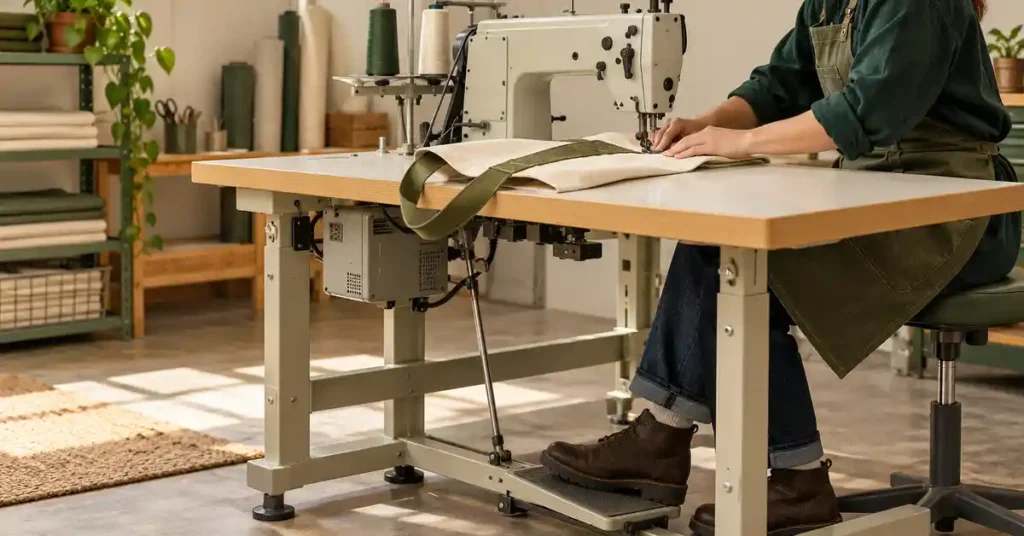
The DNU-1541 provides industrial unison feed for straight sewing. It is relevant when the actual material stack, supported thread, and repeated operation justify a specialized station. It should not be recommended as a universal shoe, sole, belt, and bag machine simply because those products contain leather.
Identify the exact suffix and included equipment. A head-only offer and a complete station create different total costs. Ask for the required needle system, compatible thread range, feet, motor, table, stand, setup, and service before comparing prices.
Inspect the surface after the sample rests. Toothed contact, an unsuitable needle point, or the wrong pressure can leave marks even when stitch formation appears satisfactory. The useful result is an acceptable finished item, not merely proof that the needle penetrates.
Cylinder-Bed Access: A Different Requirement
A suitable cylinder-bed machine can provide access that a flat bed lacks for particular shaped assemblies. Juki’s DSC family is an example to investigate by exact configuration, not a claim that every variant handles every bag or thread. Use the finished component during a demonstration.
Check that the opening fits around the cylinder and that the seam reaches the needle while the work can turn. A machine can have enough penetration while being physically wrong for the final assembly. Map construction order before deciding the bed type.
Singer 4423: Keep the Household Comparison Qualified
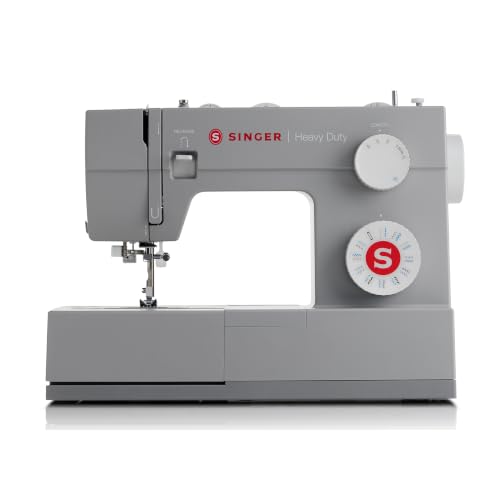
The 4423 provides general household sewing with direct controls and pressure adjustment. It may be compared only for appropriate lighter operations within its documented role. It is not an industrial unison-feed substitute, and a walking-foot attachment would not make it one.
Bring matching offcuts with lining and reinforcement. Stop if the setup struggles or produces unacceptable marking. Do not pull the material through or assume that using a larger needle can solve every feed and penetration problem.
Five Selection Benefits and Two Unavoidable Limits
- A defined operation leads to a more appropriate machine category.
- Unison feed can address suitable layered movement.
- The right bed type improves relevant assembly access.
- Matched consumables support a repeatable seam.
- A complete station makes cost and support understandable.
Two limits shape the process: leather holes remain after unpicking, and a machine’s material capacity does not establish the quality or strength of an invented product construction. Use the pattern, material guidance, and a representative finished sample.
Read our DNU-1541 guide, 4423 review, and household walking-foot guide. Our leather construction guide and bag assembly guide help plan a useful buying sample.
Project Preparation and a Repeatable Sewing Setup
Leather bag preparation reveals the seam stacks, permanent-hole decisions, and assembly access behind the machine recommendation. Use these checks to plan representative offcuts and the construction sequence before committing expensive final pieces to an unproven setup.
Identify the bag construction first
A turned bag, an exposed-edge construction, a gusseted tote, and a small flat purse use different seam and finishing arrangements. Read the pattern rather than selecting only from the silhouette. A boxy bag may depend on support and hardware that are not visible in a front photograph.
Check whether the design is intended for hand stitching, machine stitching, or a particular combination. A hand-sewing hole pattern should not be transferred directly to a machine process without understanding the stitch and seam construction. Likewise, a machine-sewn tutorial may assume access or flexibility that a thick structured material does not provide.
Choose a first project with manageable layers and a clear sequence. A simple shape can still have a difficult junction where a handle, folded top, lining, and side seam meet. Identify that point before cutting so the equipment decision is based on the actual construction rather than the easiest flat seam.
Read leather descriptions in context
Thickness, temper or flexibility, surface, finish, and variation across the hide affect the result. The general word leather does not describe one uniform sewing material. A garment-soft piece and a firm bag leather can require different patterns and handling even when their colors are similar.
Look at the supplier’s information and request a suitable sample where possible. Check which areas of the material are usable and whether stretch, marks, or irregular shape affect the cutting plan. A hide’s total area does not guarantee that it holds every long handle or large body panel in the required orientation.
Keep genuine leather and coated imitation materials distinct. Their surfaces, backing, needle requirements, heat response, and care can differ. A tutorial written for one should not automatically be used for the other because the finished photographs look alike. Follow the actual material and equipment guidance.
Make a paper mockup before a leather sample
Draw or print the pieces at the correct scale and mark seam lines, folds, hardware locations, and openings. Assemble a paper or inexpensive material mockup where useful. Check the intended contents and the way the bag opens. A flat width and height do not fully describe the three-dimensional usable space.
Keep cut dimensions separate from finished dimensions. For a simple flat panel, seam allowances consume width at the joined sides, while a folded top or bound edge uses its own allowance. A gusset or boxed base changes the geometry again. Calculate from the chosen construction instead of adding one universal amount to every edge.
Check handle length, attachment depth, and closure access on the mockup. The cut strap length is not the same as the free carrying loop or handle drop. Material folded into tabs and joins is no longer available in the exposed length. Resolve those measurements on paper before a long strip is cut from a limited hide.
Build the thickest representative sample
Include the actual leather layers, lining, support, zipper tape, handle tab, or folded edge that will meet at the difficult point. A two-layer flat sample does not establish suitability for a six-layer junction. Test the exact seam and attachment method before committing the whole project.
For machine sewing, follow the model’s compatible needle, foot, thread, and material guidance. A leather needle is a point choice for an appropriate application, not an automatic upgrade for every thick fabric or imitation material. Check the manufacturer’s instructions and make the sample at a controlled pace.
Stop if the needle deflects, strikes hardware, or the machine struggles. Do not pull the work through the feeding system or assume that running faster will overcome resistance. If repeated work needs a different feeding category or machine, compare that requirement before buying tools around an unsuitable setup.
Plan stitching where holes remain visible
Mark and position the work with methods suitable for the leather’s surface. Test any marking or temporary adhesive on an offcut. Pins and repeated unpicking can leave permanent marks, so choose positioning tools and the seam line deliberately. Clips can be useful in suitable areas, but check that they do not mark the finish.
Use a consistent seam guide and test the stitch appearance before sewing the final panel. Very dense repeated stitching can create an unwanted perforated line. The appropriate stitch and secure ending method belong to the material and construction, not to a universal instruction to sew back and forth many times over the same spot.
If a seam is misplaced, assess the visible and structural effect before sewing another line beside it. Extra holes do not disappear because the thread is removed. A sample gives room to adjust the method without accumulating those marks on the final bag.
Control bulk without improvising structural changes
Some patterns use thinning or skiving techniques at particular folds and joins. Those are skills and construction decisions to understand, not general instructions to remove material wherever the machine struggles. Removing too much can weaken a handle attachment or leave a surface vulnerable to damage.
Follow the pattern and material guidance, practice on offcuts, and use suitable tools correctly. If the project depends on a technique beyond your present experience, choose instruction or another pattern. A simpler construction with compatible material can be a better first project than an expensive design whose critical steps are being guessed.
Keep seam allowances and support layers consistent with the plan. Changing a fold to reduce bulk can alter hardware placement, finished dimensions, or the way lining joins. Recheck the paper mockup and sample whenever a structural change affects another part of the bag.
Attach hardware as a complete assembly
Rivets, snaps, buckles, rings, and zippers need compatible components and supporting material. Use the hardware maker’s tools and installation instructions. Similar-looking pieces are not necessarily a matched system. Test the actual stack and inspect both faces before installing hardware on the final bag.
Keep metal parts away from the sewing needle path and plan the order of installation. A closure installed too early can obstruct a seam, while one installed too late may be inaccessible behind the lining. The pattern sequence should explain how those operations fit together.
Do not assign a carrying-load rating from the number of rivets or the appearance of a reinforced box of stitching. Handle strength depends on the complete design, material, attachment, and use. Inspect a practice bag with appropriate ordinary contents and describe its construction honestly rather than claiming an untested performance capacity.
Finish edges and lining for the intended use
Edge painting, folding, binding, and other finishes create different appearances and work with different materials. Use a method appropriate to the leather and follow product application, drying, and care directions. An attractive edge product should not be used to hide an unstable seam or incompatible material.
Check the lining’s size and movement before closing the last access opening. Keep pockets and closures free and inspect for trapped folds. A lining that is too small can pull the outer bag out of shape. A lining that is excessively loose may catch in the zipper or collect awkwardly at the bottom.
Keep the original material and finishing information for later cleaning. Do not treat leather care as identical to ordinary fabric laundering. Use the supplier’s appropriate method and test an inconspicuous area where required. A cleaning treatment that changes the surface color may be unacceptable even if it removes a mark.
Use a buying and construction worksheet
Record the pattern, material description, usable layout, thread, needle, foot, hardware, support, seam method, and hardest sample. Add the operations you cannot yet perform confidently. This makes the equipment decision concrete and helps compare a hand-sewn, domestic-machine, or specialist-machine approach on the same project.
As an illustrative planning exercise, compare a soft small purse with a structured tote. The purse may have easier material handling but a confined closure area; the tote may need more substantial handle support and a thicker top junction. Neither should be selected only because the front photograph looks simpler. Identify the actual limiting operation first.
Plan the irreversible operations in order
List cutting, permanent stitching, punched hardware holes, thinning, and edge finishing before beginning the final leather. Mark which decisions depend on a previous fit or sample. This makes it easier to stop while a measurement can still be changed rather than after an inaccurate hole or seam has become permanent.
For a handle tab, test the complete reinforced layer stack and compatible hardware on offcuts. Check both the sewing route and the tool access needed for installation. A component that fits by itself may be inaccessible once lining or a side seam is closed.
Keep the accepted sample with the paper layout and material description. If the next hide differs in thickness or flexibility, repeat the relevant tests. The successful result is evidence about the actual combination, not a promise that every material sold as leather will behave the same way.
Frequently Asked Questions
Can any heavy-duty household machine sew leather?
No universal claim is justified. Leather type, construction, thread, needle, feed, access, and repetition all matter. Check the exact model and test an appropriate representative sample.
Is flat bed or cylinder bed better?
The construction decides. Flat panels and narrow shaped assemblies create different access needs. Demonstrate the actual final seam rather than choosing the bed type in isolation.
Does an even-feed foot create industrial capability?
No. A household attachment operates within the existing machine’s limits. It does not provide every mechanism, thread range, or access advantage of a specialized industrial station.
Why inspect surface marks after sewing?
Leather can retain holes and pressure or feed marks. A seam that forms correctly may still leave an unacceptable visible finish. Use matching offcuts before the final pieces.
What belongs in the purchase total?
Include the complete station, compatible feet, motor, setup, consumables, delivery, instruction, and service. Missing model-specific parts can substantially change an apparently inexpensive offer.
Final Recommendation
Buy leather equipment for the exact seam and access required. Investigate DNU-1541 for a justified flat-bed industrial role, a compatible cylinder bed for shaped access, and household options only within suitable limits. Validate the finished surface and complete workflow before committing valuable material.