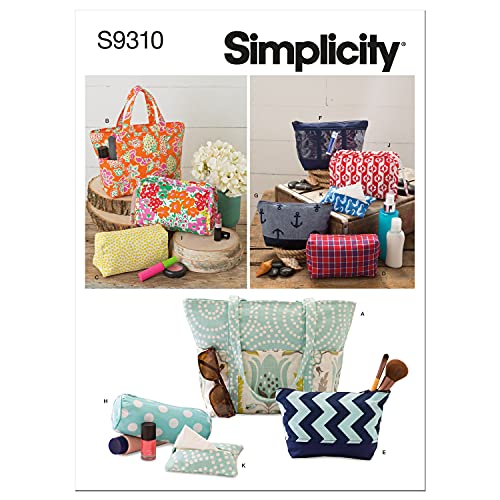
Bag sewing becomes easier when you begin with a clear cutting plan and a construction that matches your fabric. A tote, a small makeup pouch, and a simple wallet use different folds and finishing details even though all can start from rectangles. This guide provides original practice measurements, explains what they produce, and shows how to sample the seams before changing the design or adding hardware. Measure your workspace first.
Quick answer
Choose one project and keep cut size, seam allowance, and finished size separate. Make a paper mockup and a small seam sample before cutting special fabric. The tote below uses a simple flat construction; the makeup pouch uses a lined envelope method; the wallet uses a small folded pocket layout. These are original practice examples, not copies of a commercial pattern or load-rated product designs.
Choose fabric and support for the job
A stable woven fabric is useful for learning the sequence because it is easier to mark, press, and align than a slippery or highly stretchy material. The fabric still needs to suit the intended item. A light pouch for small cosmetics and a tote intended for heavier contents should not be treated as the same structural project.
Consider whether interfacing or another support is needed. Follow the product’s application and care instructions, and test the actual outer fabric and lining together. Adding a stiff layer can change turning, seam bulk, and the way a small flap folds. More interfacing does not automatically make a bag stronger or more useful.
Prepare the cloth according to its care needs and project plan. Check print direction, color release, and usable fabric width. Keep labels for any support material. The original measurements below are starting examples for an ordinary woven sample, so a substantial change in thickness or construction deserves a new paper and sewing test.
Keep the basic tools simple
Use a ruler, suitable marking tool, scissors or a rotary cutter and mat, matching thread, compatible needle, and pins or clips. A seam gauge helps keep folds consistent. A pressing tool can help where all the materials allow it. You do not need a specialist bag machine for every small woven-fabric project, but the complete layer stack must suit the equipment.
Test the thickest junction before sewing the full item. Handle attachments, folded hems, wallet divisions, and flap edges can contain several more layers than an ordinary side seam. A machine that sews one flat layer smoothly has not yet been tested on the finished construction. Stop if the needle strikes, bends, or struggles.
Original flat tote cutting example
For a basic unlined practice tote, cut two body rectangles 14 inches wide by 16 inches high. Use a half-inch seam allowance at the sides and bottom. Plan a top edge with two half-inch turns. Before any optional changes, that gives an approximate flat body width of 13 inches and height of 14.5 inches after the seams and top turns.
Cut two suitable handle strips, for example 4 by 22 inches, and prepare a fold-and-stitch handle method that suits the material. Decide whether the ends will be enclosed in the top hem or attached to a reinforced area. The usable loop length changes with that decision, so do not call the cut strip length the finished handle drop.
| Tote component | Practice cut size | Construction note |
|---|---|---|
| Body, two pieces | 14 × 16 inches | Half-inch side and bottom seams |
| Top edge | Included in body height | Two half-inch turns |
| Handles, two strips | Example: 4 × 22 inches | Fold, stitch, and plan attachment depth |
Make a paper rectangle and mark the seam and fold lines. This makes the finished body easier to visualize and exposes a dimension error before cutting. The example is a flat tote: it does not include a boxed base. Boxing corners changes the bag’s usable dimensions and needs its own draft and sample.
Sew the tote body
Place the body pieces right sides together and align the side and bottom edges. Keep directional prints facing the intended way. Sew the planned seams and secure the ends appropriately. Finish the raw allowances using a suitable method for the fabric, then check the corners before turning the body right side out.
Press or baste the top edge into the two planned turns. Keep the fold depth even around the opening and check where the side seams add bulk. Do not trim away so much allowance that the seam becomes weak. If the material makes the folded area too thick, reassess the edge construction before forcing it under the foot.
Prepare the handles consistently and position them symmetrically. Baste or temporarily attach them and check the tote while holding it. Decide whether the loop suits carrying in the hand or another intended use. A comfortable placement is easier to correct before several lines of permanent attachment are sewn.
Secure the handle ends with an appropriate construction for the intended light-use practice bag, using reinforcement where needed. This tutorial does not establish a rated carrying capacity. Inspect the attachment through the whole material stack and test the finished bag gently with its intended ordinary contents before relying on it.
Original lined envelope makeup pouch
For a small practice pouch, cut one outer rectangle and one lining rectangle, each 8 by 20 inches. Use a half-inch seam around the paired rectangles, leaving a suitable turning opening. After turning and closing, the flat panel will be approximately 7 by 19 inches, subject to material thickness and finishing accuracy.
With the panel arranged lengthwise, fold the lower 7 inches upward to form the pocket. The remaining upper portion forms an approximately 5-inch flap because the 19-inch panel uses 14 inches in the doubled pocket. These are practice dimensions for a soft envelope pouch, not a promise about fitting a particular bottle or cosmetic set.
Before sewing, fold a paper panel at the finished dimensions and place the intended items inside the outline. Check depth and flap coverage. If the contents are bulky, allow for that three-dimensional space instead of choosing dimensions only from a flat width measurement. Change the paper example first, then recalculate the cut size and allowances.
Sew and close the pouch
Place outer and lining rectangles right sides together and sew around the planned perimeter, leaving the turning opening. Keep the corners accurate and reduce bulk only as the construction permits. Turn gently, shape the corners without puncturing them, and press appropriately. Close the turning opening securely.
Fold the lower section upward and check that its top edge is even. Stitch the pocket’s sides with a suitable narrow edge attachment, keeping the opening free. Check the inside so the lining has not formed an unintended fold. The flap should fold over without forcing the pocket to collapse or pulling the side seams out of shape.
Choose an optional closure that suits the material and contents, such as a properly supported compatible snap or another documented fastening. Follow the fastening manufacturer’s tool and installation instructions. A closure should not be installed into an unsupported weak area simply because the pouch is small.
This soft pouch is not automatically waterproof or leakproof. Select and test materials if spills are a concern, and keep the care instructions with the item. A washable lining can help with maintenance, but its presence alone does not establish containment for a leaking bottle or protect other bag contents.
Original simple folded wallet example
For a flat practice wallet, cut one outer and one lining rectangle, each 9 by 8 inches. With a half-inch perimeter seam, the turned panel is approximately 8 by 7 inches. Fold the lower 2.5 inches upward to create a pocket section; the remaining 2 inches above the doubled portion can become a flap.
The practice layout can be divided with a vertical stitch line into two side-by-side compartments if their actual clear widths suit your cards. Measure the items and account for edge stitching and the center division. Do not assume that every card holder needs an extremely tight fit; a sample lets you compare access and retention without damaging the final fabric.
Make a paper mockup at the finished size and check the fold. If you want a different orientation, more pockets, or a wallet that folds again, draft that as a separate construction. Extra folded layers consume space and can change where the flap reaches. Adding features one at a time makes those effects easier to understand.
Sew the wallet and inspect the pockets
Sew the outer and lining together, leave a turning opening, and finish the panel as with the pouch. Keep the perimeter consistent so the folded pocket remains square. Fold and baste the pocket section, then test with the actual items before adding permanent side seams or a central division.
Sew the intended divisions without accidentally closing the pocket openings. Secure the upper ends appropriately for the use and material. Inspect both sides and test repeated insertion gently. A pocket that looks tidy without contents can become too tight or distort once a card or folded note is added.
Choose a supported closure only if the design needs it. This fabric example does not provide special security, waterproofing, or electronic shielding. Describe the finished item by its actual construction rather than implying a protective function that has not been tested.
Compare the three projects before adding complexity
| Project | Main learning task | Useful next variation |
|---|---|---|
| Flat tote | Body seams, top fold, and handles | A tested lining or pocket |
| Envelope makeup pouch | Turning and a lined flap | A suitable supported closure |
| Folded wallet | Pocket placement and divisions | A revised paper layout for actual contents |
Finish one working sample before adding a zipper, boxed base, thick padding, or multiple hardware pieces. Each extra feature can change seam bulk and access. A zipper pouch needs its own opening construction; it is not created simply by sewing a zipper across the envelope flap after the basic item is complete.
Diagnose fit and construction problems
If the finished item is smaller than expected, compare seam allowances and fold lines with the paper plan. If corners will not turn neatly, inspect material thickness and allowance bulk rather than pushing a sharp tool through them. If an opening twists, check grain, alignment, and whether one layer was stretched during sewing.
For a weak handle or pocket attachment, inspect the supporting fabric and full layer stack. More stitches through the same damaged tiny area may weaken it further. Open enough of the construction to repair sound material appropriately or redesign the attachment. A decorative topstitch line should not be assumed to replace structural reinforcement.
Keep an original project record
Save the cut sizes, seam allowance, fold diagram, fabric, support material, and changes you made. Photograph the paper mockup and the finished sample with a ruler where useful. That record makes the second version a controlled improvement rather than another attempt to remember a rectangle size from a loose scrap.
When sharing these practice examples, distinguish them from the original files of other designers. If you choose a published bag pattern instead, keep its name, version, instructions, and use terms with the project. A useful comparison article should help someone find the correct resource without redistributing a creator’s pattern as its own download.
FAQ
Do the example measurements include seam allowances?
Yes, the practice cutting sizes are given with their stated seam and fold assumptions. Read the complete example before cutting. If changing the seam allowance, thickness, or construction, recalculate the finished dimensions and test a paper mockup.
Can I turn the tote into a boxed-bottom bag directly?
Boxing the corners changes the three-dimensional shape and usable dimensions. Make a separate paper and seam sample and account for the amount removed or folded. The flat-tote dimensions should not be presented as the finished dimensions of the modified bag.
Is the envelope pouch a zippered makeup bag?
No. It uses a folded pocket and flap. A zipper pouch has a different opening and assembly sequence. Choose a complete zipper method if that closure is required rather than adding a zipper to a finished flap without redesigning the construction.
Can I use very thick fabric for every example?
Thicker cloth and support layers change turning, fold bulk, fit, and machine requirements. Test the complete junctions and adjust the construction deliberately. A larger needle does not automatically make every stack suitable for a domestic machine.
Are these bags waterproof or load-rated?
No such performance is established by the practice examples. Choose materials, construction, and testing appropriate to the intended use. Describe what you actually make and inspect the finished attachments instead of assuming that a lining or extra stitching proves a protective rating.
Conclusion
Use rectangles as a clear starting point, but keep dimensions, folds, and finished function connected. A paper mockup and a realistic seam sample help a tote, pouch, or wallet become a usable item. Complete one simple version, record it, and add new features only when you understand how they change the construction.
Reference and further instructions
Use the exact machine manual, pattern instructions, and material care directions for your project. The techniques and original practice examples in this guide should be sampled with your own materials. Linked designers retain ownership of their patterns; download their current instructions from the original source.