The best embroidery machine for patches should fit your design dimensions, color workflow, and finishing method. Making one personal badge is different from repeating a multicolor logo for customers. This guide compares three machine categories, explains what hoop size does and does not change, and shows how digitizing, backing, borders, and attachment affect the finished patch before you choose equipment for hobby projects or a growing small embroidery workspace today.
As an Amazon Associate, Practical Textile earns from qualifying purchases. We may earn a commission through the product links on this page.
Quick Answer: Choose by Patch Size and Repeat Work
Compare the Brother PE900 for suitable five-by-seven flat embroidery, the Poolin EOC06 when measured designs justify a larger field, and the Smartstitch S-1001 when repeated multicolor work makes a multi-needle workflow useful. None automatically turns a stitched motif into a completely finished patch. You still need appropriate digitizing, materials, an edge-finishing plan, and an attachment method.
This is a specification-based shortlist. We have not stitched comparative patch samples, measured production output, or tested edge durability.
Brother PE900

Compare it when the design fits its field and occasional color changes are acceptable.
Poolin EOC06

Investigate the extra field only when your designs or planned layout use it.
Smartstitch S-1001

Evaluate operator time, training, and ownership cost before moving to multi-needle equipment.
An Embroidered Patch Is More Than a Stitched Image
A patch workflow includes preparing the design, selecting the base and stabilization, hooping, stitching, trimming or cutting, finishing the edge, and deciding how the patch will be attached. Some steps happen outside the embroidery machine. A purchase should fit the entire process rather than only the central motif.
First decide whether you want to make patches or sew finished patches onto items. An embroidery machine creates the design; an ordinary sewing machine can perform suitable attachment work on accessible materials. The equipment needed for a thick assembled leather garment may be different again.
If your goal is both making and attaching patches, compare each operation separately. Our Brother sewing guide helps with the construction category, while the machines below address embroidery. Do not assume one attractive feature list completes both processes.
Compare Patch-Making Machine Categories
| Model | Listed flat field | Workflow | Strongest reason to investigate |
|---|---|---|---|
| Brother PE900 | 5 × 7 inches | Single-needle dedicated embroidery | Suitable home projects that fit the field. |
| Poolin EOC06 | 7.9 × 11 inches | Single-needle dedicated embroidery | Measured larger designs or a usable larger layout. |
| Smartstitch S-1001 | 9.5 × 14.2 inches | Ten-needle, single-head embroidery | Repeated multicolor work and reduced rethreading intervention. |
The largest field is not automatically the most economical choice for small badges. Likewise, multiple needles do not make several patches stitch simultaneously in separate positions. Compare the full layout, sequence, and operator time with your actual order pattern.
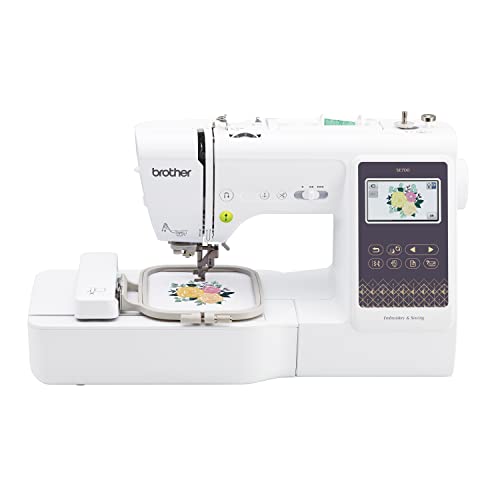
Brother PE900 Review: A Focused Home-Embroidery Option
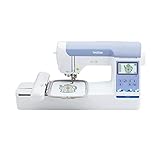

The PE900 is a candidate when your patch design fits the five-by-seven field and your workload suits a single-needle machine. Its onboard design controls and supported file-transfer options provide a route to compatible custom embroidery files. Those conveniences do not replace digitizing or a suitable patch-material setup.
For occasional hobby patches, the important question is whether the whole patch, including the planned border, fits comfortably. Leave the layout and boundary checking to the supported process rather than crowding a motif into the maximum rectangle without considering the edge finish.
Single-needle color changes are part of the workflow to evaluate. A simple one-color badge can be a different ownership proposition from repeating a logo with many color stops. Consider the time you will spend attending to the machine, not just the machine’s listed stitching speed.
Best-fit use
Investigate this category for personal or modest repeat work where the design size is sufficient and a dedicated home machine fits the budget and workspace. Choose another category if large designs or repeated color changes already define the workload.
Poolin EOC06 Review: When a Larger Field Solves a Real Need

The EOC06’s larger listed field is relevant when a patch or planned layout genuinely needs more room. Measure both dimensions of the finished design, including the intended border. A design that is too wide cannot be judged only by its height or total area.
A larger hoop can also invite a layout containing several small motifs, but this needs careful preparation. Confirm spacing, cutting room, sequence, stabilization, and how the machine will stitch the complete arrangement. More available area does not guarantee that every dense layout remains stable or efficient.
This remains a single-needle embroidery category. Extra field does not remove the operator’s color-change tasks or turn it into a multi-head production machine. Compare whether the larger work area solves your main bottleneck before treating size as a universal upgrade.
Our Poolin review explains the brand’s model distinctions. Check the exact included hoops and current seller terms rather than assuming every package matches a promotional photograph.
Smartstitch S-1001 Review: Evaluate Repeat Multicolor Work

The S-1001 provides ten installed needle positions on a single embroidery head. That arrangement can reduce rethreading interruptions when a repeat design uses several assigned colors. It does not produce ten separate patches at once simply because the specification lists ten needles.
For a studio repeating the same multicolor design, the workflow may deserve investigation. Time the complete job, including file preparation, hooping, loading, stitching, unloading, cutting, finishing, and inspection. The added equipment becomes more attractive when it saves a meaningful amount of operator attention on work you actually expect.
Training, workspace, service, and maintenance are also part of the decision. More installed colors create more thread paths to manage correctly. A verified setup can repeat efficiently, while an unnoticed design or tension problem can also repeat across an order.
Our Smartstitch buying guide discusses that ownership category. Choose it for a demonstrated workflow improvement rather than the largest needle count or maximum-speed headline.
Digitizing, Small Lettering, and Design Quality
Prepare the file for the finished patch size
A logo image needs stitch instructions suited to the patch material and dimensions. Small text, narrow gaps, dense details, and outlines may need adjustment. Reproducing a printed logo literally can produce poor embroidery when the same detail is reduced to a small stitched badge.
Discuss the final size with the digitizer and provide the intended material and edge method. A file prepared for one purpose should not be assumed suitable for every backing or much smaller size. Keep the approved version separate from trials and record the details of its successful sample.
Test the complete design, not just the center
The border, outlines, and final details can change the way a patch behaves. A central fill that looks good halfway through does not verify the complete result. Inspect alignment, coverage, stiffness, and the reverse side after all stages are finished.
Resizing controls deserve restraint. Smaller can mean crowded stitches; larger can mean insufficient coverage if stitch information is not recalculated appropriately. Obtain an appropriately prepared design and test it rather than treating a screen percentage as a quality guarantee.
Borders, Backing, and Attachment
Choose the edge finish deliberately
A satin border sewn in a hoop is not automatically the same as a merrowed edge from dedicated finishing equipment. Different shapes and materials can require different methods. Plan how the patch will be cut or trimmed and how the edge will remain secure in use.
Test the whole method on a replaceable sample. Cutting too close, leaving unsuitable material at the edge, or choosing a border that does not suit the construction can undermine an otherwise attractive stitched design. The embroidery machine is only one part of this result.
Match backing and attachment to the use
Select the base material and stabilization for the design and intended handling. A decorative patch on a display item may face different demands from a patch on washable clothing. Include any final backing, adhesive, hook-and-loop material, or sewn attachment method in the sample evaluation.
If using an adhesive or heat-applied product, follow that product’s instructions and the care limitations of the item receiving the patch. Do not assume every backing is interchangeable or that a finished patch can be safely applied to every fabric using the same method.
For sewn attachment, evaluate garment access and the combined thickness separately. Our Singer 4423 review provides a domestic-sewing reference, but a dense or restricted assembly can need a different machine configuration.
Production Planning and Sample Checks
Make a representative finished patch before accepting a repeat order. Record the design version, base, stabilizer, thread, needle, hoop, sequence, and edge method. A sample record makes it easier to reproduce the result or identify what changed when a later run behaves differently.
Inspect batches during production rather than waiting until every piece is finished. If registration shifts, thread breaks repeatedly, or edges become inconsistent, stop and investigate. Continuing through a known problem can turn a small setup issue into a larger rework task.
Calculate capacity from the whole workflow. Advertised maximum speed excludes many practical steps and does not promise a fixed number of finished patches per hour. Include color intervention, trimming, cutting, inspection, packing if relevant, and unsuccessful pieces in the production plan.
Keep design permissions organized when making goods for sale. Owning a machine or downloading artwork does not automatically establish permission for every commercial use. Confirm the rights for the actual logo or design before promising an order.
Advantages and Tradeoffs of This Shortlist
Useful strengths
- It separates occasional home embroidery from repeated multicolor work.
- The field comparison helps you evaluate measured designs.
- The larger-field option can be assessed for an appropriate layout.
- The multi-needle option provides a different color-management workflow.
- Each category can be evaluated through a complete sample patch.
Important limitations
- None automatically supplies every edge-finishing or attachment process.
- Needle count and maximum speed do not guarantee finished production output.
Buying Checklist
- Measure the complete patch and planned border in both dimensions.
- Confirm the exact hoops, accessories, condition, and model revision.
- Compare single-needle intervention with the actual repeat workload.
- Verify design format and file preparation requirements.
- Request a complete sample using a relevant material and finishing method.
- Check US electrical suitability, training, service, warranty, and returns.
- Budget for digitizing, thread, needles, backing, sample materials, and finishing supplies.
For another dedicated embroidery comparison, our Janome embroidery machine guide offers additional category context. Do not buy an enlarged field or more needles until you can explain how that change improves your intended patch workflow.
A Project Check Before You Commit
Plan the patch’s finish before digitizing the border. A sew-on patch and a patch intended for a particular adhesive backing have different finishing steps. Test the completed edge after removal from the support, including any trimming and attachment process. The design should be evaluated as a finished patch rather than only as attractive embroidery still held tightly in the hoop.
Frequently Asked Questions
Can a home embroidery machine make patches?
It can stitch suitable prepared designs on appropriate patch materials within its supported field. You still need to plan stabilization, edge finishing, cutting, and attachment. Producing the stitched motif is not the entire patch-making process.
Do I need a multi-needle machine for patches?
Not automatically. It can reduce rethreading intervention on repeated multicolor designs, but occasional or simple work may suit a single-needle workflow. Compare complete production time, budget, and support requirements.
Does a ten-needle machine make ten patches at once?
Needle positions hold different thread colors; they are not separate embroidery heads. A single-head machine works at one active position. A multi-motif layout is stitched according to its sequence rather than turning each needle into an independent machine.
Will an embroidery machine make a merrowed border?
A stitched satin border is not automatically a merrowed finish from dedicated equipment. Choose an edge method appropriate to the design and material, then test the complete finished patch before production.
What hoop size is best for patches?
Choose a supported field that fits the complete design and border or a carefully planned layout. Larger is useful only when the layout and stabilization work. Measure both dimensions instead of selecting from the longest advertised number.
Final Recommendation
Investigate the PE900 for suitable home-scale designs, the EOC06 when a larger flat field solves a measured need, and the S-1001 when repeated multicolor work justifies its ownership demands.
Choose the machine as part of a complete patch-making process. A verified design, appropriate materials, sound edge finish, and repeatable sample matter more than buying the most impressive specification in isolation.