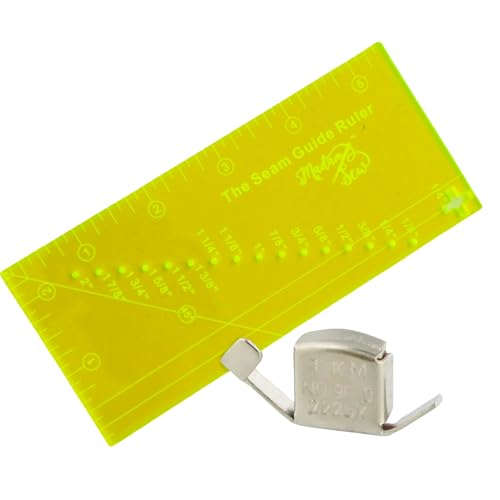
When it comes to sewing, the seam allowance is an essential aspect that can significantly affect the outcome of your projects. Whether you are a beginner or an experienced sewer, understanding the 1/2 inch seam allowance on your sewing machine is crucial. This specific seam allowance is commonly used in various sewing patterns and techniques, making it a fundamental element of garment construction. In this article, we will explore what a 1/2 inch seam allowance is, its importance, how to set it on your sewing machine, and tips for achieving perfect seams.
What is Seam Allowance?
Seam allowance refers to the area between the fabric edge and the stitching line. This allowance is crucial for various reasons, including creating a finished edge, allowing for future alterations, and providing stability to the fabric. Seam allowances can vary depending on the type of project and the fabric used. The 1/2 inch seam allowance is prevalent in many sewing patterns, especially for garments and upholstery.
Importance of Seam Allowance
Understanding the importance of seam allowance is vital for successful sewing. Here are some key reasons why seam allowance matters:
- Structural Integrity: Proper seam allowances help maintain the strength and durability of the seams, preventing fraying and providing a clean finish.
- Ease of Alteration: A generous seam allowance allows for adjustments, making it easier to resize garments as needed.
- Finishing Techniques: A 1/2 inch seam allowance provides enough fabric for various finishing techniques, such as serging, binding, or topstitching.
Setting the 1/2 Inch Seam Allowance on Your Sewing Machine
Setting the 1/2 inch seam allowance on your sewing machine is a straightforward process. Most machines have guides or markings on the needle plate that indicate different seam allowances. Here’s how to set it up:
Step-by-Step Guide
- Check Your Machine: Ensure that your sewing machine is in good condition and that the needle is correctly installed.
- Locate the Seam Allowance Markings: Look for the markings on your machine’s needle plate. Many machines will have a 1/2 inch marking, but if yours doesn’t, you can use a ruler for accuracy.
- Align Your Fabric: Place your fabric under the presser foot, aligning the edge with the 1/2 inch mark on the needle plate.
- Adjust the Needle Position: If your machine allows it, you can adjust the needle position to ensure it aligns with the desired seam allowance.
- Perform a Test Stitch: Always perform a test stitch on scrap fabric to ensure your seam allowance is accurate before sewing your final pieces.
Tips for Sewing 1/2 Inch Seams
Once you have set your sewing machine for a 1/2 inch seam allowance, here are some practical tips to help you achieve perfect seams:
1. Use the Right Presser Foot
Using a presser foot designed for straight stitching can significantly enhance your seam quality. Some sewing machines come with a 1/4 inch foot, which can help you maintain an accurate seam allowance.
2. Keep Your Fabric Aligned
As you sew, ensure that the fabric edges remain aligned with the seam allowance guide. If the fabric shifts, it can result in uneven seams.
3. Stitch Slowly
Take your time when sewing. Stitching slowly allows you to maintain control and accuracy, particularly when navigating curves or corners.
4. Press Your Seams
After sewing, pressing your seams can help them lay flat and enhance the overall appearance of your project. Use the appropriate heat setting for your fabric type.
Common Sewing Mistakes to Avoid
Even seasoned sewers can make mistakes when working with seam allowances. Here are some common pitfalls and how to avoid them:
1. Ignoring Seam Allowance Guidelines
Many patterns come with specific seam allowance guidelines. Ignoring these can lead to ill-fitting garments or unfinished edges. Always check the pattern instructions before cutting your fabric.
2. Inconsistent Seam Allowance
Inconsistent seam allowances can cause fabric pieces to fit poorly. Use a consistent guide or ruler to maintain uniformity throughout your project.
3. Not Pre-Washing Fabric
Not pre-washing your fabric can lead to shrinking after construction, which can alter your seam allowances. Always pre-wash fabric to avoid unpleasant surprises later.
FAQ
A: The standard seam allowance for quilting is typically 1/4 inch, while a 1/2 inch seam allowance is more common in garment sewing.
A: While a 1/2 inch seam allowance can be used for most fabrics, it’s essential to consider the fabric type and the pattern guidelines. Some delicate fabrics may require a smaller seam allowance.
A: If your seams are not straight, try using a guide or a seam guide foot to help you maintain a consistent seam allowance. Practice on scrap fabric until you feel comfortable.
Conclusion
Understanding and utilizing a 1/2 inch seam allowance on your sewing machine is vital for creating well-fitted and polished garments. By following the tips and techniques outlined in this article, you can improve your sewing skills and achieve professional results in your projects. Whether you’re making a simple garment or tackling more complex designs, mastering seam allowances will enhance your overall sewing experience. For those interested in expanding their sewing and embroidery knowledge, consider checking out resources like Best Embroidery Machine Books for Beginners and Experts or exploring the Top Sewing Machines for Embroidery and Quilting. Happy sewing!