Sewing is both an art and a science, and understanding the nuances of your sewing machine can significantly elevate your crafting experience. One crucial aspect of sewing is the seam allowance, which is the space between the fabric edge and the seam line. For many projects, especially when following patterns, a 1/4 inch seam allowance is standard. This article will guide you through everything you need to know about using a 1/4 inch seam allowance on your sewing machine, from its importance to practical tips and techniques.
Importance of Seam Allowance
Understanding seam allowance is critical for any sewing project. The 1/4 inch seam allowance is often used in quilting and garment making, providing a balanced and precise fit. It plays a vital role in ensuring that pieces fit together correctly, especially when working with patterns. A standard seam allowance of 1/4 inch allows for fabric fraying and provides enough room for adjustments if needed, making it a versatile choice for various sewing projects.
How to Set a 1/4 Inch Seam Allowance
Setting a 1/4 inch seam allowance on your sewing machine may vary depending on the machine model; however, the general process is straightforward. Below are the steps you can take to ensure your seam allowance is set correctly.
Using Seam Guides
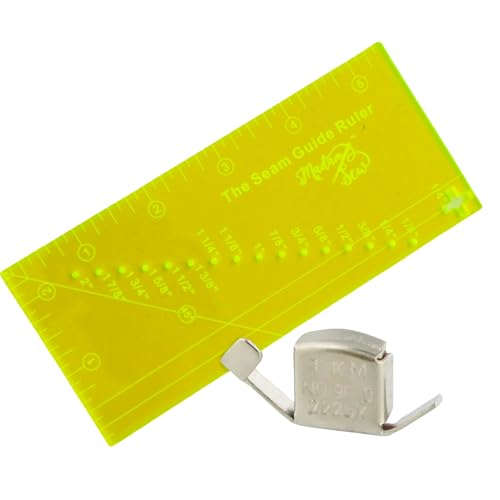
Many sewing machines come equipped with seam guides, which can help you maintain a consistent seam allowance. These guides are often marked on the throat plate or can be added as an attachment.
- Identify the 1/4 inch mark: Look for the markings on your machine’s throat plate; the 1/4 inch mark is typically indicated.
- Align your fabric: Place your fabric edge against the seam guide to ensure you are stitching at the correct distance.
- Practice on scrap fabric: Before starting your project, practice stitching on scrap fabric to ensure you are comfortable with the 1/4 inch seam allowance.
Adjusting the Sewing Machine
In some cases, you may need to adjust your machine settings to accommodate a 1/4 inch seam allowance. Here’s how you can do it:
- Change the needle position: If your machine allows for needle position adjustment, set it to the left or right to create a 1/4 inch seam allowance.
- Use a 1/4 inch foot: Consider investing in a 1/4 inch sewing foot. This specialized foot makes it easy to achieve the correct seam allowance consistently.
Common Sewing Techniques for 1/4 Inch Seam Allowance
Once you have set your machine for a 1/4 inch seam allowance, you can implement various techniques that utilize this measurement. Here are two primary areas where this seam allowance excels: quilting and garment construction.
Piecing in Quilting
In quilting, the 1/4 inch seam allowance is crucial for accurate piecing, which is the process of joining fabric pieces to create a quilt top. By adhering to this seam allowance, quilters ensure that the blocks fit together seamlessly, resulting in a polished final product.
Garment Construction
The 1/4 inch seam allowance is also widely used in garment construction, particularly for lightweight fabrics like cotton or linen. This seam allowance allows for a clean finish without adding unnecessary bulk, making it perfect for delicate seams.
- Hemming: Use a 1/4 inch seam allowance for narrow hems to achieve a professional look.
- Seam finishes: A 1/4 inch seam allowance can easily accommodate various seam finishes, such as zigzag or serging, to prevent fraying.
Troubleshooting Seam Allowance Issues
Even with the best preparations, you might encounter some issues when sewing with a 1/4 inch seam allowance. Here are common problems and how to resolve them:
| Issue | Cause | Solution |
|---|---|---|
| Inconsistent seam width | Poor fabric alignment | Use a seam guide and practice aligning fabric edges before starting. |
| Fabric puckering | Incorrect tension settings | Adjust the tension on your sewing machine until stitches lay flat. |
| Seam ripping | Wrong seam allowance | Measure twice and sew once! Verify the seam allowance before stitching. |
FAQ
A: While a 1/4 inch seam allowance is common for quilting and garment construction, always refer to the specific requirements of your project or pattern. Some patterns may call for different seam allowances.
A: If your finished project does not fit as expected or if you notice discrepancies in fabric alignment, it may be necessary to adjust your seam allowance.
A: While it is not strictly necessary, a 1/4 inch foot can simplify achieving a consistent seam allowance, making it a valuable tool for quilters and garment makers alike.
Understanding and correctly implementing a 1/4 inch seam allowance can significantly impact the quality of your sewing projects. Whether you’re piecing together a quilt or constructing a garment, the accuracy of your seam allowance ensures a polished finish. If you’re looking to enhance your sewing skills further, consider exploring various projects. You can Transform Your Shirts with Stunning Hand Embroidery Designs!, or check out the Best Thread for Sewing: Smooth, Strong, and Reliable! for optimal results in your sewing endeavors.
In conclusion, mastering the 1/4 inch seam allowance is an essential skill for any sewist. With practice and attention to detail, you can create beautifully finished projects that reflect your personal style and craftsmanship. Happy sewing!