Alumilite dye has become a popular choice among artists, crafters, and DIY enthusiasts looking to add vibrant colors to their projects. Whether you’re working with resin, woodworking, or other creative endeavors, understanding how to effectively use Alumilite dye can significantly enhance your work. This article explores the properties, applications, and best practices for using Alumilite dye, enabling you to achieve stunning results in your projects.
Table of Contents
- What is Alumilite Dye?
- Properties of Alumilite Dye
- Applications of Alumilite Dye
- How to Use Alumilite Dye
- Best Practices for Using Alumilite Dye
- Frequently Asked Questions
What is Alumilite Dye?
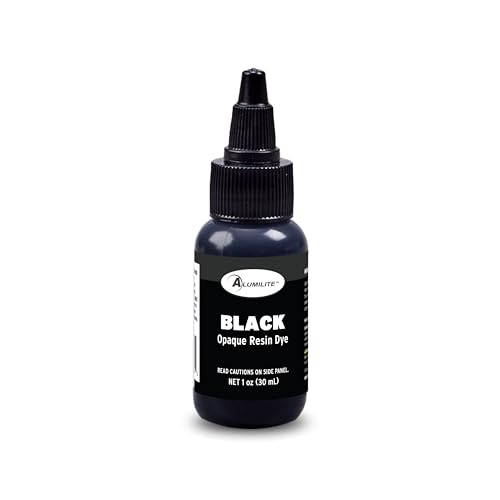
Alumilite dye is a concentrated liquid colorant designed for use with various materials, particularly resin. It is known for its ability to create vivid, transparent, and opaque colors. Originally developed for the Alumilite resin system, this dye can also be used with other resins, plastics, and wood finishes, making it a versatile tool for artists and crafters alike.
Properties of Alumilite Dye
When considering using Alumilite dye, it’s essential to understand its key properties, which contribute to its effectiveness and versatility.
Concentration
Alumilite dye is highly concentrated, meaning that only a small amount is needed to achieve vibrant colors. This concentration allows for precise control over color intensity, enabling users to create a wide range of shades and tones.
Compatibility
This dye is compatible with various materials, including epoxy resins, polyurethane, plastics, and wood. Its versatility makes it a favorite among different crafting communities.
Colorfastness
Alumilite dye is known for its excellent colorfastness, meaning the colors remain stable and vibrant over time, even when exposed to UV light and environmental conditions.
Applications of Alumilite Dye
Alumilite dye can be used in a variety of applications, making it a go-to option for many creative projects. Here are some popular uses:
Resin Casting
One of the most common uses for Alumilite dye is in resin casting. The dye can be mixed into the resin before pouring, allowing for stunning effects in various molds. From jewelry to decorative items, the possibilities are endless.
Wood Staining
Woodworkers can use Alumilite dye to create beautiful stained finishes on their projects. The dye penetrates the wood fibers, enhancing the natural grain while adding rich color.
Plastic and Foam Coloring
Alumilite dye can also be used to color plastics and foams, making it a great option for crafting toys or custom parts. Its versatility allows crafters to achieve unique looks tailored to their projects.
How to Use Alumilite Dye
Using Alumilite dye is straightforward, but following the correct steps is essential for achieving the best results. Here’s a guide on how to use this dye effectively:
Step 1: Prepare Your Materials
Gather all necessary materials, including Alumilite dye, the medium you will be coloring (like resin or wood), mixing tools, and safety equipment such as gloves and a mask.
Step 2: Measure the Dye
Because Alumilite dye is concentrated, start with a small amount. A few drops can significantly alter the color, so it’s best to add gradually and mix thoroughly.
Step 3: Mix Thoroughly
Once you’ve added the dye to your medium, mix thoroughly to ensure even color distribution. This step is crucial for achieving consistent results.
Step 4: Test the Color
Before applying the mixture to your final project, test the color on a small sample. This will allow you to adjust the hue if necessary.
Step 5: Apply to Your Project
After achieving the desired color, apply the mixture to your project as directed. Ensure you follow any additional steps specific to the medium you’re using, especially when working with resins.
Best Practices for Using Alumilite Dye
To maximize the effectiveness of Alumilite dye in your projects, consider the following best practices:
Storage
Store Alumilite dye in a cool, dry place, away from direct sunlight. Proper storage can prolong the dye’s shelf life and maintain its effectiveness.
Mixing Ratios
The mixing ratio may vary depending on the desired color intensity. A good starting point is 1% to 5% dye by weight of your medium. Adjust as needed based on your project requirements.
Safety Precautions
Always wear protective gloves and a mask when handling dyes and resins, as inhaling fumes or skin contact can be harmful. Ensure your workspace is well-ventilated to minimize exposure to any potentially harmful substances.
A: Yes, Alumilite dye is compatible with many brands of resin, but always check the manufacturer’s recommendations for the best results.
A: Clean up spills immediately using soap and water. For dried dye, you may need to use a solvent that is safe for the surface you’re cleaning.
A: Absolutely! Mixing different colors can create unique shades and effects, allowing for even more creativity in your projects.
Frequently Asked Questions
As you explore the world of Alumilite dye, you may have additional questions. Here are some common inquiries and their answers:
A: The curing time for resin varies by brand and type, but generally, it can take anywhere from a few hours to 24 hours for the resin to fully cure after adding the dye.
A: No, Alumilite dye is not FDA approved for food contact surfaces, so it should not be used on items that will come into direct contact with food.
A: Yes, Alumilite dye can be used in candle making, but ensure that the dye is compatible with the wax type you are using.
Conclusion
Alumilite dye is a versatile and powerful tool for adding vibrant colors to a wide variety of projects. Whether you’re casting resin, staining wood, or coloring plastics, understanding how to use this dye effectively can enhance your creative endeavors. By following best practices, experimenting with colors, and ensuring safety precautions, you can achieve stunning results that elevate your artistry. From DIY projects to professional crafts, Alumilite dye opens the door to endless creative possibilities.