
Best Sewing Machines for Home Use in 2026: Choose by Projects and Controls
The best sewing machine for home use in 2026 depends on the repairs, clothing, quilts, and decoration you actually want to complete. A practical.

This guide has Amazon links. If you buy through them we may earn a small commission, at no extra cost to you.
The best sewing machine for home use in 2026 depends on the repairs, clothing, quilts, and decoration you actually want to complete. A practical household choice should make those operations understandable without promising every specialist function. This guide compares several roles, explains useful controls and realistic fabric tests, and provides a starting plan so you can choose a complete working setup rather than buying mainly for a large stitch count.
As an Amazon Associate, Practical Textile earns from qualifying purchases. Product links may earn us a commission.
What’s in this article10 sections
Quick Answer
Compare an ordinary household machine for utility sewing, a quilting-oriented setup when those accessories matter, and a true combination model only when hoop embroidery is part of the plan. The XR9550, Singer 4411, and SE700 boxes identify distinct roles. This is a feature-based 2026 buying guide, not a claim of hands-on testing or a universal winner.
This guide compares published specifications and project fit; it does not report hands-on testing.
Brother XR9550
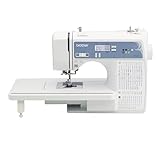
Compare controls, useful stitches, and the actual project kit.
Singer Heavy Duty 4411

A simpler stitch-menu role with a four-step buttonhole.
Brother SE700

A genuine combination role with a 4×4 embroidery field.
Five Household Machine Roles at a Glance
Read the stitch figures alongside the intended project. A large stitch library does not establish better feeding, stronger seams, or easier learning. In particular, the XR9550’s total includes lettering stitches, while the Singer’s stitch applications describe techniques rather than additional built-in patterns.
| Model | Household role to compare | Important check |
|---|---|---|
| Brother CS7000X | Computerized sewing and quilting-oriented kit | Exact current package and offer |
| Brother XM2701 | Mechanical utility sewing | Pedal control without an independent speed slider |
| Brother XR9550 | Varied computerized household work | Which supplied feet match the intended method |
| Singer 4411 | Mechanical sewing with a focused stitch menu | Four-step buttonhole and actual seam stack |
| Brother SE700 | Sewing plus small hoop embroidery | 4×4 field and mode changes |
Sewing and quilting starting point
1. Brother CS7000X: useful control for first projects
The CS7000X makes the most sense here for someone starting with pillow covers, simple clothing, patchwork, and small quilts. Brother lists 70 sewing stitches, seven one-step buttonhole styles, ten supplied sewing feet, and a wide table. Its adjustable speed control gives a new sewer another way to limit the pace while practicing.
The useful question is whether those accessories support your projects. A wide table can help support a larger piece beside the needle, but you still need room around the machine and a method of handling the fabric’s weight. A quilt dragging over the edge of a small desk can make guidance awkward regardless of the stitch selection.
Begin with a straight stitch and ordinary woven cotton. Practice stopping at a marked corner, lifting the presser foot, and turning the fabric with the needle appropriately positioned. Those exercises reveal whether the controls suit you better than cycling through decorative patterns. A computerized stitch display can help identify selections, but it does not choose a suitable needle or thread for you.
Choose this model when sewing and quilting are your priorities. It does not stitch imported designs in an embroidery hoop. Read the full Brother CS7000X review if you want a closer look at its sewing role before comparing the current seller bundle.
Five advantages
- Adjustable sewing speed control.
- Wide table in the standard package.
- Ten included sewing feet.
- Seven one-step buttonhole styles.
- Needle threader and top drop-in bobbin.
Two limitations
- No computerized hoop embroidery.
- No adjustable presser foot pressure.
Dial-based basics
2. Brother XM2701: straightforward everyday sewing
The XM2701 is worth comparing when you want to select stitches with a dial and concentrate on ordinary seams, hems, and repairs. Brother specifies 27 built-in stitches, one automatic one-step buttonhole, six supplied feet, a needle threader, and a top drop-in bobbin.
For a first tote bag or cushion cover, those basic operations matter more than decorative variety. Spend time learning how the stitch length affects the seam, how to guide an even allowance, and how to reverse at the ends. A simple control panel can make those settings feel approachable if you prefer seeing a physical dial position.
The tradeoff is control style. This model has no separate speed slider or start/stop button; you regulate sewing through the foot pedal. That may feel natural to some beginners, while others would prefer a machine that lets them set a lower speed ceiling. If pedal sensitivity is a concern, try the machine through a local demonstration or compare the seller’s return terms before committing.
We would shortlist it for learning useful everyday sewing rather than buying it with a plan to add imported embroidery later. Also check which accessories come with the exact listing, particularly if it is refurbished or bundled by a third-party seller. Keep the manual beside the machine during your first threading attempts.
Five advantages
- Physical stitch-selection dial.
- 27 built-in sewing stitches.
- One-step buttonhole function.
- Six included sewing feet.
- Needle threader and drop-in bobbin.
Two limitations
- No separate speed-control slider.
- No computerized hoop embroidery.
Decorative stitches and lettering
3. Brother XR9550: more room to explore decorative sewing
The XR9550 suits a beginner who already has a reason to use decorative patterns or built-in lettering. Brother lists 165 total built-in stitch options, including 55 alphanumeric stitches, eight one-step buttonhole styles, an LCD display, and eight supplied presser feet. The lettering count is part of the total, not an extra set added on top.
That distinction matters when comparing advertisements. More patterns broaden the menu of stitch-based decoration, but they do not demonstrate improved seam quality or a higher fabric-thickness limit. Compare the particular stitches you would actually use on a sampler, a garment detail, or a gift project before giving the total much weight.
Built-in lettering also needs realistic expectations. It is useful to investigate for simple sewn characters, but it is different from loading an embroidery file, placing fabric in a hoop, and having a machine stitch a planned design. If your intended project is an embroidered logo or an imported floral design, compare the SE700’s embroidery workflow instead.
A useful first exercise is to keep a labeled stitch sampler. Sew on the same stable fabric with the same thread, record the settings, and note where backing or another preparation would improve the result. This gives you a reference for later projects. Our guide to computerized sewing machines for beginners introduces the control features you will encounter.
Five advantages
- Built-in alphanumeric sewing stitches.
- Broad decorative stitch selection.
- Eight one-step buttonhole styles.
- LCD stitch selection.
- Eight supplied presser feet.
Two limitations
- Lettering is not imported hoop embroidery.
- Extra stitch choices may be unnecessary for basic repairs.
Mechanical utility sewing
4. Singer Heavy Duty 4411: compare the controls and fabric task
The Singer 4411 offers a mechanical alternative for someone focused on utility sewing. Singer lists eleven built-in stitches and 69 stitch applications, along with a metal internal frame, stainless steel bedplate, top drop-in bobbin, and four included feet. Applications describe uses for stitches, so they should not be compared directly with another model’s built-in stitch count.
The Heavy Duty name should lead to a closer look at your fabric, not an assumption about every thick project. Hemming ordinary jeans, sewing several intersections of heavy cloth, and assembling upholstery are different tasks. The needle, thread, seam shape, number of layers, and the machine’s ability to feed that combination all matter.
For a beginner, the first evaluation should be controlled starts, accurate stops, and consistent feeding on a sample. A model marketed around fast sewing still needs to feel manageable at the pace you can guide. Do not use maximum advertised speed as a shortcut for judging whether a machine will suit careful small-scale work.
Shortlist the 4411 if you prefer mechanical settings and your plans center on straightforward construction and repair. For occasional thicker seams, prepare a realistic sample before committing the final project. If the machine struggles or the needle deflects, stop and reassess the setup rather than pulling the material through or trying to overcome the obstruction by running faster.
Five advantages
- Mechanical stitch controls.
- Eleven built-in stitch patterns.
- Top drop-in bobbin.
- Stainless steel bedplate.
- Four supplied presser feet.
Two limitations
- No computerized hoop embroidery.
- Smaller stitch library than the other models here.
Sewing plus small hoop embroidery
5. Brother SE700: for a beginner who specifically wants embroidery
The SE700 is the different option in this comparison because it combines ordinary sewing with computerized embroidery. Brother lists 103 sewing stitches, 135 built-in embroidery designs, ten embroidery fonts, a color touchscreen, wireless LAN, and a maximum embroidery area of four by four inches.
That embroidery area should be checked against the design you want to make. Measure the stitched design itself rather than the overall size of the garment. A small chest motif and a large sweatshirt design create different requirements. Do not assume a larger optional hoop will enlarge the machine’s stated maximum single embroidery area.
The second consideration is preparation. Embroidery introduces hooping, stabilizer selection, design transfer, thread changes, and a test stitch-out. Those are worthwhile skills if decorated gifts or small personalized projects are your goal, but they add learning steps that ordinary straight-seam sewing does not require.
Before purchasing, confirm that the intended transfer software or app supports your own computer, operating system, and connection method. Wireless capability alone is not a promise that every design program will work with your setup. For supplies, read embroidery thread versus sewing thread and our explanation of water-soluble embroidery stabilizer. Match the backing and any topping to the fabric and design rather than buying one stabilizer for every project.
Five advantages
- Ordinary sewing and hoop embroidery.
- 135 built-in embroidery designs.
- Ten built-in embroidery fonts.
- Color touchscreen.
- Wireless LAN capability.
Two limitations
- Maximum embroidery area is 4 × 4 inches.
- Embroidery adds supplies and preparation steps.
How to choose your first sewing machine
Write down three real projects
Start with specific objects: a cotton tote, a pair of trouser hems, and a small quilt, for example. Then list the operations each requires. Straight seams, edge finishing, buttonholes, quilting support, and computerized embroidery are different requirements. A short project list makes it easier to explain what you need during a demonstration and to ignore features you will not use.
Choose the controls you can operate comfortably
Compare dial selection with screen-based selection, and try locating the reverse control without searching. Look at the needle area from your normal seated position. Check that your chair and table allow comfortable pedal placement. If your feet, hands, or eyesight make a particular control difficult, prioritize a suitable demonstration over choosing from the specification count alone.
Budget for the complete first project
A machine is only part of the purchase. Allow for fabric, appropriate needles, suitable thread, the correct bobbins, scissors, measuring tools, and a seam ripper. Embroidery also calls for appropriate stabilizer and other design-specific supplies. Compare the exact included accessories so you can identify what is already supplied and avoid buying duplicate feet before knowing you need them.
Check support and the seller package
Find the correct manual before ordering and look for clear instructions covering threading, bobbin insertion, and maintenance. Read the seller’s condition description and return terms. A refurbished machine or a retailer bundle may differ from a manufacturer’s standard package. Buyers outside the USA should also verify local electrical compatibility and support rather than assuming an American listing suits their region.
A practical first-week sewing plan
- Set up: place the machine on a stable table, read the safety and setup instructions, and identify the controls with the power off.
- Thread carefully: follow the exact threading path and bobbin direction in the model’s manual. Rethread slowly if the first seam looks wrong.
- Make a sampler: practice straight lines, corners, reverse stitching, and a suitable edge-finishing stitch on scraps of stable woven fabric.
- Finish one small item: choose a simple project with a short sequence, then check the seams and finishing before starting another.
- Record what worked: keep the fabric sample, needle type, thread choice, and stitch settings together for your next attempt.
Common beginner problems and sensible first checks
If thread loops appear, pause before turning several tension controls at once. Check threading, the bobbin’s installation, and the needle against the manual, then sew another sample. Changing one thing at a time makes the result easier to understand. The Brother sewing machine tension problems guide is a relevant next troubleshooting read.
If fabric will not feed cleanly, confirm the presser foot is lowered and the machine is set up for ordinary feeding. If thread breaks or stitches skip, inspect and replace a damaged or unsuitable needle as the manual directs. Avoid pulling fabric to force progress. Repeated trouble on a correctly prepared sample is a reason to seek model-specific support rather than continuing to adjust unfamiliar mechanisms.
