The best sewing machine under $300 should improve the sewing you do while keeping the complete purchase affordable. This price range can include different mechanical and computerized packages, but a feature label does not explain every control. This guide compares candidates, separates stitch selection from automation, and explains thread and setup habits that help a modest machine perform consistently instead of treating every poor seam as a reason to upgrade.
As an Amazon Associate, Practical Textile earns from qualifying purchases. Product links may earn us a commission.
Quick Answer
Compare Singer 4423 for direct mechanical utility, Brother CS5055 for electronic selection, and GX37 as another mechanical benchmark. Choose an exact offer whose delivered cost fits the limit. If a required speed slider or automatic cutter is absent, a larger stitch count will not replace it.
This guide compares published specifications and project fit; it does not report hands-on testing.
Singer Heavy Duty 4423
Compare pressure adjustment, controller feel, and project fit.
Brother CS5055
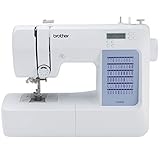
Check its actual controls and complete current offer.
Brother GX37
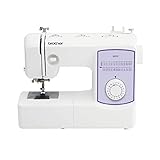
Compare the usable package rather than a decorative total.
Compare Controls Within the Complete Budget
| Candidate | Useful distinction | Do not assume |
|---|---|---|
| Singer 4423 | Mechanical operation and pressure adjustment | An independent electronic speed limiter |
| Brother CS5055 | Displayed electronic selection | Every computerized convenience |
| Brother GX37 | Direct household interface | Industrial capacity from a sales description |
Singer 4423: A Mechanical Purchase With a Defined Role
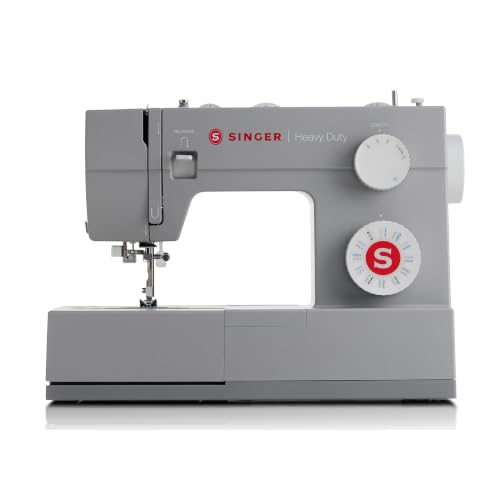
The 4423 is worth comparing for ordinary mechanical sewing and suitable utility projects. Its pressure adjustment is different from upper-thread tension; both should be understood rather than changed randomly. The machine does not provide an independent electronic speed slider.
Try repeated short seams and a supported buttonhole, not only a fast straight run. If the controller feels too abrupt for your preferred work, compare another machine even when the specification looks attractive. The right operating feel cannot be inferred from the maximum speed.
Brother CS5055: Electronic Selection Is Its Own Benefit
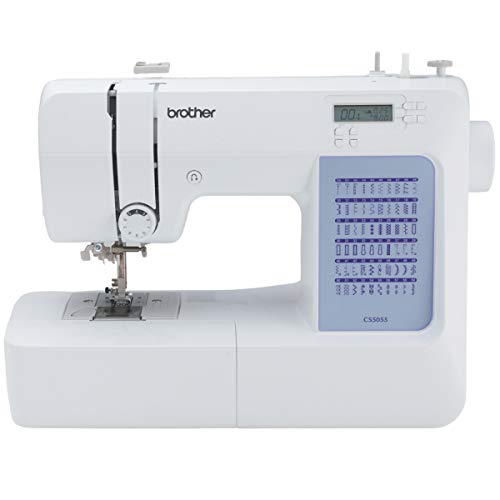

The CS5055 is a computerized household comparison with a display and electronic stitch selection. Do not buy it expecting a separate speed slider, start/stop button, automatic thread cutter, or memorized needle-stop key. Those absent features can matter more than the number of selections.
Use the actual controls to select a seam, adjust a setting, and return to the starting setup. If the display helps you understand the machine, it can be useful. If another convenience is essential, choose a model that specifically documents it.
Brother GX37: Compare a Complete Mechanical Alternative
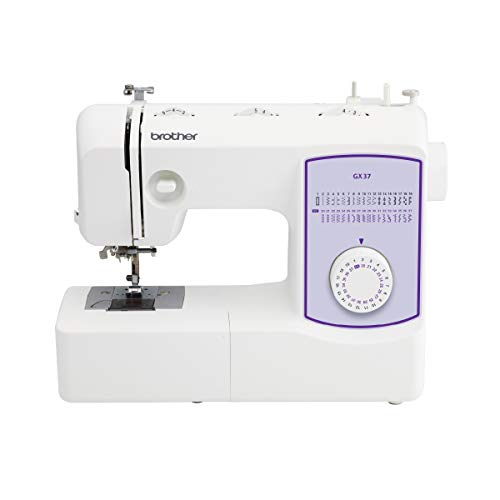
The GX37 provides another route for buyers comfortable with direct mechanical selection. Compare the exact package, condition, and support rather than assuming that a lower price means better value. A required accessory missing from the offer belongs in the total.
Bring the same fabric and construction used for the other candidates. Different thread or preparation can change the result enough to obscure the machine comparison. Learn the correct setup before concluding that a seam problem requires more expensive equipment.
Five Practical Benefits and Two Tradeoffs
- Utility functions can support useful repairs and clothing.
- Different interfaces allow a personal operating preference.
- A clear package helps keep accessory costs predictable.
- A modest setup can reveal which future upgrades matter.
- Correct thread and preparation improve repeatability.
Two tradeoffs remain: not every offer includes electronic convenience controls, and a household machine does not cover every thick construction or production duty. Buy for an identified task rather than an unrestricted heavy-duty claim.
Our 4423 review, GX37 review, and Brother guide explain the shortlist. The garment guide and operating-style comparison connect features to projects.
Project Preparation and a Repeatable Sewing Setup
Correct thread and threading habits can prevent an affordable machine from being judged through an avoidable setup fault. These checks support the model comparison by making successful samples easier to reproduce with suitable supplies.
Choose thread for the seam rather than its color alone
The thread’s fiber, thickness, surface, and intended use all matter. An all-purpose sewing thread, an embroidery thread, a heavy topstitching thread, and a hand-quilting thread should not be treated as interchangeable just because the spools look similar. Read the manufacturer’s intended application and the machine manual before putting an unfamiliar product through the threading system.
For ordinary construction, begin with a suitable sewing thread that the machine can handle, then choose the needle around the fabric and thread. A thick decorative thread may need a larger eye or a different procedure. Forcing it through a small needle can cause abrasion or poor stitch formation. Changing tension will not correct a thread-and-needle mismatch.
Check whether the thread is being used in the needle or bobbin. Some specialist techniques intentionally use different combinations, but a beginner should not infer those combinations from appearance. Follow the documented setup for the technique. Keep the original spool label so you can identify exactly what produced a useful sample or an unusual problem.
Read spool and thread numbers carefully
Different numbering systems describe thread in different ways. A larger printed number is not a reliable universal instruction to choose a thicker or finer thread unless you know the system being used. Compare the manufacturer’s description, intended use, and recommended needle rather than translating one spool’s number directly onto another brand’s label.
Spool shape also affects how thread feeds. Follow the manual’s guidance for spool position, spool cap, and any stand or guide required by the machine. A large cone balanced on a small pin is not automatically a usable substitute for a properly supported cone setup. Check that thread can unwind without catching on the spool rim, cap, or a damaged notch.
If you use several similar colors, label the project bag with the actual thread product and color code. A visually close replacement may still differ in thickness or behavior. Keeping a record is particularly useful when returning to a long project after several weeks or when troubleshooting a seam made with an unlabeled bobbin.
The Threading Process
Threading your sewing machine correctly is crucial for achieving the best results. Here’s a step-by-step guide to help you through the threading process.
Before you start threading, make sure your machine is turned off. Raise the presser foot to relieve tension on the thread tension discs.
Place the spool of thread on the spool pin. Depending on your sewing machine, you may need to use a spool cap to prevent the thread from unraveling.
Follow the threading path indicated on your machine. Most machines have a diagram that shows the correct route for the thread. Generally, you’ll need to:
Don’t forget to thread the bobbin! Wind the thread around the bobbin and insert it into the bobbin case. Make sure the thread is in the correct position to catch the needle thread.
After threading, it’s a good idea to test a few stitches on a scrap piece of fabric. This will help you ensure that everything is functioning correctly before you start your project.
Maintenance and Care for Your Threading System
Proper maintenance of your sewing machine threading system is crucial for ensuring longevity and optimal performance. Here are some essential tips:
Lint and dust can accumulate in your machine, affecting its performance. Clean the bobbin area and the feed dogs regularly to keep your machine running smoothly.
Investing in high-quality thread can reduce the likelihood of issues like breakage and jamming. Cheap threads often lead to more significant problems in the long run.
Protect your threads from light and moisture by storing them in a cool, dark place. Use thread organizers to keep them untangled and easily accessible.
Refer to your sewing machine manual for specific maintenance and threading guidelines tailored to your machine’s model.
Thread the machine as a sequence of checks
Use the threading diagram for the exact model. Machines can differ in the route around tension guides, the take-up lever, needle orientation, and bobbin placement. A guide for a related model may look plausible while omitting a step that matters. Keep the correct manual available instead of relying only on a remembered sequence from another machine.
Raise the needle and presser foot as instructed before threading. Move deliberately through every guide and check that the thread is actually seated rather than lying beside it. At the needle, confirm the direction specified by the manual. If you meet unexpected resistance, stop and find the cause instead of pulling harder through the mechanism.
For the bobbin, use the specified type and inspect it for damage or poor winding. Follow the correct unwind direction and path through the case or tensioning slot. Similar-looking bobbins can have different dimensions. A bobbin that drops into a compartment should not be considered compatible until its specification is confirmed.
Before sewing the garment, make a seam on a representative sample and inspect both surfaces. Include the number of layers and seam intersection you expect to sew. Testing one flat layer can miss a feeding or thickness issue that appears only in the finished construction. Keep the successful sample as a reference.
Distinguish threading problems from tension problems
Loose loops, thread breakage, and puckering can have several causes. Rethreading correctly and checking the needle are sensible first steps before turning tension controls repeatedly. A missed take-up lever or thread not seated correctly in the upper path cannot be diagnosed reliably by copying a tension number from a chart.
Make one change, sew another labeled sample, and compare it with the previous result. If several settings change together, you lose the ability to identify what helped. Record the original setting before an adjustment so you can return to a known starting point. Keep model-specific bobbin-tension changes for the procedure and expertise described in the manual.
If problems continue after correct threading, a suitable fresh needle, compatible bobbin, and a realistic sample, seek model-specific support. A damaged hook area, unsuitable thread, or mechanical problem should not be treated as a reason to keep tightening a dial. Stop if the needle strikes a part or the machine behaves abnormally.
Store usable thread and bobbins together
Protect thread from unnecessary dust, moisture, direct sun, and heat. Keep labels visible and store loose ends so they do not tangle. There is no single age limit that proves every spool is good or bad; storage conditions, material, and the spool’s actual condition matter. Inspect questionable thread and test it before using it in an important seam.
Keep bobbins identified by their compatible machine as well as their thread. Mixing different bobbin types in a shared organizer can create a later setup error. Avoid winding new thread over a random remaining color if it prevents you from understanding the bobbin’s contents or creates an uneven wind.
For a long project, reserve enough matching thread or record the product details early. Replacing a color halfway through a visible seam can be difficult even when the new spool looks close in indoor light. A short project note is often more useful than collecting many unlabeled spools that cannot be matched confidently.
Keep a threading reset card
Write the exact model, correct bobbin type, ordinary needle system, and the location of the current threading diagram on a small reference card. Add the thread and needle used in a successful basic sample. The card should point to the manual rather than replace its full safety and setup instructions.
When a new project develops a fault, return to that known combination on matching practice fabric before making several adjustments. If the ordinary baseline works, compare what changed in the new project. If it does not, investigate the basic setup or condition first. This separates a material-specific problem from a general threading error more clearly than repeatedly turning tension controls.
Frequently Asked Questions
Are these machines always below $300?
No offer is permanently guaranteed. Check the exact seller, condition, accessories, tax, and delivery before treating a package as qualifying. Do not rely on an old review price.
Will a computerized model limit my sewing speed?
Only if the exact model provides that control. Electronic stitch selection alone does not establish a speed slider. Compare the function rather than the category label.
Can I use any thread supplied in a large kit?
Confirm the thread’s purpose, condition, and compatibility with the machine and seam. An unidentified spool is not automatically suitable because it was included free.
Should I adjust tension when stitches look wrong?
Begin with the correct manual, threading route, needle, and bobbin. A setup error can resemble tension trouble. Change one variable at a time on a known sample.
What justifies choosing the more expensive offer?
A necessary control, useful compatible accessory, demonstrated handling advantage, or usable instruction can justify it. A larger decorative total alone may not improve the project.
Final Recommendation
Compare the 4423, CS5055, and GX37 by their real controls and complete current offers. Reserve enough for suitable thread and basic setup. Buy the machine that makes your regular work manageable, then establish a repeatable threading and sample routine.