
Elna sewing machine reviews should identify the exact model rather than combine mechanical, computerized, and embroidery features into one brand description. The eXperience 550 offers a useful household comparison with electronic controls and a defined accessory package. This guide explains its practical role, distinguishes locking from cutting, evaluates separately named alternatives, and uses a small construction project to show how control, preparation, and finishing work together in a real purchase.
As an Amazon Associate, Practical Textile earns from qualifying purchases. Product links may earn us a commission.
Quick Answer
Compare Elna eXperience 550 for computerized household sewing, pace and needle-position controls, pressure adjustment, and its listed table package. It does not specify the automatic thread cutter found on some nearby models. The Amazon boxes below identify other-brand alternatives, not Elna listings or an incorrectly substituted Janome 550E.
This guide compares published specifications and project fit; it does not report hands-on testing.
Juki HZL-F300
No verified Amazon offer is linked for this model; read the buying checks below.
Include optional table and knee-lifter costs where needed.
Brother XR9550
Check actual feet and supported operations.
eXperience 550: The Model-Specific Starting Point
| Published feature | Practical check |
|---|---|
| 50 stitches and LCD | Select the utility settings used regularly |
| Speed slider and needle positioning | Controlled starts and planned pivots |
| Automatic lock stitch | Do not confuse it with automatic trimming |
| Manual foot pressure | Adjust handling separately from thread tension |
| Table and seven listed feet | Verify the exact seller inventory |
Evaluate the Controls on a Real Sequence
The 550 belongs in a computerized household sewing shortlist. A useful demonstration should include selecting a seam, adjusting its setting, starting slowly, stopping near a mark, and returning to a familiar setup. This tests ordinary usability rather than the maximum decorative menu.
Needle positioning can help preserve a planned pivot, while speed limiting can make short detailed seams more manageable. Neither guides the work automatically. Fabric preparation, suitable thread and needle, and support remain part of the result.
Lock Stitch Is Not a Thread Cutter
The 550 specification distinguishes its locking function from automatic thread cutting. Do not import the cutter feature from a neighboring eXperience model. Ask the dealer to demonstrate the finish you expect instead of accepting the general word automatic.
If trimming is the reason for upgrading, compare an exact model that documents it. If the main tasks are modest garment and craft seams, a locking function and comfortable control may already provide useful value. Name the recurring task before deciding which addition matters.
Table, Feet, and Working Space Are Different Questions
Elna lists an extension table and seven feet with the 550. Confirm the actual offer, especially for used or open-box equipment. A table supports work outside the bed; it does not enlarge the internal needle-to-tower space. Large projects still need a handling test.
Match the supplied feet to actual operations and confirm optional compatibility. A zipper foot, buttonhole foot, and quarter-inch guide serve different jobs. A large accessory count is less useful than having the correct tool and instructions for the seam in your pattern.
Five Advantages and Two Limitations
- Electronic selection provides visible settings.
- Speed control supports deliberate detailed work.
- Needle positioning helps planned turning points.
- Pressure adjustment adds a separate handling variable.
- The listed table and feet define a useful package comparison.
Two limitations matter: the 550 does not specify an automatic cutter, and its household working space is not a large-quilt guarantee. Nearby model numbers and embroidery-only products should not be treated as interchangeable.
Compare Separately Identified Alternatives
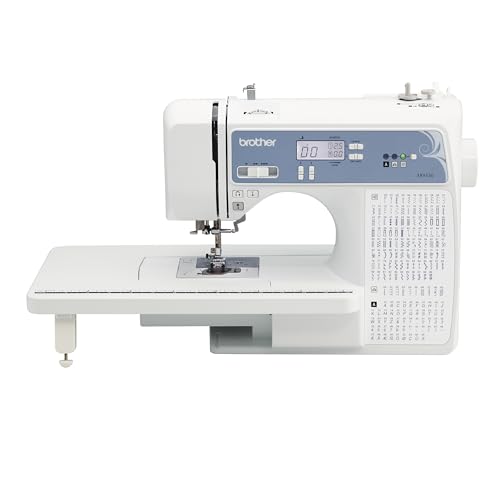

The F300 and XR9550 are other-brand references. Compare their actual finishing functions, pace controls, table costs, feet, and instruction. Neither Amazon box should be read as a purchase listing for Elna. In particular, Janome Memory Craft 550E is a different embroidery-only product despite the similar number.
Our Janome comparison, Brother range, and operating-style guide help frame the choice. Use the soft-toy construction guide and garment equipment guide to define a practical sample.
Project Preparation and a Repeatable Sewing Setup
A small soft-toy project tests curves, turning, and seam finishing in a manageable form. Use the following preparation checks to evaluate the Elna controls through real construction while following the selected pattern and intended-use requirements.
Choose a first pattern with a clear construction
A flat felt softie can introduce outlining, hand stitches, and stuffing without a complicated three-dimensional body. A gusseted animal, articulated joint, or shaped muzzle adds other construction skills. Choose a pattern that explains those steps rather than assuming a small size makes every toy easier to sew.
Look for a named designer, complete templates, clear seam allowances, and instructions for turning, stuffing, and closing. Clover’s softie tutorials are examples of creator-provided project resources that can lead to an authorized template. Use the original current resource and keep it with the instructions rather than tracing an unscaled photograph from another page.
Decide whether you are making a decorative object, an adult gift, or something intended for a child. Those uses create different design and safety questions. Follow applicable guidance and appropriate product information for the intended recipient; do not treat a simple hobby sewing sequence as proof that every detail is suitable for every age.
Read all the pieces before cutting
Identify body, limbs, ears, gussets, faces, and any lining or reinforcement pieces. Check which shapes are cut as mirrored pairs and which are cut on a fold. Mark the right and wrong sides where needed. Two identical left pieces can be difficult to correct after the fabric has already been cut into small shapes.
Confirm whether allowances are included and which marks identify joins or openings. Print a scale test first when using a downloadable pattern. A piece that looks approximately the right size can still be systematically wrong if the printer has fitted the page automatically. Keep the correct version and size with your notes.
Read the assembly order to see when small parts must be attached. Some features are sewn before the main body closes; others depend on later access. A detail that seems simple from the finished photograph may require a particular sequence. Planning that sequence prevents the need to open a completed seam to add a forgotten ear or tail.
Choose fabric for handling as well as appearance
Stable woven fabric or suitable felt can be easier for an early project than a slippery pile material. Plush, fleece, and faux fur can shift, stretch, or hide the stitch line. Follow the pattern’s fabric recommendation and test the material stack rather than choosing only the softest surface in the shop.
Check nap and print direction before cutting. Mirrored animal pieces should normally create the intended matching surface, not one side with the fur or print running unexpectedly upward. Mark the direction on the pattern pieces and arrange the layout before making small irreversible cuts.
Prepare the fabric and filling according to their care needs and the intended finished item. Consider whether all components can be maintained together. A washable outer fabric does not automatically make an object washable when its filling, decorations, internal support, or other parts need a different method.
Test the seam and turning method
Make a small seam sample with the same fabric layers, needle, thread, and seam allowance. Check whether it can be turned and whether the seam remains sound when filled lightly. A narrow allowance that works in stable woven cotton may be unsuitable for a fabric that frays or stretches differently.
For hand sewing, choose stitches that suit the construction and maintain consistent secure attachment. For machine sewing, use a compatible needle and supported setup at a controlled pace. Keep small pieces from being pulled into the needle area at the start. A stabilizing starter method or different sequence may help where the manual and project permit it.
Do not trim or clip immediately beside a seam before inspecting the stitches. Clipping a curve can help it turn, but cutting structural thread creates a weak point. Work in good light and test the curve on a sample. The goal is a sound smooth shape, not the smallest possible hidden allowance.
Sew curved body sections accurately
Match notches and reference points before sewing. Baste or secure small curves using an appropriate method so one layer does not slide away. Sew short sections and reposition calmly rather than stretching the edge to force a mismatch. If the pieces differ substantially, check mirrored orientation, scale, and seam allowance first.
Keep appendages and loose layers clear of the seam when closing the main body. A tail, ear, or opposite leg can accidentally be caught inside the stitching. Check the arrangement before and after each important join. It is easier to unpick a short open section than to discover the error after stuffing.
Leave the intended turning opening large enough for the material and shape. A tiny opening can encourage excessive pulling that damages narrow limbs or a bulky seam. Follow the pattern’s placement and finishing method rather than choosing an arbitrary gap in the most visible area.
Stuff gradually and preserve the intended shape
Use filling suitable for the project and care plan. Add it in small amounts and work it into the shape gently. Narrow areas may need a suitable blunt tool, but do not force a sharp object against a seam or through the fabric. The pattern’s shape should guide the amount and distribution.
Avoid assuming that the firmest possible filling is best. Excess stuffing can strain seams, distort proportions, and make closing the opening difficult. Too little can leave unwanted folds or unsupported areas. Compare the intended character with the sample as you go and distribute the filling before adding more.
Keep loose filling contained during the work and clear it away before final inspection. Check that small hidden spaces are filled as intended without leaving a hard clump at the opening. If the shape looks wrong, reassess seam alignment and filling distribution rather than immediately pulling more material into the body.
Close the opening securely
Arrange the opening’s allowances in the intended position and keep filling away from the stitch line. A ladder-stitch or other suitable closure depends on secure bites into sound fabric, not on a few almost invisible catches at a fraying edge. Match the closure to the material and follow the pattern’s method.
Work in controlled sections and inspect the seam as it closes. Secure the thread ends appropriately and check that the opening has not been left under excessive strain. If the closing area is overfilled, remove or redistribute filling before tightening the final stitches. A strained opening should not be hidden with a decorative patch and assumed to be sound.
Inspect the entire object, not only the final seam. Check joins, loose threads, exposed filling, detached trim, and sharp or unsuitable internal components. A decorative handmade object should be described by its actual construction. If intended as a child’s product, use the relevant current safety requirements and appropriate design information rather than relying on visual inspection alone.
Keep a construction record for each softie
Record the pattern, fabric, filling, thread, facial-detail method, and closing seam. Keep any supplied component instructions with the project and note its intended use. A decorative sample and an item intended for a child should not be described as equivalent simply because they share the same outline.
Before making several copies, complete one item and inspect the difficult joins, turning access, stuffing distribution, and closure. A short sample run can reveal a repeated weak point before it appears across a batch. Changing only the fabric can also change the behavior of a small curved seam.
If a detail loosens in use, inspect the supporting material as well as the thread. Sewing another dense line into damaged cloth may not restore the intended construction. Choose a sound repair and appropriate use decision rather than treating a hidden loose part as harmless because the surface still looks attractive.
Frequently Asked Questions
Are all Elna machines computerized?
No brand-wide assumption should be made. This review concerns the computerized eXperience 550. Mechanical and embroidery-focused machines serve different operating roles.
Does the 550 cut thread automatically?
The reviewed specification does not include an automatic cutter. Its lock-stitch function is different. Confirm the exact model before borrowing a nearby machine’s feature list.
Does the table increase throat space?
No. It supports the project outside the bed. Internal working space remains a separate measurement and must suit the bulk you need to move through the machine.
Is Janome 550E an Elna alternative listing?
It is a separate embroidery-only model, not an exact Elna 550 identity. Similar numbers do not justify substituting images, specifications, or purchase codes.
What should I test before buying?
Threading, bobbin winding, controlled seams, a relevant closure, needle positioning, and the stated finishing sequence. Use matching project fabric and inspect the completed sample.
Final Recommendation
Compare eXperience 550 for its specific computerized household controls and complete package. Confirm the absence or presence of every function influencing your decision, then use a modest construction sample and written accessory inventory to choose a supported offer.



