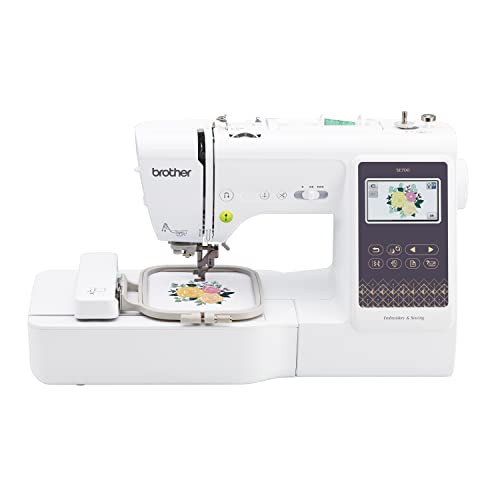
Embroidery has long been a cherished craft, allowing crafters to personalize garments, accessories, and home décor. With advancements in technology, embroidering with a sewing machine has become more accessible and efficient. Whether you’re a seasoned seamstress or a curious beginner, learning how to embroider with a sewing machine can take your projects to the next level. This article delves into the essentials, tips, and techniques for successfully embroidering with a sewing machine, ensuring you can unleash your creativity with ease.
Table of Contents
- Understanding Embroidery Machines
- Choosing the Right Supplies
- Setting Up Your Machine
- Mastering Embroidery Techniques
- Troubleshooting Common Issues
- FAQ
- Conclusion
Understanding Embroidery Machines
To start embroidering with a sewing machine, it’s essential to understand the different types of machines available. There are primarily two categories: standard sewing machines and specialized embroidery machines. While standard sewing machines can perform basic embroidery, investing in a dedicated embroidery machine can provide you with a variety of features and capabilities.
Types of Embroidery Machines
Here’s a breakdown of the common types of embroidery machines:
| Type | Description | Best For |
|---|---|---|
| Standard Sewing Machine | Basic models can do simple embroidery stitches. | Beginners or those who sew occasionally. |
| Embroidery Machine | Designed specifically for embroidery, featuring built-in designs and advanced capabilities. | Serious crafters seeking intricate designs. |
| Sewing and Embroidery Combo Machine | Combines sewing and embroidery functions in one machine. | Those who want versatility without multiple machines. |
Choosing the Right Supplies
Once you have your machine, the next step is selecting the right supplies for your embroidery project. The essential items include fabric, stabilizers, threads, and needles.
Fabric Selection
Choosing the right fabric is crucial for a successful embroidery project. Common fabrics for embroidery include cotton, denim, and linen. When selecting fabric, consider its weight, texture, and how well it will hold embroidery.
Stabilizers
Stabilizers are essential for preventing fabric distortion during embroidery. Here are the main types:
- Cut-Away Stabilizer: Best for knit fabrics; it remains in the finished project.
- Tear-Away Stabilizer: Ideal for woven fabrics; it can be torn away after stitching.
- Wash-Away Stabilizer: Disappears when washed, suitable for delicate designs.
Threads and Needles
Embroidery threads come in various materials, including polyester, rayon, and cotton. Polyester threads are known for their durability and colorfastness, making them a popular choice. Additionally, using the right needle is crucial; a needle designed specifically for embroidery can help prevent thread breakage and fabric damage.
Setting Up Your Machine
After gathering your supplies, it’s time to set up your sewing machine for embroidery. This process typically involves several steps:
Preparing the Machine
Ensure that your machine is clean and well-oiled. Check the needle and change it if it appears dull or damaged. Thread the machine with your chosen embroidery thread, and wind the bobbin with a matching thread.
Hooping the Fabric
Properly hooping your fabric is essential for achieving accurate designs. Follow these steps for effective hooping:
- Place the stabilizer in the hoop first.
- Lay the fabric over the stabilizer, ensuring it’s smooth and wrinkle-free.
- Align the fabric so that the design area is centered in the hoop.
- Secure the hoop tightly, ensuring the fabric is taut but not stretched.
Mastering Embroidery Techniques
Now that your machine is set up, it’s time to dive into the techniques that will help you create stunning embroidery designs. Here are some essential techniques to master:
Choosing Designs
Embroidery designs can be sourced from various places, including software, online libraries, or pre-made design packs. Ensure the design is compatible with your machine format and size limitations.
Editing Designs
Many embroidery machines come with built-in software that allows you to edit designs. You can resize, rotate, or combine designs to create unique pieces. Familiarize yourself with your machine’s software to optimize your designs.
Stitching Your Design
When you’re ready to stitch, select the design on your machine and adjust any settings for speed and stitch quality. Monitor the process closely, especially during the first few runs, to ensure everything is functioning correctly.
Finishing Touches
Once your design is stitched, carefully remove the hoop and trim any excess stabilizer. If you used a wash-away stabilizer, rinse it according to the manufacturer’s instructions. Press the fabric to eliminate any hoop marks and enhance the overall appearance of your project.
Troubleshooting Common Issues
Even experienced embroiderers encounter challenges. Here are some common issues and how to address them:
Thread Breakage
Thread breakage can be frustrating. Common causes include:
- Incorrect threading
- Using a dull needle
- Poor-quality thread
Solution: Rethread your machine, ensure your needle is sharp, and use high-quality thread.
Design Misalignment
If your design is not aligning correctly, it could be due to improper hooping or settings. To fix this, double-check your hooping process and ensure your machine settings are accurate.
Puckering Fabric
Puckering can occur if the fabric isn’t stabilized properly. To prevent this, always use the appropriate stabilizer for your fabric type and ensure your fabric is taut in the hoop.
FAQ
A: Yes, many standard sewing machines have embroidery features, but a dedicated embroidery machine will offer more advanced options and capabilities.
A: Polyester thread is often recommended for its durability and colorfastness, while rayon thread offers a beautiful sheen.
A: The type of stabilizer depends on the fabric you’re using. Cut-away stabilizers are excellent for knits, while tear-away stabilizers work well with woven fabrics.
A: Yes, but it’s essential to follow care instructions based on the fabric and type of thread used. Wash-away stabilizers will dissolve in water.
Conclusion
Embroidery with a sewing machine opens up a world of creative possibilities, allowing you to personalize your projects like never before. By understanding the various machines available, selecting the right supplies, mastering essential techniques, and troubleshooting common issues, you can create stunning embroidered pieces with confidence. Whether you’re looking to embellish clothing, decorate home textiles, or create unique gifts, the skills you develop in machine embroidery will serve you well in all your crafting endeavors. Dive in, embrace the creativity, and enjoy the journey of embroidery!
For those looking to enhance their embroidery experience, consider exploring options such as SmartStitch Side Hoops for increased versatility, or check out the best embroidery machine for beginners to kickstart your journey. Combining sewing and embroidery can also streamline your projects—discover the perfect sewing and embroidery combo for creative projects. And for those who want to save time, prewound bobbins for Babylock can make your stitching effortless. Lastly, if you’re ready for a professional upgrade, consider a two head embroidery machine for larger projects.