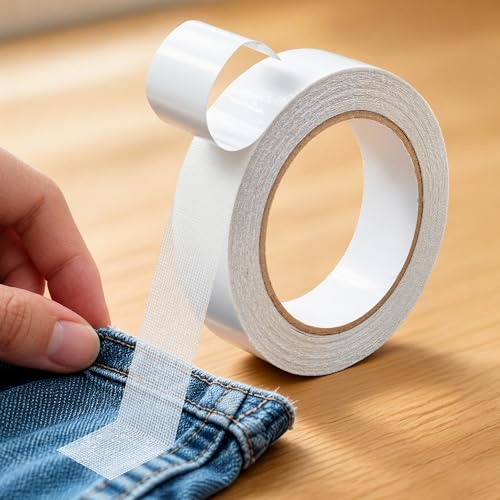
Hemming pants with a sewing machine starts with a fitting decision, not a stitch setting. The right finished length depends on the shoes, the trouser style, and how much fabric you can remove. This guide walks through measuring, marking, cutting, pressing, and stitching, with separate choices for dress trousers and denim. You can use the same checks to judge an existing hem before altering it. Start with a small sample.
Quick answer
Mark the finished length while wearing the pants and intended shoes. Measure both legs, leave enough fabric for the chosen hem, and test the stitch on a matching offcut. Press or baste the fold, sew without pulling the cloth, and inspect the result from both sides. A blind hem, visible topstitched hem, and original jeans hem are different finishes; choose the method before cutting.
Choose a finish before shortening the legs
A visible machine hem is a practical choice for casual cotton trousers. It uses a straight stitch near the folded edge and leaves a deliberate line on the outside. A blind hem catches small amounts of the garment fabric so the stitches show less. It requires a suitable stitch, the correct folding arrangement, and practice. Neither finish is universally better: choose the result that suits the garment’s fabric and existing construction.
An original jeans hem preserves the worn-looking factory edge by repositioning it. This can be useful when the original color and abrasion would be difficult to reproduce, but it creates an additional fold inside. On slim openings, heavy denim, or pronounced taper, that fold can be awkward. A fresh turned hem may be simpler if the factory edge is not essential to the appearance.
Look inside the trousers before deciding. Dress pants may have a hem facing or tape rather than a deep doubled fold. Some hems include a cuff, lining, vent, zipper, or reinforced edge. Photograph those details before opening them. If a side zipper or unusual cuff crosses the proposed cutting line, treat the alteration as a construction change rather than an ordinary hem.
| Finish | Useful starting point | Main check |
|---|---|---|
| Visible turned hem | Casual woven trousers | Even fold and matching topstitching |
| Blind hem | Dress trousers | Small catches and an accurate fold |
| Repositioned original jeans hem | Keeping the factory edge | Bulk and circumference at the new position |
| Faced hem | Limited available allowance | Suitable facing and a tidy attachment |
Fit and mark the finished length
Wear the shoes you expect to use with the trousers. Fasten the waistband normally and stand naturally. A waistband pulled higher than usual changes the apparent leg length. If another person marks the hem, ask them to measure while you look forward instead of bending down to watch. Bending can move the garment and spoil the result.
Fold the excess inward and use pins, clips, or temporary basting to hold the proposed length. Walk, sit, and check the front and back. A small amount of trouser break may be part of the intended style, while cropped pants require a different decision. There is no single distance from the floor that makes every pair fit correctly.
Check both legs rather than assuming they need identical shortening. The wearer, shoe soles, or garment may be uneven. Mark the intended finished edge clearly, then remove the pants and lay them flat without stretching them. Compare the side seams and inseams. Record each leg’s adjustment before taking out the existing stitching.
Plan the allowance and cutting line
The finished-length mark is not the cutting line. You must leave material below it for the fold. For a simple practice example, a half-inch finished double-turn hem uses two half-inch turns and therefore needs one inch below the finished edge. That is an example of the arithmetic, not the correct allowance for every trouser fabric or style.
Mark a second line for cutting only after choosing the hem depth. A deeper hem can look appropriate on some dress trousers, but a strong taper means the lower raw edge may be too narrow to fold up smoothly. In that case, reducing the depth or using a suitable facing can be easier than forcing the circumference to match.
Open enough of the existing hem to understand its construction. Remove loose threads and press out old folds as the fabric’s care instructions permit. Permanent fading, needle holes, or wear marks may remain. Test pressing on a hidden area, use a pressing cloth where appropriate, and avoid promising that every old crease can be removed completely.
Prepare the machine and a realistic test piece
Choose the needle for the fabric and thread, and confirm that its system suits the machine. Denim may need a different needle type from a lightweight woven dress fabric. Simply selecting a larger needle is not a universal cure: an oversized needle can leave visible holes in fine cloth. Use a fresh, suitable needle and consult the machine’s instructions.
Use offcuts from the trousers to recreate the planned fold. Include a seam intersection if possible. A test on one flat layer does not show how the machine will behave over the actual folded hem. Check the stitch appearance on top and underneath, then gently flex the sample to make sure the seam behaves as intended.
Thread the machine correctly before changing tension. For a straightforward woven hem, begin with the manual’s normal straight-stitch setup and adjust from a sample. Do not copy a tension number from an unrelated machine. If your sample puckers or loops, investigate threading, needle condition, thread suitability, and fabric handling before changing several controls at once.
Sew a simple double-turn hem
Turn the raw edge inward by the planned first amount and press or baste it. Turn again to reach the finished-length mark, enclosing the raw edge. Work around the leg in small sections. Check the depth with a seam gauge rather than trusting a fold that gradually changes as you go around the circumference.
Pin or clip the fold so it stays even, keeping metal pins out of the needle’s path. If the fabric is slippery, temporary hand basting can be more dependable than many pins. Keep the trousers’ other leg and the opposite side of the opening clear. Accidentally sewing the opening closed is an avoidable mistake on a narrow leg.
Position the fold under the foot and stitch near its inside edge at a steady pace. Support the garment’s weight on the table. Do not let the trouser legs pull against the needle area. Sew a short section, stop with the machine appropriately positioned, and check that the inside fold is being caught before continuing around the whole leg.
Secure the end according to the stitch and finish you are using. Trim thread tails neatly, inspect for missed sections, and press the finished hem using fabric-appropriate heat. Try the pants on again before altering the second pair or removing any temporary fitting marks. Check both appearance and comfort while walking.
Adjust the method for dress trousers
For a blind hem, follow the folding diagram for your particular machine and foot. The stitch must catch only the intended amount of the garment face. A large bite can leave obvious marks outside, while a tiny or inconsistent bite can fail to secure the fold. Practicing the exact fold on a scrap is more useful than starting on the trousers immediately.
Match thread color to the visible fabric when a discreet finish is the goal. Inspect the sample in normal light from a short distance, not only directly under the machine lamp. A finish can look tidy close up yet show a row of regular catches when worn. Decide whether that appearance is acceptable before sewing the garment.
If the trousers have a lining, preserve its freedom to move. Do not trap the lining into the hem accidentally. Check any original attachment points and leave the lining shorter than the finished outer leg as the construction requires. Where the original tailoring is complex or valuable, a reversible basting trial is a sensible first step.
Adjust the method for jeans
The thickest area is often the intersection of the folded hem with an existing side seam. Approach that section slowly. A suitable foot-leveling aid can help keep the presser foot level when used as the machine manufacturer describes. Stop if the needle struggles, bends, or strikes a part; a domestic machine’s limits are not changed by adding a denim needle.
When using heavier topstitching thread, check whether the machine and needle support that thread combination. The bobbin arrangement may differ from the upper thread recommendation. Follow the manual and test rather than putting an unusually heavy thread into every part of the threading path. Matching appearance is useful only if the stitch forms reliably.
For a repositioned original hem, measure and baste the join before trimming anything. Compare the circumference at the new position with the circumference of the factory hem. A strongly tapered leg may require extra alteration. After securing the join, inspect the inside fold for bulk and make sure it lies comfortably instead of rubbing or turning outward.
Troubleshoot the finished hem
| Problem | Check first | Useful next action |
|---|---|---|
| Uneven depth | Marking and pressing | Remeasure from the finished edge and rebaste |
| Puckering | Threading and handling | Retest on a folded matching sample |
| Missed fold | Stitch position | Open the affected section and align it accurately |
| Trouble at a bulky seam | Layer thickness and foot position | Stop, reassess the setup, and use supported techniques |
| Hem twists | Grain, seam alignment, and tension from handling | Flatten the leg and inspect before resewing |
A skipped section is usually easier to correct locally than by tightening the entire seam. Remove enough stitches to work smoothly, secure any loose ends, and resew after fixing the cause. Repeated unpicking can damage fine fabric, so avoid making a series of increasingly aggressive adjustments on the garment itself.
A final fitting checklist
Check that the waistband is worn at its usual position, both legs hang correctly, and the chosen shoes still suit the length. Inspect the hem from the front, back, and side. Look for a visible ridge, a twisted fold, or an exposed raw edge. Sit down and walk to confirm that the hem does not catch on the shoe or rub uncomfortably.
Keep a short record of the successful needle, thread, fold depth, and stitch choice with a scrap from the alteration. This gives you a useful starting point for another pair made from similar fabric. It is a reference rather than a rule: trousers with different fiber content, weave, or seam bulk still deserve a fresh sample.
FAQ
Can I hem pants without cutting them?
Sometimes. A deeper temporary fold or hand-basted adjustment may work if it lies flat and feels comfortable. Excess cloth can create bulk or show through a lightweight leg. Try the reversible version first, then decide whether a more permanent alteration is appropriate.
Do I need a special hemming machine?
Many ordinary hems can be sewn on a suitable domestic machine. A blind-hem machine is a specialist option, but it is not necessary for every pair of trousers. Your fabric, desired finish, and machine’s documented capabilities determine the practical method.
Should the two legs always be shortened equally?
No. Fit and mark both legs on the wearer. Differences in posture, garment construction, or footwear can affect the needed adjustment. Keep clear notes so you preserve the intended length for each leg rather than automatically copying one measurement.
Why does my hem look wavy?
The fabric may have been stretched or pushed while sewing, or the setup may not suit the cloth. Inspect the fold and grain, rethread if necessary, and test a matching sample. Stretch trousers can require a different stitch and handling method from stable woven pants.
Can I preserve the original jeans hem?
Often, but check taper, circumference, and bulk before choosing that method. A factory hem that is much narrower than its new attachment position may not fit neatly. A new turned hem can be a better option when the original edge is not essential.
Conclusion
A neat pants hem comes from a correct fitting mark, a suitable allowance, and a tested sewing setup. Decide the finish before cutting, sample the actual folded layers, and inspect the result while the wearer moves. Those checks are more reliable than choosing a stitch setting first and hoping the length and fabric will cooperate.
Reference and further instructions
Use the exact machine manual, pattern instructions, and material care directions for your project. The techniques and original practice examples in this guide should be sampled with your own materials. Linked designers retain ownership of their patterns; download their current instructions from the original source.