The Husqvarna Viking Emerald 116 is worth considering when you prefer a mechanical sewing interface and need useful household garment functions. Its appeal should be evaluated through the controls, complete package, and actual fabric samples rather than brand familiarity alone. This review explains the stitch-count distinction, buttonhole and pressure controls, practical alternatives, and garment-planning checks that help you decide whether a supported Emerald setup suits the projects you will repeat.
As an Amazon Associate, Practical Textile earns from qualifying purchases. Product links may earn us a commission.
Quick Answer
Compare Emerald 116 for direct mechanical sewing, a one-step buttonhole, adjustable pressure, and its reference chart. Check the exact US offer and supplied feet. The Amazon boxes below identify other-brand mechanical alternatives; they are not Emerald listings or images relabeled as Viking.
This guide compares published specifications and project fit; it does not report hands-on testing.
Singer Heavy Duty 4423
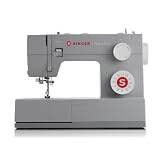
Compare actual starts, buttonholes, pressure control, and package.
Brother GX37
A separate model with different controls and limitations.
What the Emerald 116 Offers
| Feature | Practical meaning |
|---|---|
| Mechanical operation | Direct household control style |
| 16 stitches and 60 functions | Different counting descriptions, not 60 separate patterns |
| One-step buttonhole | A garment function to test in supported fabric |
| Adjustable pressure | A handling adjustment distinct from thread tension |
| Reference chart | Starting guidance rather than guaranteed settings |
Mechanical Operation: Test the Whole Sequence
The Emerald 116’s direct approach may suit someone who wants ordinary sewing without navigating a large electronic menu. That preference is individual. Ask to select the usual stitch, adjust it, make a seam, and return to the initial setup yourself. Ease of watching a demonstration is not the same as independent operation.
Check the controller at a comfortable slow pace. Most garment work includes short seams, corners, and repositioning. A smooth fast line on stiff cotton is less informative than controlled starts on the material used in your next project.
Read the Stitch Count Correctly
The manufacturer’s 16 stitches and 60 functions describe different ways of counting. Do not compare the function total directly with another machine’s independently selectable patterns. For practical sewing, identify the actual straight, zigzag, stretch, and buttonhole operations required by the pattern.
A broad utility selection is useful only when the seam performs appropriately in the fabric. Test recovery on knits and appearance after pressing on wovens. The model name does not select the correct needle, thread, support, or seam construction.
Pressure and Buttonholes Deserve Their Own Test
Adjustable presser-foot pressure changes how the foot holds the material. It is not the same adjustment as upper-thread tension. Start from the manual’s guidance and change one variable at a time on matching scraps. Keep the successful settings with the project.
Make several buttonholes in the real fabric and interfacing, then open one and inspect it. A one-step process reduces operator sequencing, but preparation and placement still matter. The reference chart provides guidance rather than a promise that every fabric will sew correctly without sampling.
Five Advantages and Two Limitations
- Direct mechanical controls suit a focused operating preference.
- The one-step buttonhole supports ordinary clothing.
- Pressure adjustment adds a useful handling variable.
- The reference chart helps organize starting decisions.
- Utility sewing can serve repairs and repeat garment projects.
Two limitations should shape expectations. This mechanical household model should not be bought for advanced electronic automation, and it is not an industrial feed system for unrestricted heavy-material work.
Compare Other Mechanical Offers Fairly
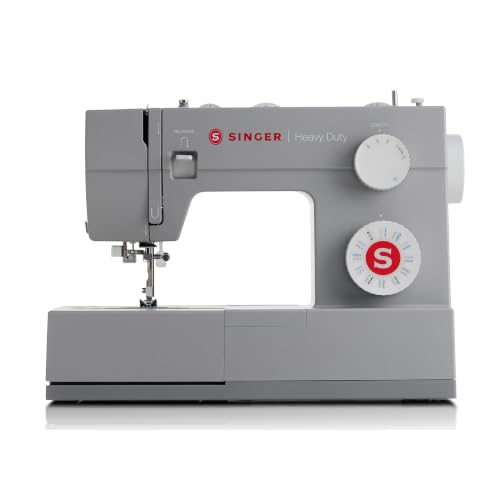
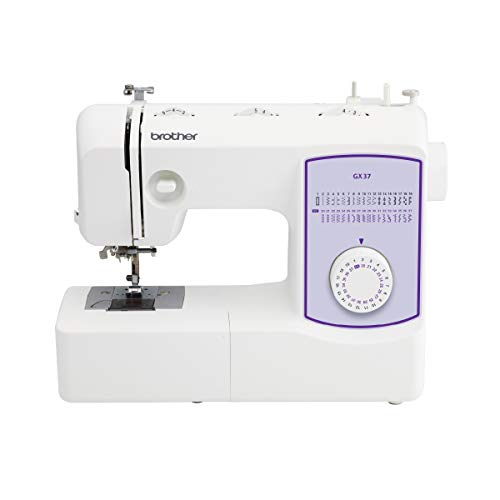

The 4423 and GX37 are separate-brand references with their own controls and accessory packages. They help compare cost and handling but are not substitute purchase links for Emerald. Use the same samples and calculate the full delivered offer with instruction and any missing compatible foot.
See our 4423 review, GX37 guide, and operating-style comparison. Our dress guide, skirt guide, and garment equipment guide help identify what the machine must do.
Project Preparation and a Repeatable Sewing Setup
The garment examples below connect the Emerald controls to preparation and assembly. A suitable mechanical machine still depends on a workable pattern, fabric choice, fitting plan, and supported samples rather than a reference chart alone.
Plan a prom dress as a staged project
Read the entire formalwear pattern before setting a deadline. List the unfamiliar tasks: lining, boning or other structure, an invisible zipper, a shaped bodice, a delicate hem, or handling a slippery outer fabric. A style with few pattern pieces can still require careful fitting and internal construction.
Choose the intended undergarments before fitting the bodice when they affect the finished shape. Make the sample in a material that helps you evaluate the relevant fit and support. A quick drape over clothing is not equivalent to testing the actual bodice construction. Leave time for adjustments, another fitting, and finishing after the major seams are joined.
Plan the skirt hem with the shoes and any intended underlayers. Let the fabric hang when the pattern and material call for it before leveling the hem. A formal skirt can change its apparent length with footwear and support. Do not finalize every length from a measurement taken before the full garment is assembled.
Use free dress patterns from the original designer
Mood’s current free-pattern library is one legitimate starting resource for dress designs and related pattern categories. Availability, files, size ranges, and instructions should be checked on the current designer page. A pattern listed as free may still require a download step or may provide a different level of instruction from a paid beginner pattern.
Download from the authorized source rather than a reposted file whose completeness and permissions are unclear. Keep the pattern name, version, instructions, and your size notes together. Link readers to the original designer when sharing the resource; do not repackage someone else’s pattern files as your own downloadable template.
Print a scale-check page first and measure it. Use the printing setting specified by the pattern rather than letting the printer fit every page automatically. Confirm page assembly and layer choices before printing the entire set. An incorrect scale can create a systematic fit problem that later seam adjustments will not solve neatly.
A practical cutting and assembly check
Before cutting the final cloth, count the pieces, check grainlines and fold marks, and confirm seam allowances. Some patterns include allowances while others require them to be added. Label similar pieces and their right or wrong sides where the fabric is difficult to distinguish. Cut interfacing and lining according to the actual plan, not as an afterthought.
Work through the intended sequence and make intermediate fit checks before enclosing areas that may need adjustment. Test closures, pockets, sleeve movement, and lining freedom. Secure and finish seam allowances appropriately for the cloth. A dress is not finished merely because the outer seams are joined and it looks complete on a hanger.
Build a short fitting schedule before the event
For an occasion dress, work backward from the date when the completed garment must be ready. Allow separate time for reading the pattern, obtaining compatible materials, making the fitting sample, transferring adjustments, sewing the main garment, and finishing after the last fit check. This is a planning sequence rather than a promise that every dress takes the same number of hours.
Keep the intended shoes and underlayers available for the relevant fittings. If a neckline, closure, or skirt volume changes, recheck the neighboring areas instead of treating the first fitting as permanent approval for every later alteration. A small written list of accepted changes makes the final version easier to compare with the sample.
When choosing between patterns, compare that workload with your available experience and time. A manageable design completed with a clear fit and tidy finish can serve the occasion better than a more elaborate project whose unfamiliar internal construction is left until the final evening.
Start with the waist, hip, and intended position
Measure where the waistband will actually sit and record the relevant hip measurement according to the pattern. A high-waisted design and one worn lower on the body do not use identical fitting assumptions. Compare the designer’s chart rather than selecting from the clothing size you usually buy.
Check finished-garment measurements and intended ease where provided. The skirt needs the movement and wearing room designed into the style. Do not remove ease simply because a measured waist looks larger than the body measurement. Equally, do not assume a loose elastic waist guarantees enough fabric circumference to pull the garment over the hips.
Record length from the intended waist position and consider the shoes and underlayers. Keep finished length separate from cutting length and hem allowance. A change in waistband depth or waist position can change where the hem falls even if the skirt panel itself was not shortened.
Choose an A-line skirt pattern
An A-line design can provide a useful first fitted skirt when its instructions are clear and its shaping suits the intended fabric. Check darts, panel seams, waistband, facing, and closure. A simple drawing may hide important fitting decisions at the waist and hip. Plan to test those areas before concentrating on the final hem.
Use a sample to assess side-seam balance and how the skirt hangs from the waistband. If the hem tilts or the side seam pulls forward, investigate the fit and grain rather than leveling the hem immediately to disguise the problem. A fit change near the top can affect the way the entire skirt falls.
Compare your fabric’s drape with the desired shape. A firm woven cloth can emphasize the A-line outline, while a softer cloth may fall closer to the body. Neither is inherently wrong, but the result will differ. Choose material from the pattern recommendation and a representative sample instead of expecting the drawing to override the fabric’s behavior.
Plan a maxi skirt for walking and weight
Long length introduces practical questions about stride, stairs, footwear, and where the fabric carries weight. A narrow maxi may require a vent, slit, or other walking allowance designed into the pattern. A broad full maxi has different handling and fabric-quantity needs. Do not close a planned opening simply because it seems optional in a flat drawing.
Fit the waist and hips before setting the final length. Try the skirt with the intended shoes and move normally. A hem that clears the floor in one pose may catch during walking. Consider how the garment will be worn rather than treating a dramatic photograph as its only fitting test.
If the skirt includes bias or sections likely to settle, follow the pattern and fabric guidance about hanging before leveling the hem. Mark the final length after the relevant construction and underlayers are present. An early measurement is useful for planning, but it should not prevent a final practical adjustment.
Use the reference chart as a starting aid and keep a note of the final settings that work on your fabric. Two materials described by the same general name can differ in weight, finish, and recovery. The chart cannot diagnose every threading error or choose the final result you prefer. If a seam changes unexpectedly, return to a known sample, confirm threading and needle condition, and change one adjustment at a time. This keeps the machine comparison separate from an avoidable setup mistake.
Frequently Asked Questions
Is Emerald 116 computerized?
It is a mechanical household model. Compare a documented electronic alternative if a speed slider, automatic cutting, or programmed functions are central to your upgrade.
Does it have 60 built-in stitches?
The manufacturer distinguishes 16 stitches from 60 functions. Those totals should not be treated as the same measure when comparing machines.
What is the pressure control for?
It changes the foot’s downward handling pressure. Thread tension is separate. Use the manual and matching samples rather than changing both controls together without notes.
Is it suitable for beginners?
It can suit a learner who understands the controls and has clear instruction. Test threading, controlled starts, and a supported buttonhole before deciding that the interface works for you.
What should a used offer include?
Confirm the exact model, correct controller, essential feet, covers, manual, demonstrated operation, and support. Missing parts and inspection costs belong in the total comparison.
Final Recommendation
Choose Emerald 116 for a clearly understood mechanical garment workflow, not a function count alone. Test the actual materials and buttonhole, compare complete offers, and keep its household limits distinct from industrial or automatic embroidery equipment.