Sewing enthusiasts know that mastering the various components of a sewing machine can significantly enhance their crafting experience. One such crucial part is the presser foot lever, a small yet powerful feature that can make a big difference in how fabric is handled during sewing. Whether you’re a novice or an experienced seamstress, understanding the function and operation of the presser foot lever is essential for achieving precise results in your sewing projects.
Table of Contents
- What is a Presser Foot Lever?
- Importance of the Presser Foot Lever
- Different Types of Presser Feet
- How to Use the Presser Foot Lever
- Troubleshooting Presser Foot Issues
- Frequently Asked Questions
What is a Presser Foot Lever?
The presser foot lever is a small switch or lever located on the sewing machine that allows the user to raise or lower the presser foot. This mechanism is essential for securing the fabric in place while sewing. When the presser foot is lowered, it exerts pressure on the fabric, ensuring that it feeds evenly through the machine. Raising the presser foot, on the other hand, allows you to remove or adjust the fabric without interfering with the sewing process.
Importance of the Presser Foot Lever
The presser foot lever plays a vital role in sewing for several reasons:
- Fabric Control: The lever ensures that the fabric remains firmly in place while sewing, allowing for precise stitching.
- Different Techniques: Different sewing techniques require different presser foot positions. The lever allows for quick changes between tasks.
- Safety: Proper use of the presser foot lever can prevent accidents, such as sewing over fingers or uneven stitches.
Different Types of Presser Feet
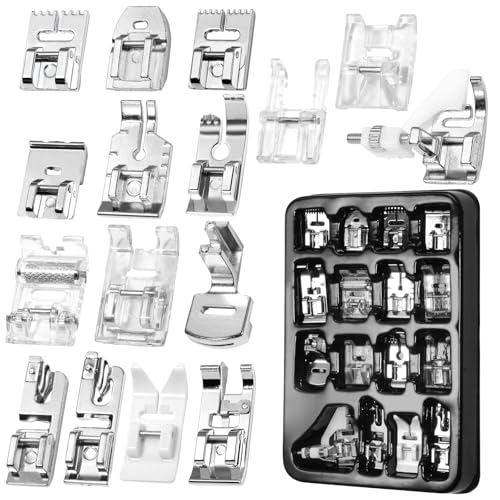
Understanding the various types of presser feet that can be used in conjunction with the presser foot lever is essential for any sewing project. Here are some common types:
| Type of Presser Foot | Use |
|---|---|
| Standard Foot | For general sewing tasks. |
| Zipper Foot | To sew zippers into garments. |
| Buttonhole Foot | To create buttonholes with precision. |
| Walking Foot | For sewing multiple layers or slippery fabrics. |
How to Use the Presser Foot Lever
Using the presser foot lever is straightforward, but here are some steps to ensure you’re doing it correctly:
Step 1: Prepare Your Machine
Ensure that your sewing machine is properly threaded and that the needle is in the correct position.
Step 2: Raise the Presser Foot
Before placing your fabric under the presser foot, raise the presser foot using the lever. This will allow you to easily position your fabric.
Step 3: Position Your Fabric
Align your fabric beneath the presser foot, ensuring that it is straight and ready to be sewn.
Step 4: Lower the Presser Foot
Once your fabric is positioned correctly, lower the presser foot using the lever. This will engage the feed dogs, which will help move the fabric through the machine.
Step 5: Start Sewing
Begin sewing your project while keeping an eye on the fabric to ensure it is feeding evenly.
Step 6: Raise the Presser Foot Again
Once you have finished sewing a seam, use the presser foot lever to raise the foot before removing the fabric. This will allow you to cut the thread and pull the fabric out without any hassle.
Troubleshooting Presser Foot Issues
Even with the best sewing machines, issues can arise with the presser foot and its lever. Here are some common problems and their solutions:
Problem 1: Presser Foot Won’t Lower
This can often be attributed to a mechanical issue or dirt buildup. Check for any obstructions or debris around the lever mechanism. If the problem persists, consult your machine’s manual.
Problem 2: Uneven Stitching
If your stitches appear uneven, it could be due to insufficient pressure from the presser foot. Adjust the pressure settings if your machine allows, or ensure that the presser foot is securely in place.
Problem 3: Fabric Slipping
When working with slippery fabrics, consider using a walking foot. If you don’t have one, try using a presser foot with a textured bottom to improve grip.
Frequently Asked Questions
A: It’s ideal to clean the presser foot lever and surrounding areas regularly, especially if you use your machine often. Dust and lint can accumulate and affect its operation.
A: Not all presser feet are universal. Check your machine’s specifications to ensure compatibility with different presser feet.
A: If the lever is stiff, it may need lubrication. Refer to your sewing machine manual for guidance on proper maintenance and lubrication procedures.
Understanding the sewing machine presser foot lever can significantly improve your sewing skills and project outcomes. By mastering its use, you can achieve precise stitching, better fabric control, and ultimately greater satisfaction in your sewing endeavors. Whether you’re crafting a beautiful quilt, sewing a new garment, or working on custom embroidery, the presser foot lever is a small but mighty tool in your sewing arsenal.
For those looking to expand their sewing capabilities, consider exploring machines like the Singer SE9180 Sewing & Embroidery Machine or discover creative options with Merry and Bright Embroidery Designs. If you’re passionate about custom projects, don’t miss out on Naturally Stylish Custom Embroidery on My Golf Bag! and learn about the benefits of an Embroidery Only Sewing Machine for focused projects. Finally, enhance your projects with the Best Hand Embroidery Thread Ever! for stunning finishes.
With the right knowledge, tools, and techniques, you can take your sewing to the next level and create beautiful, professional-quality projects.