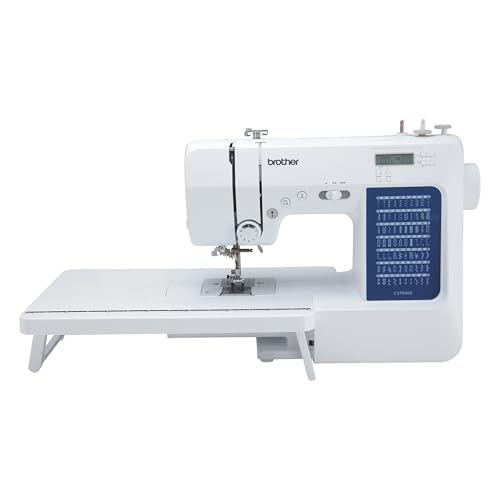
Quilting is a timeless craft that has evolved significantly with advancements in technology, particularly with the advent of sewing machines designed specifically for quilting. One essential feature in many quilting machines is the quilting guide bar, which can dramatically improve your quilting precision and efficiency. Understanding how to properly use this tool can make a substantial difference in the quality of your quilts. In this article, we’ll provide a comprehensive guide to sewing machine quilting guide bars, their benefits, and tips on how to use them effectively.
What is a Quilting Guide Bar?
A quilting guide bar is an accessory that attaches to your sewing machine, providing a reference point to help guide your fabric as you sew. This tool is particularly beneficial for maintaining consistent seam allowance and achieving straight lines in your quilting projects. Most guide bars are adjustable, allowing you to customize the distance from the needle to the guide for different quilting patterns.
Benefits of Using a Quilting Guide Bar
Utilizing a quilting guide bar can enhance your quilting experience in several ways:
- Improved Precision: The guide bar helps you achieve straight lines and uniform spacing, which is vital for professional-looking quilts.
- Increased Efficiency: With a guide bar, you can quilt faster as it minimizes the need for constant measuring and marking.
- Consistency: It ensures that your quilting patterns are consistent across the entire quilt, which is especially important for intricate designs.
How to Use a Quilting Guide Bar
Using a quilting guide bar is straightforward, but there are specific steps to ensure you get the best results:
Step 1: Attach the Quilting Guide Bar
Begin by attaching the guide bar to your sewing machine according to the manufacturer’s instructions. Most guide bars fit into a designated slot on the machine’s arm.
Step 2: Adjust the Distance
Set the distance from the needle to the guide bar based on your desired seam allowance or quilting pattern. For example, if you want a ¼-inch seam, adjust the guide bar accordingly.
Step 3: Align Your Fabric
Place your fabric under the presser foot and align it with the guide bar. Ensure that the fabric is flat and free of wrinkles for the best results.
Step 4: Start Sewing
Begin sewing slowly, guiding the fabric against the bar. Keep your eyes on the fabric rather than the needle to maintain a straight line.
Types of Quilting Guide Bars
Quilting guide bars come in various types, each designed for different quilters’ needs:
| Type | Description |
|---|---|
| Fixed Guide Bar | A simple, unadjustable bar that is set at a specific distance from the needle. |
| Adjustable Guide Bar | Allows the user to change the distance from the needle, offering more versatility for different quilting techniques. |
| Multi-Guide Bar | Features multiple guide bars that can be used simultaneously for more complex quilting patterns. |
Common Mistakes to Avoid
While using a quilting guide bar can be beneficial, there are common pitfalls to be aware of:
- Not securing the guide bar: If the guide bar is not tightly secured, it can shift during sewing, leading to uneven seams.
- Ignoring fabric thickness: Always consider the thickness of your fabric when adjusting the guide bar. A thick quilt may require a different setup than a standard fabric.
- Rushing the process: Take your time when sewing to ensure that you’re accurately guiding the fabric against the bar.
FAQ
A: Most modern sewing machines are compatible with quilting guide bars, but it’s best to check your machine’s manual for compatibility and installation instructions.
A: The distance will depend on your desired seam allowance or quilting pattern. Common distances include ¼ inch for standard quilting or more for specific designs.
A: A guide bar is primarily used for straight stitching. For free-motion quilting, it is better to rely on your own eye for precision and control.
Conclusion
Understanding and utilizing a sewing machine quilting guide bar can significantly enhance your quilting projects, leading to more precise and efficient results. With various types available, you can choose the one that best suits your quilting style and needs. Remember to practice and take your time as you familiarize yourself with this tool. As you master the use of a quilting guide bar, you’ll find that your quilting skills will improve, allowing you to create beautiful and professional-looking quilts.
For those looking to expand their sewing and embroidery skills, consider exploring products like the Brother SE630 Embroidery Machine or discover easy embroidery designs that can transform your quilts. If you’re a beginner, the Letters Embroidery Machine is a great choice to start your journey. And for vibrant colors that are easy to use, check out Tri-Chem Liquid Embroidery. For those needing precision and quality, the Tajima Hat Embroidery Machine is unmatched.