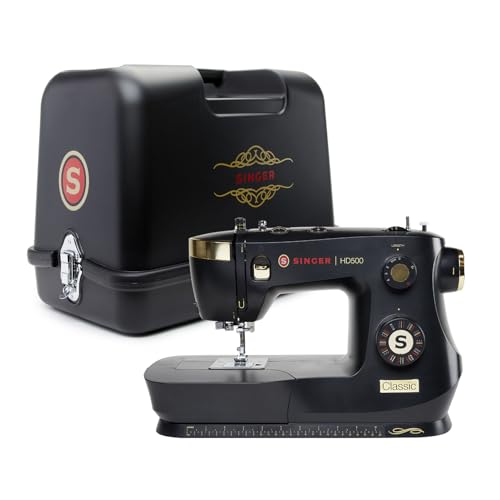
Vintage Singer sewing machines hold a special place in the hearts of sewing enthusiasts and collectors alike. These machines are often lauded for their durability, reliability, and classic aesthetics. However, as with any vintage equipment, keeping them in working condition requires access to the right parts. Whether you’re restoring a family heirloom or simply maintaining your sewing machine, understanding the various parts and their functions is essential. This article provides a comprehensive vintage Singer sewing machine parts list, along with tips and insights for sourcing and maintaining these invaluable machines.
Overview of Vintage Singer Sewing Machines
Since its inception, Singer has produced a wide range of sewing machines that cater to different sewing needs. Vintage models, particularly those manufactured before the 1970s, are prized for their craftsmanship and the quality of materials used. Models such as the Singer 221 Featherweight and the Singer 201 are especially sought after for their unique features and ease of use. Understanding the components of these machines is crucial for anyone looking to restore or maintain one.
Essential Parts of Vintage Singer Sewing Machines
Each vintage Singer sewing machine consists of several essential components. Familiarizing yourself with these parts will not only aid in repairs but also enhance your sewing experience.
1. Machine Head
The machine head houses the motor and various mechanical components. This is the most recognizable part of the sewing machine.
2. Needle and Needle Plate
The needle is crucial for sewing, while the needle plate guides the fabric and protects the internal components.
3. Bobbin and Bobbin Case
The bobbin holds the thread that forms the stitches. The bobbin case secures the bobbin in place and allows for smooth operation.
4. Tension Mechanism
The tension mechanism controls the tightness of the threads, ensuring balanced stitching.
5. Feed Dogs
Feed dogs are small metal teeth that move the fabric forward as you sew. Properly functioning feed dogs are essential for consistent stitching.
6. Presser Foot
The presser foot holds the fabric in place during sewing. Various types of presser feet are available for different sewing techniques.
7. Handwheel
The handwheel allows you to manually move the needle up and down, which is helpful for securing stitches at the beginning and end of a seam.
8. Power Switch and Foot Pedal
The power switch turns the machine on and off, while the foot pedal controls the speed at which you sew.
Commonly Replaced Parts
Over time, certain parts of vintage Singer sewing machines may wear out or become damaged. Here are some commonly replaced parts and their functions.
1. Needles
Due to their frequent use, needles are often the first parts to be replaced. Make sure to choose the right needle type for your fabric.
2. Bobbins
Bobbin wear can lead to stitching issues. Ensure you have the correct bobbin type compatible with your machine.
3. Tension Discs
Dirty or worn tension discs can cause stitching inconsistencies. Cleaning or replacing them can resolve these issues.
4. Belts
The belts that connect the motor to the machine head can wear out over time. Replacing them can restore your machine’s functionality.
5. Light Bulbs
Many vintage models come with built-in lights. If your machine’s light goes out, replacing the bulb can improve visibility while sewing.
6. Foot Pedals
If the foot pedal becomes unresponsive, it may need to be repaired or replaced. Ensure compatibility with your model.
Where to Find Vintage Singer Sewing Machine Parts
Finding the right parts for your vintage Singer sewing machine can be challenging but not impossible. Here are some effective strategies to locate the parts you need:
1. Online Marketplaces
Websites like eBay and Etsy often have listings for vintage Singer machine parts. Be sure to check the seller’s ratings and reviews.
2. Specialty Sewing Shops
Local or online sewing shops may carry a selection of parts for vintage machines. They can also provide valuable advice on repairs.
3. Singer Authorized Dealers
Contacting Singer’s customer service or visiting their website may help you locate authorized dealers who specialize in vintage parts.
4. Sewing Machine Repair Shops
Local repair shops often have parts available or can assist in sourcing them. They may also offer repair services to ensure your machine is functioning optimally.
5. Online Sewing Forums and Groups
Joining online communities dedicated to vintage sewing machines can connect you with other enthusiasts who may have parts for sale or trade.
Care and Maintenance Tips
Regular maintenance is essential for keeping your vintage Singer sewing machine in excellent working order. Here are some care tips to consider:
1. Regular Cleaning
Dust and lint can accumulate in your machine, affecting its performance. Use a soft brush to remove debris regularly.
2. Oiling
Oiling your machine helps keep the moving parts lubricated. Use the recommended oil and follow the guidelines in your machine’s manual.
3. Tension Adjustments
Periodically check and adjust the tension settings to ensure even stitches. Refer to the manual for guidance.
4. Store Properly
When not in use, cover your machine to protect it from dust and moisture. Consider storing it in a dedicated case or cabinet.
5. Regular Use
Regularly using your machine helps keep the internal components lubricated and functional. If you haven’t used it in a while, consider running it for a few minutes.
Frequently Asked Questions
A: While some modern parts may fit, it’s essential to check for compatibility as vintage machines have unique specifications.
A: The model number is usually located on a metal plate attached to the machine, often near the base or on the back.
A: Yes! Vintage Singer machines are known for their quality and durability, making them a worthwhile investment for sewing enthusiasts.
A: Start by cleaning and oiling the machine, check for any damaged parts, and replace them as necessary. Consult a professional if needed.
A: Yes, numerous forums and social media groups are dedicated to vintage sewing machines where you can share experiences and seek advice.
In conclusion, maintaining and restoring vintage Singer sewing machines can be a rewarding hobby that connects you to the art of sewing. By understanding the essential parts and common replacements, you can ensure that your machine remains in top condition. With the right resources, you can find the necessary parts and learn valuable maintenance tips to keep your vintage Singer sewing machine sewing like new. Whether you’re creating beautiful pieces with your machine or simply cherishing a family heirloom, the legacy of vintage Singer sewing machines continues to inspire creativity and craftsmanship.
For those interested in expanding their sewing projects, consider exploring the Beautifully Crafted USA Flag Embroidery or check out the Stunning Christmas Cards: A Machine Embroidery Marvel! Looking for a bigger workspace? Read our Review: big embroidery machine. Don’t forget to Transform Your Creations with Brother Embroidery Thread! and explore how to Transform Your Gear: Custom Embroidery Patch Magic! for your next creative endeavor!