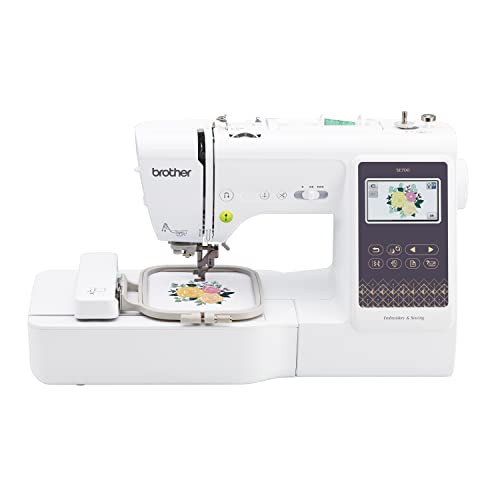
Embroidering with a sewing machine can be an incredibly rewarding and creative hobby. Whether you are looking to personalize clothing, create unique gifts, or add decorative elements to home textiles, machine embroidery offers a versatile and efficient way to achieve beautiful results. With a variety of techniques and tools available, even beginners can create stunning designs with just a little guidance and practice. In this article, we’ll explore everything you need to know about embroidering with a sewing machine, from the essential equipment to tips for perfecting your technique.
Table of Contents
- Essential Equipment for Machine Embroidery
- Preparing Your Sewing Machine for Embroidery
- Choosing the Right Fabric and Thread
- Designing Your Embroidery
- Techniques and Tips for Successful Embroidery
- Troubleshooting Common Issues
- Frequently Asked Questions
- Conclusion
Essential Equipment for Machine Embroidery
Before diving into the world of machine embroidery, it’s essential to have the right equipment. Here’s what you’ll need:
| Equipment | Description |
|---|---|
| Sewing Machine | A mechanical or computerized sewing machine that can handle embroidery tasks. |
| Embroidery Foot | A specialized foot that allows the machine to create intricate designs. |
| Embroidery Hoops | Frames that hold the fabric taut while the machine stitches the design. |
| Stabilizers | Support materials that prevent fabric from puckering during embroidery. |
| Embroidery Thread | High-quality thread designed specifically for machine embroidery. |
Preparing Your Sewing Machine for Embroidery
Once you have your equipment ready, the next step is to prepare your sewing machine for embroidery. Follow these steps:
1. Install the Embroidery Foot
Replace your regular sewing foot with the embroidery foot. This foot has an open toe design, allowing better visibility while stitching.
2. Thread Your Machine
Use high-quality embroidery thread, as it is designed to withstand the tension and speed of embroidery. Make sure to follow the threading path accurately.
3. Attach the Embroidery Hoops
Place your fabric in the embroidery hoop, ensuring it is tight but not overstretched. Attach the hoop to the machine securely.
Choosing the Right Fabric and Thread
The choice of fabric and thread can significantly impact the quality of your embroidery. Here’s how to make the best selections:
Fabric Selection
Different fabrics behave differently when embroidered. Here are some popular choices:
- Cotton: A versatile choice that works well for most designs.
- Denim: Great for adding texture, but requires heavier stabilizers.
- Fleece: Soft and warm, ideal for blankets and outerwear.
- Silk: Luxurious but slippery; requires careful handling.
Thread Selection
When it comes to thread, consider the following:
- Polyester Thread: Durable and commonly used for machine embroidery.
- Rayon Thread: Offers a beautiful sheen but is less durable than polyester.
- Variegated Thread: Adds dimension to your designs with multiple colors; discover more about variegated embroidery thread.
Designing Your Embroidery
Designing your embroidery can be one of the most enjoyable parts of the process. Whether you choose pre-made designs or create your own, here are some tips:
1. Choosing a Design
There are many resources for finding embroidery designs, including:
- Embroidery software that allows you to create custom designs.
- Online marketplaces where designers sell their work.
- Built-in designs available in many modern embroidery machines.
2. Editing Designs
With embroidery software, you can edit designs to fit your project. This may include resizing, changing colors, or combining multiple designs.
3. Transferring Designs to Your Machine
Most embroidery machines allow you to transfer designs via USB or direct connection. Follow the instructions specific to your machine to ensure a smooth transfer.
Techniques and Tips for Successful Embroidery
To achieve the best results in your embroidery projects, consider the following techniques and tips:
1. Use the Right Stabilizer
Different stabilizers serve various purposes. Here are common types:
- Cutaway Stabilizer: Best for knit fabrics to prevent stretching.
- Tearaway Stabilizer: Ideal for woven fabrics and easy to remove.
- Water-Soluble Stabilizer: Perfect for delicate fabrics and detailed designs.
2. Maintain Machine Tension
Proper tension is essential for achieving even stitches. If you notice thread breaking or uneven stitching, adjust the tension settings accordingly.
3. Keep Your Needle Sharp
A dull needle can cause skipped stitches and other issues. Always use a needle suited for embroidery, such as a special embroidery or ballpoint needle.
Troubleshooting Common Issues
Even experienced embroiderers face challenges. Here are some common issues and how to solve them:
1. Thread Breaking
If your thread keeps breaking, check for:
- Dull or damaged needles.
- Incorrect thread tension.
- Snagged thread or debris in the machine.
2. Puckering Fabric
Puckering can be caused by:
- Using the wrong stabilizer.
- Incorrect hooping technique.
- Too much or too little tension on the thread.
3. Skipped Stitches
Skipped stitches often indicate issues with the needle or thread. Check for:
- Correct needle type and size.
- Proper threading of the machine.
- Debris in the bobbin case.
Frequently Asked Questions
A: No, not all sewing machines are equipped for embroidery. Look for a machine specifically designed for embroidery or one that has an embroidery attachment.
A: Consider starting with a machine that has user-friendly features and built-in designs. You can discover the perfect starter embroidery kit for your needs.
A: Remove the needle and presser foot, clean the bobbin area with a soft brush, and check for lint or debris. Regular cleaning will help maintain your machine’s performance.
Conclusion
Embroidering with a sewing machine opens up a world of creative possibilities. By investing in the right equipment, preparing your machine properly, and understanding the intricacies of fabric and thread selection, you can embark on a fulfilling embroidery journey. Whether you are crafting personalized gifts or enhancing your wardrobe, mastering machine embroidery can be a rewarding experience. Don’t hesitate to explore additional resources, like the review on how to start with an embroidery machine or the top multi-needle embroidery machines available. Happy stitching!