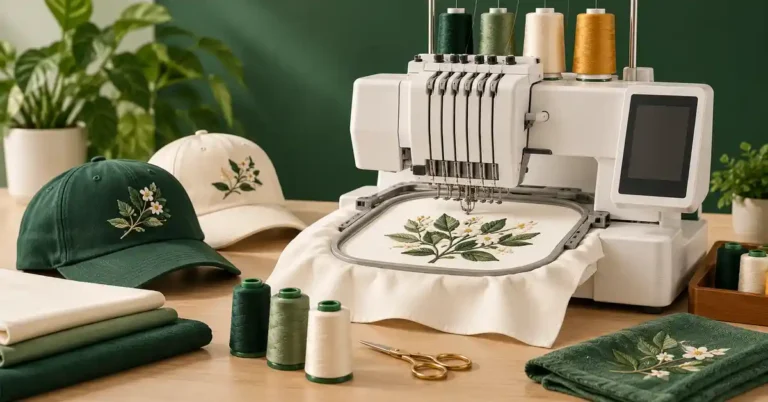
Embroidery machine hats have become a popular choice for crafters and businesses alike, offering a unique way to personalize headwear. Whether you’re a hobbyist looking to create custom designs or a business aiming to provide personalized merchandise, understanding the essentials of using embroidery machines for hats can significantly enhance your projects. This article will delve into the various aspects of embroidery machine hats, from choosing the right equipment to tips for achieving professional results.
Understanding Embroidery Machines for Hats
Embroidery machines designed for hats come equipped with specialized features to facilitate the unique shape and fabric of headwear. These machines can handle various materials, including cotton, polyester, and blends, ensuring a high-quality finish. Understanding the anatomy of an embroidery machine and how it functions specifically for hats is crucial for achieving the best results.
Features of Embroidery Machines for Hats
When selecting an embroidery machine for hats, look for the following key features:
- **Cap Frames**: These frames are essential for holding the hat securely during the embroidery process.
- **Adjustable Pressure**: Allows you to customize the pressure on the fabric, which is vital for different hat types and materials.
- **Multiple Needle Options**: Machines with multiple needles can streamline the process by allowing you to use different colors without changing threads manually.
Choosing the Right Embroidery Machine
Selecting the appropriate embroidery machine is a crucial step in your hat-embroidery journey. The right machine can make a significant difference in both the quality of your work and the efficiency of your production process.
Factors to Consider
When choosing an embroidery machine, consider the following:
| Factor | Description |
|---|---|
| **Budget** | Determine how much you’re willing to invest in an embroidery machine. Prices can range from a few hundred to several thousand dollars. |
| **Type of Use** | Will you be using the machine for personal projects or for a business? Commercial machines often have more features and durability. |
| **Ease of Use** | Look for user-friendly interfaces, especially if you are a beginner. |
| **Support and Warranty** | Check for good customer support and warranty options to protect your investment. |
Setup and Preparation for Hat Embroidery
Once you’ve chosen your embroidery machine, setting it up correctly is the next step. Proper setup ensures smooth operation and high-quality results.
Preparing Your Workspace
A well-organized workspace can significantly improve your embroidery experience. Here are some setup tips:
- **Clean Surface**: Ensure your workspace is clean and free of dust to prevent contamination of your projects.
- **Good Lighting**: Adequate lighting is essential for seeing your work clearly and avoiding mistakes.
- **Tools at Hand**: Keep scissors, thread, and other essential tools within reach to streamline your process.
Loading Your Machine
Follow these steps to properly load your embroidery machine for hat embroidery:
- **Set Up the Cap Frame**: Attach the cap frame to the machine according to the manufacturer’s instructions.
- **Select the Design**: Choose your embroidery design and upload it to the machine.
- **Thread the Machine**: Use high-quality embroidery thread that matches your design.
Techniques for Embroidery on Hats
Mastering various techniques can elevate your hat embroidery projects. Here are some of the most effective techniques to consider.
Stabilizers
Using the right stabilizer is crucial for successful hat embroidery. Stabilizers help to support the fabric and prevent puckering. Here are common types:
- **Tear-Away Stabilizers**: Best for woven fabrics, they are easy to remove after embroidery.
- **Cut-Away Stabilizers**: Ideal for stretchy fabrics, providing long-lasting support even after the embroidery is complete.
- **Wash-Away Stabilizers**: Perfect for delicate fabrics, as they dissolve in water.
Design Placement
Proper design placement can make or break your embroidery project. Consider these tips:
- **Centering**: Make sure the design is centered on the hat. Use measuring tools to find the midpoint.
- **Height**: Adjust the height of the design to ensure it sits well on the wearer’s head without obstructing vision.
Thread Choices
Selecting the right thread can enhance the appearance of your embroidery. Consider the following:
- **Colorfastness**: Choose threads that won’t fade with washing and sun exposure.
- **Material**: Polyester threads are popular for their durability, while rayon offers a shiny finish.
Common Challenges and Solutions
While hat embroidery can be rewarding, it’s not without its challenges. Understanding common issues and how to resolve them can save you time and frustration.
Puckering
Puckering is a common problem that occurs when the fabric gathers around the embroidery design. To prevent this:
- Use the appropriate stabilizer for your fabric.
- Ensure the tension on your machine is correctly set.
Needle Breakage
Needle breakage can disrupt your workflow and ruin your project. Here are some prevention tips:
- Regularly check and replace needles that show signs of wear.
- Use the right needle type for your fabric; for hats, a ballpoint needle is often recommended.
Thread Breakage
Thread breakage can be frustrating, especially during a long run. To reduce the risk:
- Use high-quality thread and ensure it is properly wound on the bobbin.
- Check for any obstructions in the thread path.
Maintenance and Care of Your Embroidery Machine
Proper maintenance of your embroidery machine is essential for longevity and consistent performance. Following a regular maintenance schedule can help avoid issues that may arise from neglect.
Routine Maintenance Tasks
Include these tasks in your maintenance routine:
- **Cleaning**: Regularly clean the machine, especially the bobbin area and needle plate, to remove dust and lint.
- **Oiling**: Refer to your machine’s manual for guidelines on oiling the moving parts.
- **Software Updates**: Keep your machine’s firmware updated to ensure optimal performance.
Storage and Care
How you store your machine can also impact its lifespan. Consider these tips:
- Keep the machine covered when not in use to protect it from dust.
- Store it in a cool, dry environment to prevent damage from humidity.
Frequently Asked Questions
A: While it’s possible, specialized embroidery machines for hats offer features that make the process easier and more efficient.
A: Look for designs that suit the style of the hat and consider using customizable templates available online.
A: Polyester thread is often recommended for its durability and resistance to fading, making it suitable for hats exposed to sun and moisture.
A: Regularly check your thread tension, use quality thread, and ensure that the thread path is free from obstructions.
A: Many services, like [Effortless Hat Embroidery: No Minimum Order Needed](https://practicaltextile.com/no-minimum-hat-embroidery/), offer no minimum order requirements, making it easier for small projects.
In conclusion, mastering the art of embroidery machine hats requires knowledge, practice, and the right tools. By understanding the features of embroidery machines, choosing the right equipment, preparing correctly, and using effective techniques, you can create beautiful, personalized hats that stand out. Whether for personal use or a business venture, the world of hat embroidery offers endless possibilities for creativity and expression.