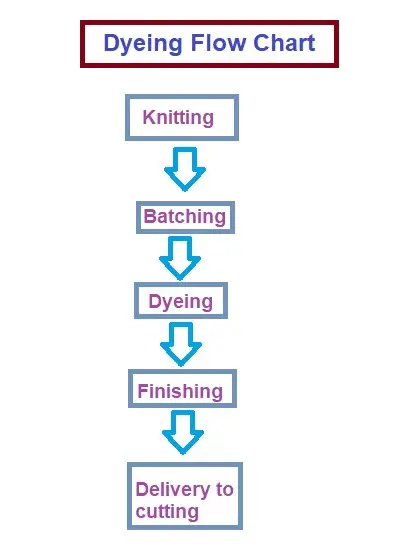
Knitting is a wonderful craft that allows for endless creativity and expression. One great way to add a personal touch to your knitted creations is through dyeing your yarn. However, the process can seem daunting for beginners. That’s where a knitting to dyeing picture chart comes in handy, providing a visual guide that simplifies the dyeing process and helps you achieve the colors you desire. In this article, we will explore how to effectively use a knitting to dyeing picture chart, tips for dyeing yarn, and the benefits of creating your own custom colors.
Table of Contents
- Understanding Color Theory
- Choosing the Right Dye
- Preparing Your Yarn
- Using the Knitting to Dyeing Picture Chart
- Dyeing Techniques
- Caring for Your Dyed Yarn
- FAQ
Understanding Color Theory
Before diving into dyeing, it is essential to grasp the basics of color theory. Understanding how colors interact with each other can greatly enhance your dyeing experience and end results.
The Color Wheel
The color wheel is a visual representation of colors arranged according to their chromatic relationship. It is divided into primary, secondary, and tertiary colors. Primary colors (red, blue, yellow) can be mixed to create secondary colors (green, orange, purple) and so forth.
Color Harmony
Color harmony refers to the aesthetically pleasing arrangement of colors. Combinations of colors can create different moods and effects in your knitting. Some common schemes include:
- Complementary: Colors opposite each other on the wheel (e.g., blue and orange)
- Analogous: Colors next to each other (e.g., blue, blue-green, green)
- Triadic: Three colors evenly spaced on the wheel (e.g., red, yellow, blue)
Choosing the Right Dye
There are various types of dyes available for yarn, each with its unique properties. Here’s a brief overview of popular dye types:
| Dye Type | Description | Best For |
|---|---|---|
| Acid Dyes | Bright, vibrant colors, best used with protein fibers like wool. | Wool, alpaca, silk |
| Fiber Reactive Dyes | Great for cellulose fibers, these dyes create long-lasting colors. | Cotton, linen, rayon |
| Natural Dyes | Made from plants, insects, and minerals, offering earth tones. | Any fiber, but often used with wool and cotton |
Preparing Your Yarn
Preparation is key to successful dyeing. Here are the steps you should follow:
Washing Your Yarn
Before dyeing, wash your yarn to remove any oils or dirt that may affect the dye absorption. Use a gentle soap and rinse thoroughly.
Soaking Your Yarn
Soak your clean yarn in warm water for at least 30 minutes. This will help the fibers absorb the dye more evenly.
Using the Knitting to Dyeing Picture Chart
A knitting to dyeing picture chart can be a valuable tool for visualizing color combinations and outcomes. Here’s how to effectively use one:
Understanding the Chart
Typically, these charts include a variety of base colors along with dye mixes that produce different shades. Each section of the chart represents a combination of dyes and their resulting color.
Mapping Your Colors
Before diving into dyeing, sketch out your project and map out the colors you want. Use the chart to find the closest matches or create custom blends.
Dyeing Techniques
Once you have your yarn prepared and your colors mapped out, it’s time to start dyeing. Here are some popular techniques to consider:
Dip Dyeing
Dip dyeing involves immersing one end of the yarn into a dye bath. This method creates a beautiful gradient effect.
Kettle Dyeing
This technique involves simmering yarn in a pot with dye, allowing for a more controlled color distribution. It’s great for creating variegated yarns.
Hand Painting
Hand painting allows for creativity, as you can apply dye directly onto the yarn in patterns or stripes. It’s perfect for unique, artistic pieces.
Caring for Your Dyed Yarn
After dyeing, it’s essential to care for your yarn properly to maintain its color and integrity.
Setting the Dye
After dyeing, set the dye by rinsing the yarn in cold water until it runs clear. This helps to ensure that excess dye is removed and that the color is set.
Washing Your Finished Item
When you’ve completed your knitting project, wash it with a gentle soap in cold water to preserve the color. Avoid hot water, which can cause colors to bleed.
FAQ
A: Yes, food coloring can be used to dye yarn, particularly natural fibers. However, it may not produce as vibrant results as commercial dyes.
A: To prevent dye bleeding, always wash your finished project in cold water and use a color catcher when washing.
A: It depends on the type of dye used. Acid dyes typically do not require a fixative, while some natural dyes may benefit from a mordant as a fixative.
In conclusion, dyeing your yarn can be a rewarding experience that adds a unique touch to your knitting projects. By understanding color theory, choosing the right dyes, and using a knitting to dyeing picture chart, you can create stunning and personalized pieces. Remember to prepare your yarn properly, experiment with different dyeing techniques, and care for your dyed yarn to achieve the best results. Happy dyeing!