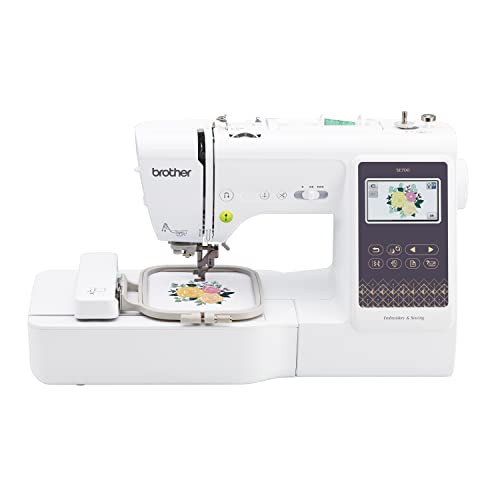
Machine embroidery patches have become a popular choice for both hobbyists and professionals looking to add a personal touch to garments, accessories, and home decor. These patches serve as a creative outlet, allowing individuals to express their unique style while also offering practical solutions for repairing or embellishing fabric items. With the right techniques and tools, anyone can create beautiful embroidered patches that stand out and make a statement.
Table of Contents
- What Are Machine Embroidery Patches?
- Benefits of Using Machine Embroidery Patches
- Types of Machine Embroidery Patches
- How to Create Your Own Machine Embroidery Patches
- Tools and Materials Needed
- Common Mistakes to Avoid
- Care and Maintenance of Machine Embroidery Patches
- FAQs
What Are Machine Embroidery Patches?
Machine embroidery patches are decorative pieces made from fabric that have been embellished with designs using machine embroidery techniques. These patches can be stitched onto garments, bags, hats, and more, allowing for customization and personalization. They are available in various shapes, sizes, and designs, making them suitable for different purposes, from branding to personal expression.
Benefits of Using Machine Embroidery Patches
Machine embroidery patches offer numerous advantages that make them a preferred choice among crafters and designers.
Durability
One of the primary benefits of machine embroidery patches is their durability. Unlike printed designs, embroidered patches are less likely to fade or wear away over time. This longevity makes them ideal for items that experience regular use.
Versatility
Patches can be applied to a wide range of fabrics and materials, including denim, canvas, and leather. This versatility allows for creative expression across various projects.
Cost-Effectiveness
Creating custom patches can be more cost-effective than purchasing new garments or accessories. With a sewing machine and some basic materials, you can create personalized designs at a fraction of the cost.
Types of Machine Embroidery Patches
Understanding the different types of machine embroidery patches can help you choose the right one for your project.
Woven Patches
Woven patches are created from threads woven together into a specific design. They offer a smooth finish and are often used for logos and text due to their fine detail.
Felt Patches
Felt patches are made from thick, soft fabric and can be cut into various shapes. They are perfect for creating fun and playful designs, especially for children’s clothing or accessories.
Chenille Patches
Chenille patches have a fluffy, textured appearance and are often used for a retro look. They are ideal for sports jerseys or casual wear.
Embroidered Appliqué Patches
Appliqué patches involve sewing fabric pieces onto a base fabric, allowing for layered designs. This technique is great for creating intricate patterns and images.
How to Create Your Own Machine Embroidery Patches
Creating machine embroidery patches can be a rewarding project. Follow these steps to get started:
Step 1: Design Your Patch
Begin by sketching out your design. Consider the size, shape, and colors you want to use. You can also use software programs to create digital designs that can be directly sent to your embroidery machine.
Step 2: Choose the Right Fabric
Select a suitable fabric for your patch. Cotton and twill are common choices, but consider your project’s final application and desired look.
Step 3: Prepare the Fabric
Cut your fabric to the desired size, and use stabilizers to prevent shifting during embroidery. Stabilizers come in various weights and types, so choose one that matches your fabric and design complexity.
Step 4: Embroider the Design
Load your design into the embroidery machine, making sure to select the correct settings for thread tension and needle type. Begin the embroidery process, monitoring for any issues.
Step 5: Cut and Finish the Patch
Once the embroidery is complete, carefully cut around your design, leaving a small border for sewing. You can also apply a backing to your patch for additional durability.
Tools and Materials Needed
To create machine embroidery patches, you will need several essential tools and materials:
| Tool/Material | Purpose |
|---|---|
| Embroidery Machine | Used for stitching the design onto fabric. |
| Stabilizer | Prevents fabric from shifting during embroidery. |
| Embroidery Thread | Used for stitching the design; available in various colors. |
| Fabric | The base material for the patch. |
| Scissors | For cutting the fabric and trimming the patch. |
| Backing Material | Provides additional support and durability to the finished patch. |
Common Mistakes to Avoid
When creating machine embroidery patches, it’s essential to avoid common pitfalls that can hinder your results.
Overlooking Stabilizer
Not using an appropriate stabilizer can lead to puckering and distortion. Always choose a stabilizer that matches your fabric type and design complexity.
Ignoring Thread Tension
Incorrect thread tension can result in uneven stitching. Always test your tension settings on scrap fabric before starting your project.
Skipping Design Testing
Failing to test your design on a similar fabric can lead to unforeseen issues. Always conduct a test run to ensure that everything looks good and works correctly.
Care and Maintenance of Machine Embroidery Patches
To ensure that your machine embroidery patches last, proper care and maintenance are crucial.
Washing and Drying
When washing items with patches, turn them inside out and use a gentle cycle. Avoid harsh detergents and bleach, as these can fade colors and damage the fabric.
Ironing
If ironing is necessary, use a low heat setting and place a cloth between the iron and the patch to protect the embroidery.
Storage
Store garments with patches in a cool, dry place. Avoid hanging items with heavy patches, as this can distort their shape.
FAQs
A: While you can use a variety of fabrics, it’s best to choose stable fabrics like cotton or twill for the best results. Some fabrics may not hold up well during the embroidery process.
A: You can sew the patch onto the clothing by hand or machine, or use fabric glue for a no-sew option. Make sure to secure the edges to prevent fraying.
A: Yes! Many machine embroidery patches are durable enough for outdoor gear, but ensure you use high-quality materials that can withstand the elements.
A: Use graphic design software to create a digital version of your logo or design. Ensure you use the right dimensions and colors for your patch to fit the branding.
In conclusion, machine embroidery patches offer a fantastic way to personalize and enhance your fabric items. With the right tools, techniques, and a bit of creativity, you can create beautiful patches that showcase your individual style. Whether for repair, personalization, or decoration, machine embroidery patches are a versatile and enduring addition to your sewing repertoire. For more tips on embroidery, check out our articles on seamlessly crafting with a 23-inch embroidery hoop and our reliable Brother SE600 sewing and embroidery machine review.